

Starting a food blog takes more than publishing great recipes and taking beautiful photos. Behind the scenes, you also need a handful of tools to build your site, research topics, track traffic, create graphics, grow an email list, and keep everything organized.
The good news is that you do not need dozens of expensive subscriptions to get started.
The right food blogging tools should make your work easier, save time, and help you understand what is actually working. Some tools become essential from day one, while others make more sense once your traffic, content library, and income begin to grow.
In this guide, we’ll break down the essential food blogging tech stack, including tools for hosting, SEO, analytics, recipe optimization, photography, email marketing, social media, content planning, security, and more.
We’ll also look at which tools are worth paying for, which free options are good enough, and how to build a practical tech stack without spending money on software you rarely use.
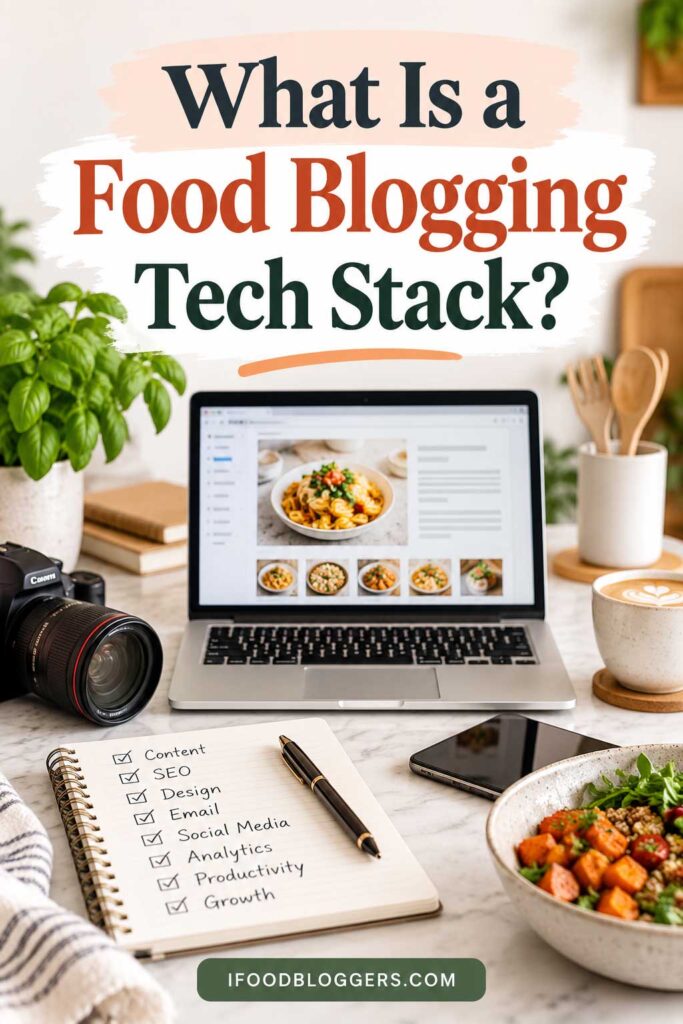
What Is a Food Blogging Tech Stack?
A food blogging tech stack is simply the collection of tools and platforms you use to run your food blog.
It includes the obvious tools, such as your website platform and hosting, but it can also include software for keyword research, recipe cards, analytics, food photography, image optimization, email marketing, social media scheduling, backups, and security.
You do not need a tool for every possible task. In fact, adding too many apps can make your workflow more complicated and increase your monthly expenses without providing much value.
A better approach is to build your stack gradually. Start with the tools that help you publish, optimize, and measure your content. As your blog grows, you can add more specialized tools when they solve a specific problem or save enough time to justify the cost.
For most food bloggers, a practical tech stack should help with five things: creating content, getting discovered, understanding your audience, growing your readership, and protecting your website.
Affiliate Disclosure: Some links in this article may be affiliate links. If you make a purchase or sign up through one of these links, iFoodBloggers may earn a commission at no extra cost to you.
Food Blogging Tech Stack at a Glance
You do not need every one of these food blogging tools when you are starting out. Think of it as a roadmap: begin with the essentials, then add specialized tools as your food blog grows and your workflow becomes more complex.
| Category | Popular Tools | What You Use Them For |
|---|---|---|
| Website Platform | WordPress | Building and managing your food blog |
| Web Hosting | Hostinger, SiteGround, Cloudways | Keeping your website online, fast, and secure |
| SEO & Keyword Research | Google Search Console, Semrush, Ahrefs | Finding search opportunities and improving organic traffic |
| Analytics | Google Analytics 4, Google Search Console | Tracking traffic, search performance, and reader behavior |
| Recipe Cards & Schema | WP Recipe Maker, Tasty Recipes | Formatting recipes and adding structured recipe data |
| Food Photography | Adobe Lightroom, Photoshop | Editing and improving food photos |
| Image Optimization | ShortPixel, Imagify, TinyPNG | Compressing images and improving page speed |
| Graphic Design | Canva | Creating Pinterest pins, social graphics, and other visuals |
| Email Marketing | MailerLite, Kit, Brevo | Building an email list and communicating with readers |
| Social Media | Buffer, Tailwind | Planning and scheduling social and Pinterest content |
| Content Planning | Trello, Notion, CoSchedule | Managing your editorial calendar and publishing workflow |
| Writing & Editing | Google Docs, Grammarly, ProWritingAid | Drafting, editing, and organizing content |
| Content Discovery | Google Trends, Pinterest Trends, Feedly | Finding trends, topics, and new content ideas |
| File Storage | Google Drive, Dropbox | Storing photos, documents, and other blog files |
| Security & Backups | Wordfence, UpdraftPlus | Protecting your site and creating backups |
The best combination will depend on your budget, publishing schedule, traffic, and how much of the work you handle yourself. A new food blogger might use mostly free tools, while an established site may benefit from paid SEO, email marketing, automation, and workflow software.
Now let’s look at each part of the stack, what it actually does, and whether you really need it.

Website Platform and Hosting Tools
Your website platform and hosting are the foundation of your food blogging tech stack. Before worrying about other food blogging tools such as keyword research platforms, social media schedulers, or email marketing software, you need a reliable place to publish your recipes and other content.
For most food bloggers who want control over SEO, monetization, design, and future growth, self-hosted WordPress remains one of the most flexible options.
WordPress
WordPress gives you control over nearly every part of your food blog, from your theme and site structure to recipe cards, SEO plugins, advertising, affiliate links, and email integrations.
One of the biggest advantages of WordPress is that you can start simple. As your food blog grows, you can add new features without rebuilding the entire website.
There is also a large ecosystem of themes and plugins designed specifically for recipe and food websites.
The downside is that WordPress requires a little more hands-on management than an all-in-one website builder. You are responsible for things such as hosting, updates, backups, security, and plugin compatibility.
For a serious food blog, however, that additional control can be worth it.
Web Hosting
Your hosting provider stores your website files and makes your food blog available to visitors.
Hosting may not be the most exciting part of running a food blog, but it affects things that readers notice quickly: speed, reliability, and whether your site can handle a sudden spike in traffic.
This becomes particularly important for recipe sites because pages often contain multiple high-resolution food photos, recipe cards, advertising scripts, analytics tools, and other elements that can make them heavier than a simple text-based blog.
You do not necessarily need expensive managed hosting when you are starting. A reliable entry-level hosting plan may be enough for a new site with limited traffic.
As your audience grows, however, it may make sense to move to faster hosting or a plan with more resources rather than paying for capacity you do not yet need.
What to Look for in Food Blog Hosting
When comparing hosting providers, focus on the features that can make a meaningful difference to your website rather than choosing a host based only on the introductory price.
Look for solid uptime, good performance, SSL certificates, automatic backups, responsive support, adequate storage, and an easy way to scale your plan as traffic increases.
Food bloggers should pay particular attention to performance because image-heavy recipe pages can quickly become slow if the hosting environment is underpowered or poorly configured.
Your hosting does not need to be the most expensive part of your tech stack. It simply needs to be reliable enough that you can focus on publishing and growing your food blog instead of constantly troubleshooting your server.
If you are still comparing providers, our guide to the best hosting for food bloggers explains what to look for and compares hosting options for different stages of growth.
SEO and Keyword Research Tools
Publishing a great recipe does not automatically mean people will find it.
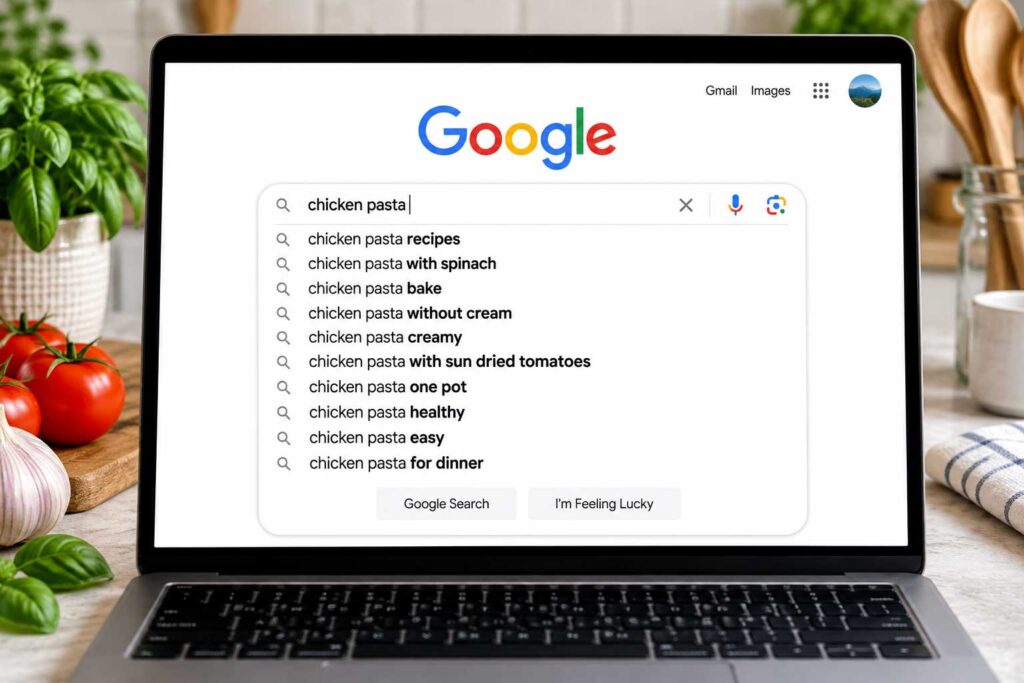
SEO and keyword research tools help you understand what people are searching for, how your existing content performs in Google, and where there may be opportunities to attract more organic traffic.
For food bloggers, these tools are particularly useful for researching recipe ideas, identifying seasonal searches, finding long-tail keywords, monitoring rankings, and improving older posts that are already getting impressions.
You can do a surprising amount of this work with free tools before investing in an expensive SEO platform.
Google Search Console
Google Search Console should be part of almost every food blogger’s tech stack.
It shows how your website performs in Google Search, including the queries people use to find your content, which pages receive clicks and impressions, average search positions, indexing issues, and other useful information about your site’s visibility.
One of its most valuable uses is finding opportunities within content you have already published.
For example, a recipe may be receiving impressions for related searches you never intentionally targeted. Those queries can give you ideas for improving the article, adding useful sections, answering additional questions, or creating supporting content.
Set up Search Console as early as possible. Even when your blog is small, the data it collects can become extremely useful once your recipes begin appearing in search results.
Google Trends
Google Trends is useful when you want to understand how interest in a food, recipe, ingredient, or cooking topic changes over time.
This is especially valuable for seasonal content.
Instead of guessing when people start searching for pumpkin recipes, Christmas cookies, summer salads, grilling ideas, or Thanksgiving side dishes, you can examine historical interest and plan your content before demand reaches its peak.
You can also compare different search terms to see how their relative popularity changes.
Semrush and Ahrefs
As your food blog grows, paid SEO platforms such as Semrush and Ahrefs can provide much deeper competitive and keyword data.
They can help you research keywords, estimate search demand, study competitors, find backlink opportunities, monitor rankings, and discover topics that are already bringing search traffic to competing websites.
These platforms are powerful, but a new food blogger does not necessarily need one immediately.
Start by learning how to use free data from Google Search Console, Google Trends, Google Keyword Planner, autocomplete suggestions, and search results. Once you are publishing consistently and need more competitive data, a paid SEO platform can become much easier to justify.
Keyword Research Is About More Than Search Volume
A common mistake is choosing recipe topics based entirely on which keyword has the largest search volume.
A smaller, highly specific search can sometimes be a much better opportunity than a broad keyword dominated by established recipe websites.
For example, targeting a specific cooking method, ingredient combination, dietary variation, or regional dish may give a newer food blog a more realistic opportunity to compete.
Look at search intent, relevance, competition, seasonality, and how well the topic fits your audience alongside estimated search volume.
The goal of keyword research is not simply to find the biggest keyword. It is to find topics where you can create genuinely useful content that matches what the searcher wants.
If you are not ready to pay for an SEO platform, start with our guide to the best free keyword research tools for food bloggers, which covers several ways to research recipe and food-related searches without adding another monthly subscription.
Analytics and Search Performance Tools
Once people start visiting your food blog, you need a way to understand where those visitors come from and what they do after arriving.
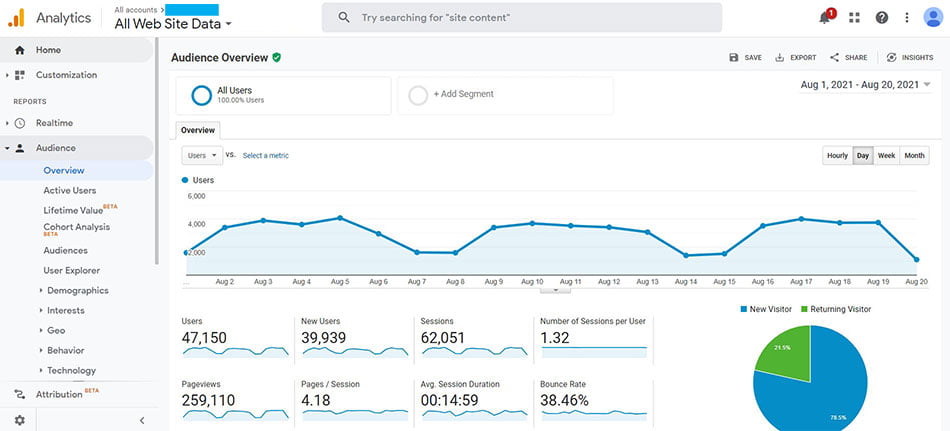
Analytics tools can help you answer practical questions: Which recipes attract the most readers? Is your traffic coming from Google, Pinterest, social media, email, or other websites? Are seasonal posts beginning to gain traction? Which older recipes continue bringing visitors months after publication?
You do not need to watch these numbers every day. The real value comes from using the data to make better decisions about what to publish, update, and promote.
Google Analytics 4
Google Analytics 4, usually called GA4, is Google’s current analytics platform and one of the most useful free tools for measuring website traffic and user behavior.
For a food blogger, GA4 can help you see:
- Which recipes and articles receive the most traffic
- Where visitors come from
- Which devices readers use
- How visitors move through your website
- Which landing pages attract new readers
- How traffic changes over time
- Whether important actions and events are being completed
The amount of data can feel overwhelming at first, so you do not need to learn every GA4 report.
Start with the metrics that answer actual questions about your blog. If a recipe suddenly receives significantly more traffic, find out where those visitors came from. If Pinterest traffic drops, compare it with previous periods. If an older article starts growing through Google, investigate the search queries behind that growth.
That is much more useful than checking total page views without knowing what caused them.
Use GA4 and Google Search Console Together
Google Analytics and Google Search Console answer different questions.
Think of them as two sides of the same picture. Search Console shows how people find your site through Google Search, while GA4 helps you understand what visitors do after they arrive.
For example, Search Console might show that one of your recipes is receiving thousands of impressions but relatively few clicks. That could indicate an opportunity to improve the title, search snippet, or how well the page matches search intent.
GA4 can then help you understand what visitors do after they reach that recipe.
Using both gives you a more complete picture than relying on either tool alone.
Focus on Trends, Not Daily Fluctuations
Food blog traffic naturally moves up and down.
Seasonality, holidays, weekends, Google updates, Pinterest activity, viral social posts, and even the weather can influence how often people search for certain recipes.
A single slow day usually does not tell you much.
Instead, compare longer periods and look for patterns. Which recipe categories are growing? Which older posts are losing traffic? Which traffic sources are becoming more important? Which seasonal recipes begin gaining impressions before their peak season?
Those trends can help you decide where your time is best spent.
Analytics should ultimately do more than produce charts and numbers. It should help you understand what is working, what is changing, and what you should do next.
Once you understand where your visitors are coming from, the next step is improving those channels. Our guide on how to get more traffic to your food blog covers SEO, Pinterest, video, email, internal linking, seasonal searches, and other practical traffic strategies.
Recipe Card and Schema Tools
A recipe card is one of the most important tools that separates a food blog from a general lifestyle website.
Instead of manually formatting ingredients, instructions, cooking times, serving sizes, and nutrition information every time you publish a recipe, a dedicated recipe plugin gives you a consistent structure that is easier for readers to follow.
More importantly, many recipe plugins can add recipe structured data, often called recipe schema, to your pages.
Why Recipe Schema Matters
Recipe schema helps search engines understand that a page contains a recipe and identify specific information within it, such as the ingredients, cooking time, preparation time, servings, ratings, nutrition information, and instructions.
Properly implemented structured data can also make a recipe eligible for certain recipe-related search features.
Recipe schema does not guarantee higher rankings or rich results, but it gives search engines structured information they can use to better understand the recipe.
For that reason, manually building attractive recipe boxes without proper structured data is usually not the best approach for a serious food blog.
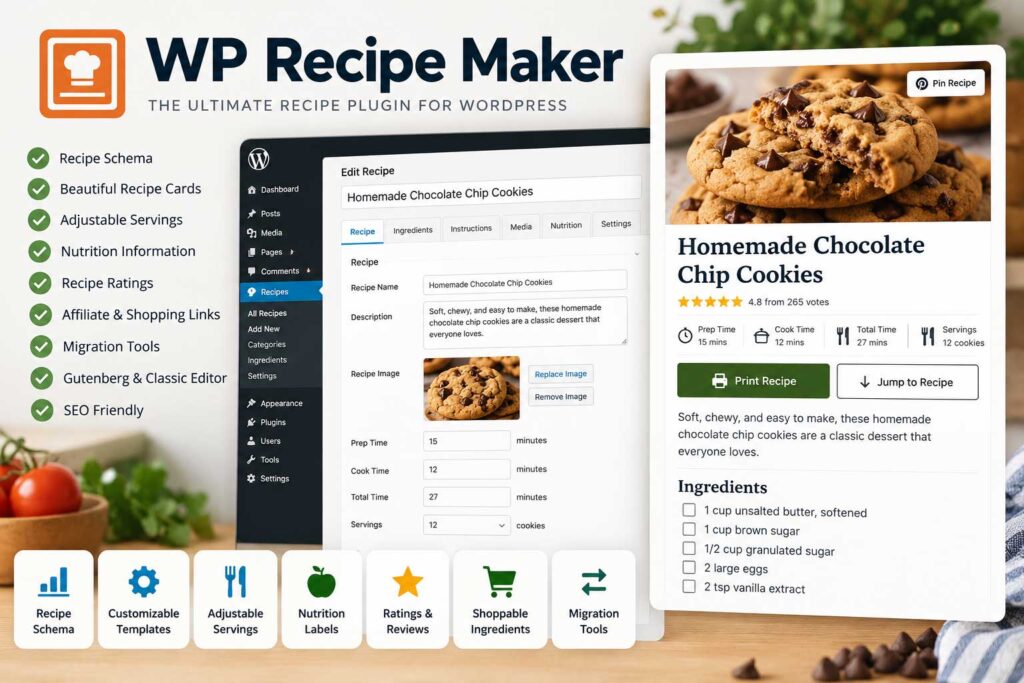
WP Recipe Maker
WP Recipe Maker is a popular WordPress recipe plugin that offers both free and premium features.
It allows food bloggers to create structured recipe cards with ingredients, instructions, preparation and cooking times, servings, images, nutrition information, and other recipe details.
The plugin can also handle recipe structured data, making it useful for bloggers who want a dedicated system for managing recipes rather than formatting each one manually.
For a newer food blog, the free version may provide enough functionality to get started. Additional features can be added later if the site grows and you actually need them.
Tasty Recipes
Tasty Recipes is another option designed specifically for recipe publishers.
It provides customizable recipe cards, structured recipe data, ingredient and instruction formatting, and other features intended to make recipes easier for both readers and search engines to understand.
Unlike choosing a general WordPress plugin, selecting a recipe plugin is a decision worth making relatively early. Changing hundreds of recipe cards later can create unnecessary work.
What to Look for in a Recipe Plugin
Do not choose a recipe plugin based only on how attractive the recipe card looks.
Check whether it is actively maintained, works well with your WordPress setup, supports appropriate recipe structured data, performs well on mobile devices, and gives you enough control over ingredients and instructions.
Performance matters too. A recipe plugin should provide useful functionality without adding unnecessary weight to every page.
You should also avoid installing several recipe plugins that perform essentially the same job. Choose one reliable system and use it consistently across your recipes.
If recipes are a major part of your site, a good recipe plugin is more than a design feature. It becomes part of your publishing workflow and helps keep recipe information structured and consistent.
Food Photography and Image Optimization Tools
Food photography can have a major influence on how readers experience your recipes.
A great photo can make someone want to cook a dish before they have read the first ingredient. Those same images may also appear on Pinterest, social media, Google, email newsletters, and other places where your recipes are promoted.
But there is a tradeoff.
High-resolution food photos can create very large files, and uploading them directly from your camera or phone can slow down recipe pages considerably. That means your workflow needs to do two things well: make your photos look great and keep their file sizes under control.
Adobe Lightroom
If you regularly photograph your own recipes, Adobe Lightroom can make editing an entire shoot much faster.
You can use it to adjust exposure, white balance, contrast, highlights, shadows, color, cropping, and other elements without completely changing the original image.
It is especially helpful when editing an entire recipe shoot because you can apply similar adjustments across multiple photos instead of starting from scratch with every image.
You do not need to make food look unnaturally perfect. Good editing should make the photograph clearer and more appealing while keeping the dish recognizable and realistic.
Adobe Photoshop
Adobe Photoshop offers more advanced editing capabilities and can be useful when an image needs more precise adjustments.
For everyday food photography, you may not need everything Photoshop offers. Lightroom is often faster for processing a batch of recipe photos, while Photoshop makes more sense when you need detailed editing or more control over individual elements.
You also do not need expensive food blogging tools or Adobe software simply to start a food blog. There are free and lower-cost editing alternatives available, and modern smartphones already provide surprisingly capable basic editing tools.
What matters more is developing a consistent photography and editing workflow.
Image Compression and Optimization
Editing your photos is only half of the process. Before large images are served to readers, they should also be optimized for the web.
Tools and plugins such as ShortPixel, Imagify, and TinyPNG can reduce image file sizes while trying to preserve acceptable visual quality.
Depending on your WordPress setup, your optimization system may also be able to generate modern image formats such as WebP or AVIF.
The goal is not to compress every image as aggressively as possible. Food photography depends on detail, texture, and color, so there needs to be a balance between image quality and file size.
Do Not Upload Full-Size Camera Files
One of the easiest mistakes to avoid is uploading enormous original camera files directly to WordPress.
A photo does not need to be 5,000 or 6,000 pixels wide if it will only appear at a fraction of that size on your website.
Resize images to dimensions appropriate for your site, compress them, and let your website serve responsive image sizes where possible.
This can reduce unnecessary data transfer without requiring you to sacrifice the visual quality readers actually see.
Create an Image Workflow You Can Repeat
The best image optimization setup is one you can follow every time you publish.
A simple workflow might be:
Shoot → edit → crop and resize → rename the file → compress → upload → add descriptive alt text where appropriate.
Once that process becomes routine, image optimization takes very little additional time.
For a food blogger, photography and website performance should not work against each other. The goal is to publish beautiful food images that load efficiently, giving readers the visual experience they expect without unnecessarily slowing down your recipes.
Graphic Design and Pinterest Tools
Great food photography gives you the raw material, but you will often need to turn those photos into graphics for Pinterest, social media, email campaigns, and other promotional content.
You do not need professional graphic design skills to do this.
For most food bloggers, a simple design tool with reusable templates is more useful than complicated software that takes hours to learn.
Canva
Canva is one of the easiest design tools to add to a food blogging workflow.
You can use it to create Pinterest pins, Instagram graphics, Facebook posts, recipe roundups, email graphics, media kits, lead magnets, and other visual content without designing everything from scratch.
Where Canva really saves time is with reusable templates.
Instead of creating a new Pinterest design every time you publish a recipe, you can build several branded templates and simply replace the photograph, headline, and other relevant details.
This can make your visual content much more consistent while significantly reducing the amount of time required to create it.
Create Reusable Templates
One of the best ways to use Canva is to create a small library of templates for the graphics you make repeatedly.
For example, you might have several Pinterest layouts, a recipe roundup template, a social media template, and a newsletter graphic.
Keep your fonts, logo placement, and general visual identity consistent, but do not make every graphic identical.
This gives your food blog a recognizable look without forcing you to redesign the same assets every week.
Pinterest Graphics
Pinterest deserves particular attention because food and recipe content is highly visual.
A single recipe can provide material for several different pins using different photographs, headlines, layouts, or angles.
For example, the same chicken recipe might be promoted as an easy weeknight dinner, a 30-minute chicken recipe, or a family dinner idea, provided each description accurately reflects the recipe.
Canva makes creating these variations relatively fast.
Avoid simply producing dozens of nearly identical graphics, though. Focus on useful variations that give you something genuinely different to test.
Free vs. Paid Design Tools
Canva’s free version provides enough functionality for many new food bloggers.
A paid plan can become more useful when you need additional templates, brand-management features, premium assets, background-removal tools, resizing options, or a higher-volume design workflow.
As with most tools in your food blogging tech stack, there is little reason to pay for advanced features before you actually need them.
Start with a simple system that allows you to create good-looking graphics quickly. Upgrade when the paid features begin saving enough time to justify the additional cost.
The goal is not to become a full-time graphic designer. Your design tools should help you turn your recipes and food photography into reusable promotional assets without taking time away from creating content.
Email Marketing Tools
Google, Pinterest, Instagram, and other platforms can introduce thousands of people to your recipes, but there is no guarantee those readers will come back.
An email list gives interested readers a simple way to stay connected with your food blog.
Instead of hoping someone finds your website again, you can let subscribers know when you publish a new recipe, send seasonal recipe collections, share meal ideas, promote a free resource, or bring attention back to useful content from your archives.
That makes email marketing an important part of a food blogging tech stack, even if you start with a relatively small list.
MailerLite
MailerLite is a popular option for bloggers who want email campaigns, signup forms, landing pages, and basic automation without an overly complicated setup.
If you are building your first email list, that simplicity can be an advantage. You can concentrate on building your list and sending useful emails before worrying about complex automation.
Kit
Kit is designed heavily around creators and online publishers.
It can be particularly useful as your email strategy becomes more sophisticated and you want to organize subscribers, create automated sequences, segment your audience, or connect email marketing with digital products and other parts of your business.
A food blogger, for example, might eventually separate readers interested in quick dinners from subscribers who signed up for a baking guide or vegetarian recipe collection.
Brevo
Brevo is another platform worth considering, particularly if you want email marketing alongside automation and other communication or marketing features.
As with any email platform, compare the features you will actually use rather than choosing solely because one provider offers the longest list of features.
Give Readers a Reason to Subscribe
Simply adding a “Subscribe to my newsletter” form to your sidebar may not be enough to build an email list consistently.
Give readers a clear reason to join.
For a food blog, that could be a weekly recipe email, printable meal planner, seasonal recipe collection, shopping checklist, cooking guide, or another useful resource related to your content.
The incentive should attract the type of reader you want to keep reaching rather than generating signups from people who have little interest in your recipes.
Start Building Your List Early
You do not need thousands of daily visitors before starting an email list.
Setting up basic email capture early means your list can grow alongside your website. Even if only a small percentage of visitors subscribe, those subscribers accumulate over time.
You can begin with a simple signup form and occasional newsletter. More advanced segmentation, automated sequences, and funnels can come later.
When choosing an email marketing platform, pay attention to pricing as your subscriber count grows, automation features, signup forms, segmentation, integrations, deliverability tools, and how easy the platform is to use.
The best email marketing tool is not necessarily the one with the most features. It is the one you can use consistently to build and maintain a useful relationship with your readers.
If you are comparing providers, see our complete guide to the best email marketing platforms for food bloggers for a deeper look at features, pricing, automation, and which platforms fit different stages of a food blog.
Social Media and Pinterest Scheduling Tools
Publishing a recipe is only part of the job. You may also want to promote it on Pinterest, Instagram, Facebook, and other platforms where your audience spends time.
Doing all of that manually can become surprisingly time-consuming.
Social media scheduling tools let you prepare content in advance and organize your promotional workflow without having to stop what you are doing every time you want to publish a post.
You do not need to be everywhere. If Pinterest sends readers to your recipes but another platform takes hours each week and produces almost nothing, your time is probably better spent on Pinterest.
Buffer
Buffer is a straightforward option for planning and scheduling social media content across multiple platforms.
Instead of logging into several accounts individually, you can prepare content ahead of time. When a new recipe goes live, for example, you might schedule several promotional posts for the following days or weeks rather than sharing it once and forgetting about it.
Buffer also provides tools for reviewing content performance, which can help you understand which types of posts receive the most engagement.
Tailwind
Tailwind is particularly well known among bloggers for its Pinterest-focused tools.
For a food blogger producing multiple pins for recipes, a scheduling tool can make it easier to organize Pinterest content and spread publishing across your calendar.
That does not mean you should automatically schedule huge numbers of pins.
Pinterest strategy should still focus on useful, relevant content and strong visuals rather than simply maximizing publishing volume. Scheduling is there to make your workflow more manageable, not to replace a thoughtful content strategy.
Native Scheduling Tools May Be Enough
Before paying for another subscription, remember that some social platforms provide their own scheduling features.
If you only use one or two platforms and publish relatively infrequently, native scheduling may be all you need.
A third-party tool becomes more valuable when you manage several channels, publish frequently, work with a team, or find yourself spending too much time switching between platforms.
Do Not Try to Be Everywhere
One of the easiest ways to waste time as a food blogger is trying to maintain an active presence on every social network.
Your audience may respond particularly well to Pinterest and Instagram, while another food blog may generate more value from Facebook, YouTube, or short-form video.
Use your analytics to see which platforms actually send visitors and contribute to your goals.
Then build your social media tech stack around those channels.
A scheduling tool should ultimately reduce repetitive work and help you promote your content consistently. If managing the tool itself becomes another major task, your setup is probably more complicated than it needs to be.
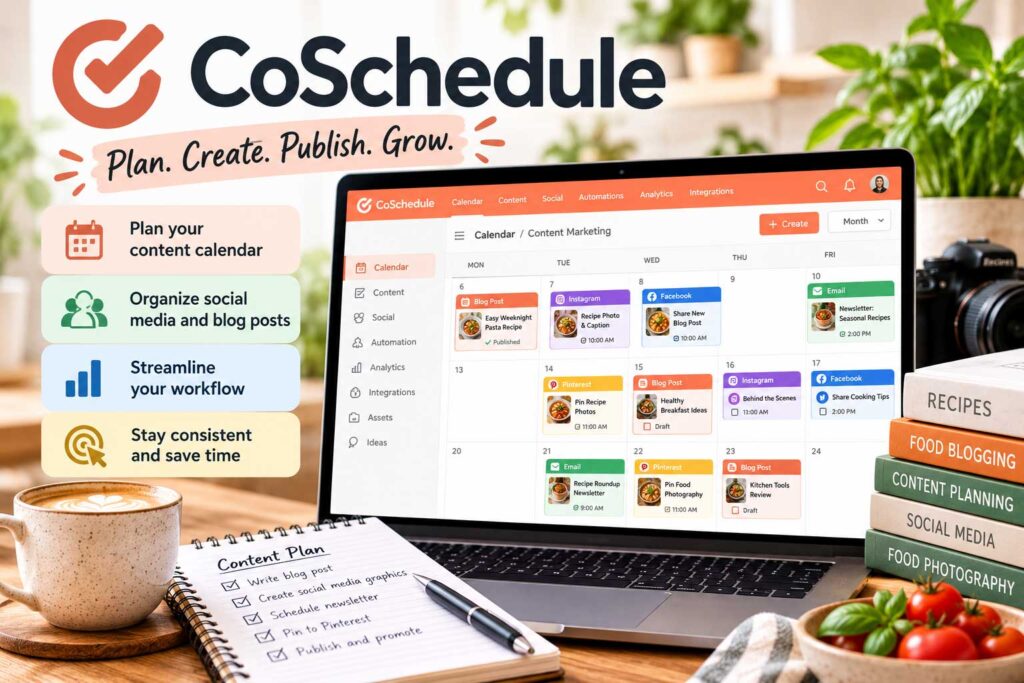
Content Planning and Productivity Tools
As your food blog grows, keeping track of everything can become almost as difficult as creating the content itself.
You may have recipes waiting to be photographed, drafts that need editing, seasonal posts that should be updated, Pinterest graphics to create, newsletters to send, and older articles that need another round of optimization.
A simple content planning system helps keep those tasks from living entirely in your head.
The right tool does not need to be complicated. It simply needs to show you what needs to be done, what is in progress, and what should happen next.
Trello
Trello works well for bloggers who prefer a visual workflow.
You can create columns such as Ideas, Keyword Research, Testing, Photography, Writing, Editing, Scheduled, and Published, then move each recipe or article through the process.
That makes it easy to see where every piece of content stands without maintaining a complicated spreadsheet or project-management system.
You can also add deadlines, checklists, attachments, notes, and collaborators to individual cards.
Notion
Notion offers more flexibility if you want to keep several parts of your blogging operation in one workspace.
You can use it for an editorial calendar, recipe ideas, keyword research notes, content briefs, checklists, brand guidelines, sponsorship information, or other documentation.
That flexibility is useful, but it can also become a distraction.
You do not need to build an elaborate productivity dashboard before publishing your first recipe. Start with a simple system and expand it only when you have a genuine organizational problem to solve.
CoSchedule
CoSchedule combines content planning with marketing and publishing tools.
It can be useful for bloggers or teams that want to coordinate editorial tasks, deadlines, campaigns, and promotional activities within a more structured workflow.
For a solo food blogger publishing a few times per month, a simpler tool may be enough. As publishing volume increases or more people become involved, a more comprehensive system can become easier to justify.
Build Your Workflow Around the Content
Your productivity system should reflect how you actually create recipes.
For example, your workflow might look like:
Keyword research → recipe testing → photography → writing → editing → SEO → publishing → email → Pinterest and social promotion.
Once you define that process, choosing a productivity tool becomes much easier.
You can also create reusable checklists for repetitive tasks so you do not have to remember every step each time you publish.
The biggest mistake is spending more time organizing the work than doing it.
A good productivity tool should make your food blogging workflow simpler, more consistent, and easier to manage. If maintaining the system becomes another job, simplify it.
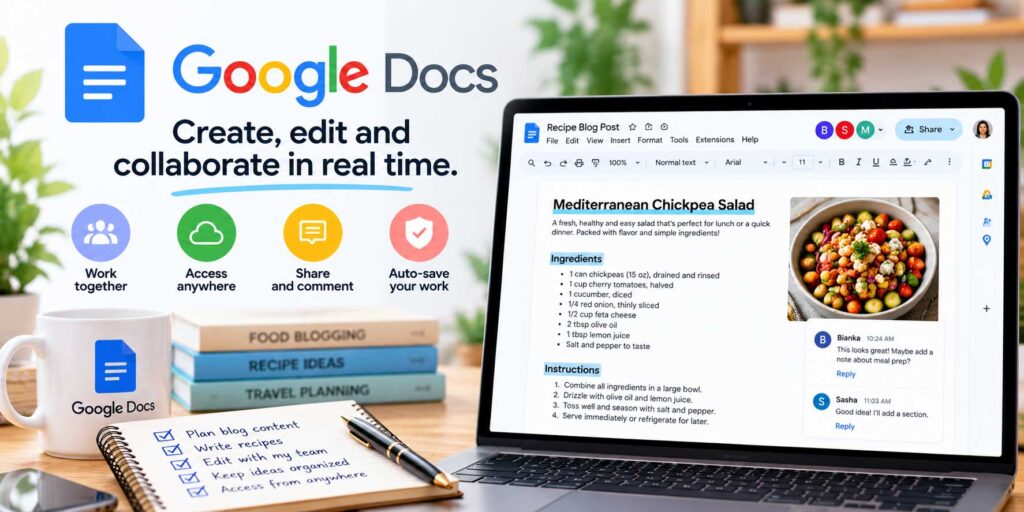
Writing and Editing Tools
Beautiful photos may get someone’s attention, but clear writing helps them actually make the recipe.
Beyond the recipe card itself, you may need to explain ingredients, substitutions, cooking techniques, storage instructions, serving ideas, common mistakes, and answers to questions readers are likely to have.
Writing and editing tools can make that process easier, particularly when you publish frequently or work with other writers.
Google Docs
Google Docs is one of the simplest tools for drafting food blog content.
Because documents are stored online, you can work from different devices, organize drafts in Google Drive, share articles with collaborators, and leave comments or suggestions during editing.
This is especially useful if your workflow involves writers, editors, recipe testers, or other people who need access to a draft before it reaches WordPress.
You can also create reusable templates for recipe posts so every new article starts with the basic sections you normally include.
Grammarly
Grammarly can help identify spelling, grammar, punctuation, and readability issues while you write or edit.
It can be useful as a final check before publishing, but automated suggestions should not replace your own judgment.
Food writing often includes unusual ingredient names, regional dishes, brand names, measurements, and conversational language that an editing tool may misunderstand.
Review each suggestion rather than accepting everything automatically.
ProWritingAid
ProWritingAid is another writing and editing tool that can help identify grammar problems, repetitive language, awkward sentences, and other readability issues.
It may be useful for longer guides and informational articles where you want more detailed feedback on the writing itself.
Editing Tools Should Support Your Voice
It is easy to over-edit an article until it sounds generic.
Readers generally do not need every recipe introduction to sound like formal publishing copy. They want clear instructions, useful information, and a writer they can understand and trust.
Use editing tools to catch genuine problems and improve clarity, but keep your own experience and personality in the content.
This is especially important when describing how a recipe should look, smell, taste, or feel during cooking. Those details often come from actual experience and are far more useful than perfectly polished but generic sentences.
The best writing tools should help you write more clearly and efficiently without removing the human voice behind your food blog.
For more options, see our guide to the best writing tools for food bloggers, including tools for drafting, editing, research, organization, and improving your writing workflow.
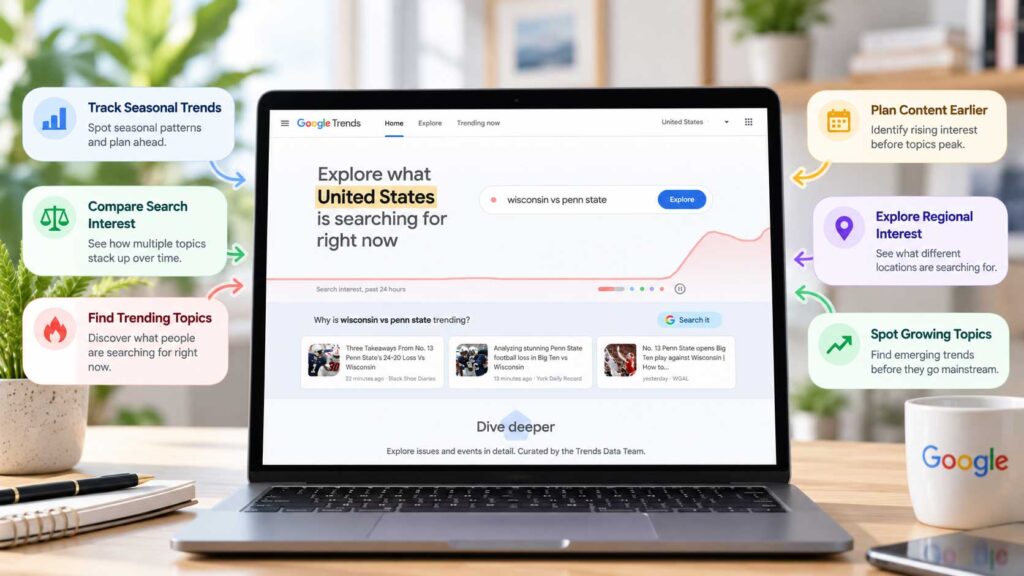
Content Discovery and Research Tools
Coming up with food blog ideas is usually not difficult. The harder part is deciding which ideas are actually worth your time.
Content discovery tools can help you spot emerging food trends, seasonal interest, frequently asked questions, popular ingredients, and topics that are gaining attention in your niche.
They are different from traditional keyword research tools. Keyword research often focuses on search demand and competition, while content discovery looks more broadly at what people are talking about, sharing, searching for, and becoming interested in.
Using both can give you a much stronger content strategy.
Google Trends
Google Trends is one of the best free starting points for researching changing interest in food topics.
You can compare ingredients, recipes, cooking methods, and seasonal dishes to see how search interest changes over time.
This can be particularly useful when planning your editorial calendar.
If interest in a particular holiday recipe consistently begins rising several weeks before the holiday itself, you can update or publish your content before that demand reaches its peak.
Pinterest Trends
Pinterest Trends can be especially useful for food bloggers because recipe discovery is such a strong part of the platform.
It can help you explore trends around recipes, ingredients, holidays, entertaining, meal planning, and other food-related topics.
Pinterest users also tend to plan ahead, so the platform can provide useful signals about seasonal topics before the actual event arrives.
Use those signals as research rather than assuming every trending topic deserves its own article.
A trend is most valuable when it also fits your niche and the type of food your audience expects from you.
Feedly
Feedly helps you organize content from websites and publications you want to follow in one place.
Instead of manually visiting dozens of food websites, industry publications, and other sources, you can organize relevant feeds and review new content more efficiently.
For food bloggers, this can be useful for following developments in your niche, watching broader food trends, discovering interesting angles, and keeping up with publications related to cooking, nutrition, restaurants, ingredients, or the food industry.
The point is not to see what another food blogger published on Monday and create your version on Tuesday. Use Feedly to stay aware of what is happening in your niche, then bring your own recipes, testing, photography, and experience to the ideas worth pursuing.
Turn Discovery Into Original Content
Finding a trending idea is only the beginning.
Before creating a new post, ask whether you can add something genuinely useful.
Perhaps you can test a different cooking method, explain a traditional technique, compare ingredients, photograph each step, answer questions competing articles overlook, or provide firsthand tips from making the recipe yourself.
That is where content discovery becomes valuable.
The best research tools do not tell you exactly what to publish. They help you identify opportunities that you can turn into original, useful content for your own audience.
If you want to build a repeatable system for finding new topics, our guide to the best content discovery tools for food bloggers covers additional ways to uncover trends, questions, seasonal opportunities, and content ideas.
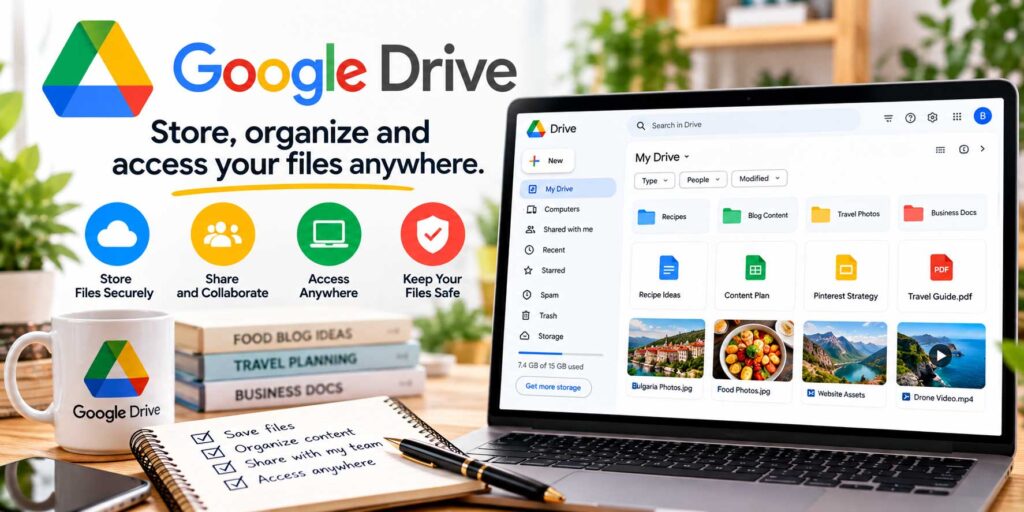
File Storage and Collaboration Tools
Food blogs can generate a surprising number of files.
A single recipe might include dozens of original photographs, edited images, Pinterest graphics, a written draft, research notes, and other assets. Multiply that by hundreds of recipes and file organization can quickly become a problem.
Cloud storage keeps those files accessible across your devices and makes sharing them much easier when writers, editors, photographers, or virtual assistants become part of your workflow.
Google Drive
Google Drive is one of the easiest options for storing and sharing everyday blogging files.
Its integration with Google Docs, Sheets, and other Google tools makes it particularly useful for content workflows.
For example, you might create a folder for each recipe containing the article draft, keyword research, photography notes, final images, and promotional assets.
You can then share specific files or folders with collaborators instead of emailing attachments back and forth.
Google Drive is also useful for maintaining editorial calendars, content inventories, keyword lists, affiliate information, and other documents related to your blog.
Dropbox
Dropbox is another popular option for cloud storage and file synchronization.
It can be particularly useful when you work with large numbers of photographs or want files synchronized across several computers and devices.
Whether you choose Google Drive, Dropbox, or another cloud storage provider matters less than having a consistent system for organizing your files.
Create a Simple Folder Structure
Do not wait until you have thousands of images to decide how your files should be organized.
A simple recipe folder might look something like this:
Recipe Name → Originals → Edited Photos → Web Images → Pinterest → Final Assets
You could also organize your main folders by year, category, or publication status.
Choose a structure that makes sense for the way you work and use it consistently.
Clear file names also help. A descriptive name such as homemade-chicken-soup-ingredients.jpg is much easier to identify later than IMG_8472.jpg.
Cloud Storage Is Not Your Entire Backup Strategy
Cloud storage is useful, but do not confuse storing files in the cloud with having a complete backup strategy for your food blog.
Your WordPress website, database, themes, plugins, uploaded media, and original photography may require different types of backups.
Important files should ideally not exist in only one place.
For a growing food blog, a sensible combination of organized cloud storage and independent website backups can save a tremendous amount of trouble if a device fails, a file is accidentally deleted, or something goes wrong with your website.
The goal is simple: you should know where your important files are and be able to recover them when you need them.

Security and Backup Tools
Security is easy to ignore when you are focused on recipes, photography, traffic, and monetization, but it should still be part of your food blogging tech stack.
As your website grows, it becomes more valuable. As your archive grows, so does the amount of work tied up in your website — recipes, photographs, search visibility, affiliate content, and years of updates.hing goes wrong.
You do not need to become a cybersecurity expert. A few basic tools and habits can significantly reduce unnecessary risk.
Wordfence
Wordfence is a popular WordPress security plugin that provides features such as firewall protection, malware scanning, login security, and monitoring for suspicious activity.
For a food blogger running WordPress, a security plugin can provide an additional layer of protection against common threats and automated attacks.
However, installing a security plugin does not mean you can ignore the rest of your website.
Keep WordPress, your theme, and your plugins updated, remove software you no longer use, and avoid installing plugins from questionable sources.
UpdraftPlus
UpdraftPlus is a WordPress backup plugin that can automate backups of your website files and database.
Automatic backups are important because problems do not always come from hackers. A failed update, plugin conflict, hosting problem, accidental deletion, or simple human error can also damage a website.
Having a recent backup gives you a way to recover instead of rebuilding everything manually.
Keep Backups Away From Your Website
Whenever possible, avoid keeping your only backup on the same server as your website.
If the server itself has a serious problem, you do not want the live website and its only usable backup affected at the same time.
Depending on your setup, backups can be stored using cloud storage or another remote destination.
Your hosting provider may also include automatic backups, but understand how those backups work, how long they are retained, and how you would restore one before you actually need it.
Use Strong Login Security
Your WordPress administrator account should use a strong, unique password that is not reused on other websites.
Two-factor authentication can add another useful layer of protection by requiring more than a password to access your account.
The same principle applies to other important services connected to your food blog, including your hosting account, domain registrar, email marketing platform, cloud storage, and business email.
Protecting WordPress while leaving your domain or hosting account poorly secured still creates unnecessary risk.
Test Your Backup System
A backup is useful only if you can restore it.
You do not need to perform constant restoration tests, but you should understand where your backups are stored and what the recovery process looks like.
This becomes increasingly important as your food blog grows.
Security and backups may not help you publish your next recipe faster, but they protect the work you have already put into your blog.
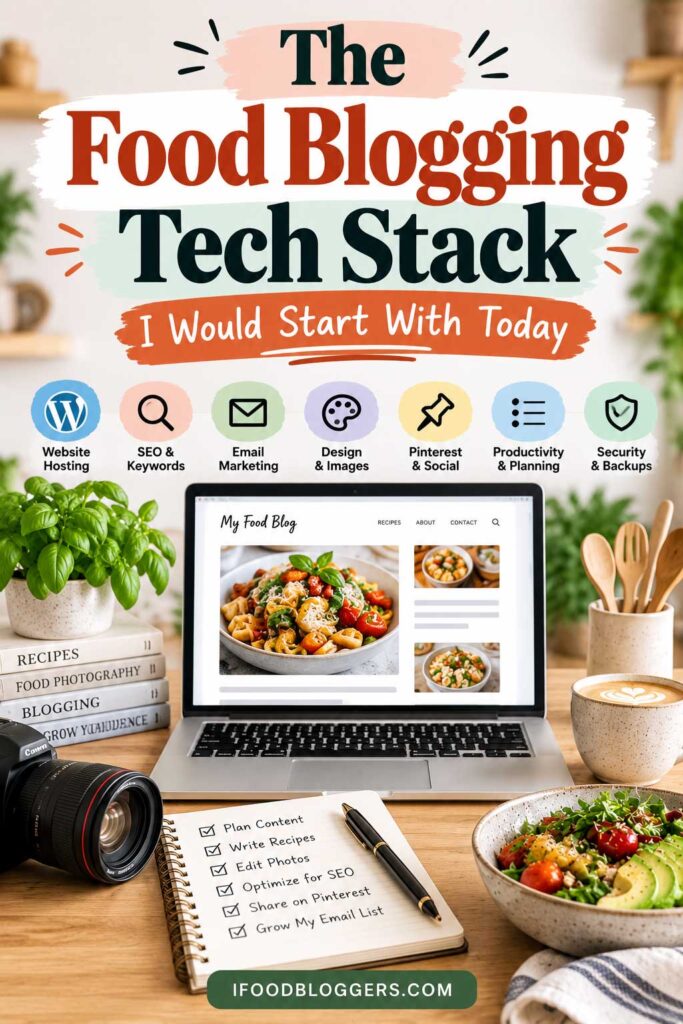
The Food Blogging Tech Stack I Would Start With Today
If I were starting a food blog today, I would keep the setup surprisingly small.
I would rather learn ten tools I actually use than pay for twenty-five platforms because someone else’s “ultimate blogging stack” says I need them. The stack can grow later, when the blog gives me a reason to add something.
Here is how I would approach it at each stage.
Beginner Food Blog: Keep It Simple
When you are starting out, put most of your effort into publishing useful recipes and learning how your audience finds them.
Your basic stack could include:
- WordPress for your website
- Reliable entry-level web hosting
- WP Recipe Maker or another established recipe plugin
- Google Search Console
- Google Analytics 4
- Google Trends
- Google Drive and Docs
- Canva
- A basic image optimization tool
- A simple backup and security setup
Apart from your domain and hosting, much of this starter stack can be built with free tools or free versions of paid products.
At this stage, I would not rush into expensive SEO subscriptions, complicated automation platforms, or several different project-management tools.
Spend that money only when you know what problem the paid tool will solve.
Growing Food Blog: Add Tools That Save Time
Once you have a meaningful library of content and traffic is beginning to grow, your priorities change.
Now you have older recipes to update, more keywords to research, an email list to build, social content to distribute, and considerably more data to analyze.
This is when tools such as MailerLite, Kit, or Brevo can become more important for email marketing.
You may also benefit from a more structured planning system such as Trello, Notion, or CoSchedule, particularly if you are publishing frequently.
A paid SEO platform such as Semrush or Ahrefs may also become easier to justify when you have enough existing content and competitor data to use its features regularly.
The key question is still the same:
Will this tool save meaningful time, reveal information I cannot easily get elsewhere, or help me grow the business?
If the answer is no, you probably do not need another subscription yet.
Monetized Food Blog: Build Around Efficiency
Once your food blog is making consistent money, it becomes easier to judge a paid tool by the time or revenue it can save.
Saving five hours per month may now be worth considerably more than the subscription that saves those hours.
At this stage, your stack might include premium hosting, advanced SEO software, more capable email automation, professional photography software, premium recipe tools, automated backups, security monitoring, and a more structured content-management system.
You may also have writers, editors, photographers, virtual assistants, or other people working on the site.
That makes collaboration tools and standardized workflows much more valuable.
The goal is no longer simply to keep software costs as low as possible. It is to spend money where it improves efficiency, protects revenue, or creates additional growth opportunities.
Do Not Build Your Stack Around Someone Else’s Blog
A tool that makes sense for a food website receiving millions of page views may be completely unnecessary for a new blogger publishing twice a month.
The reverse can also be true.
Your niche, traffic sources, publishing frequency, team size, monetization strategy, and technical skills all influence which tools provide the most value.
Start with the essentials. Add new tools when a real need appears. Remove tools you stop using.
A good food blogging tech stack should become more useful as your business grows — not simply more expensive.
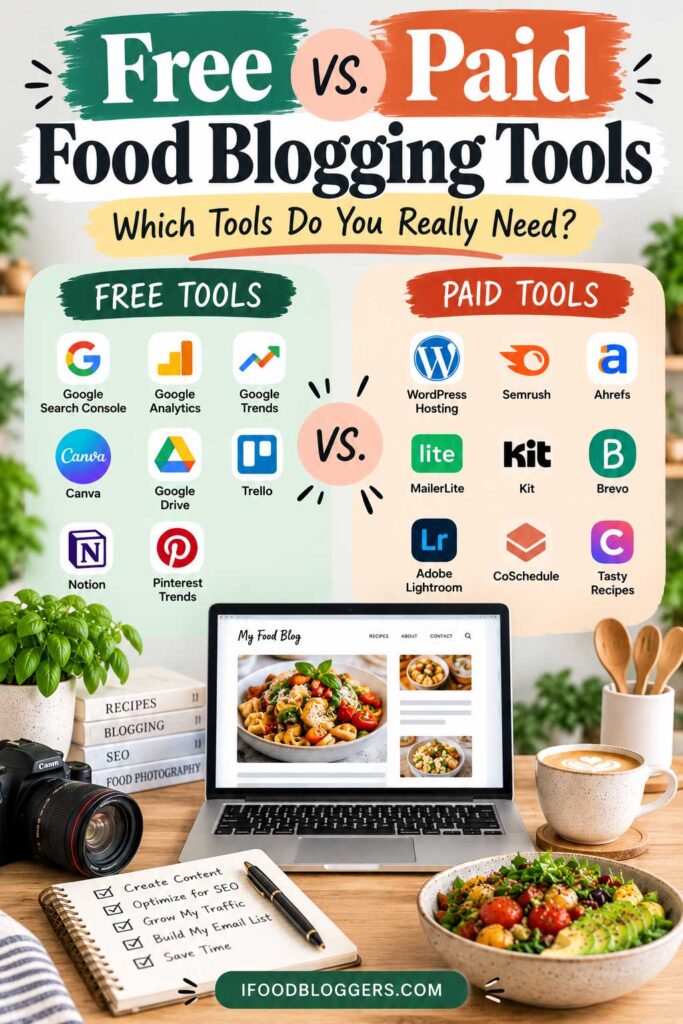
Free vs. Paid Food Blogging Tools
One of the easiest ways to overspend on a food blog is to assume that every free tool eventually needs to be replaced with a paid one.
That is not necessarily true.
Free does not necessarily mean temporary. Tools such as Google Search Console, Google Analytics, and Google Trends can remain useful even after your blog becomes an established business.
Other tools follow a freemium model, where the free version is enough when you are starting but paid features become useful as your needs grow.
When Free Tools Are Enough
Free tools are usually the best place to start when you are still building your content library and learning your workflow.
At this stage, you may not need advanced competitor analysis, complex email automation, premium design features, or an expensive project-management platform.
For example, Google Search Console can reveal the queries already generating impressions for your recipes. Google Trends can help with seasonality. Canva’s free tools may cover your basic graphics, and a simple planning system can keep your publishing schedule organized.
Use those tools until you can identify a limitation that is actually affecting your work.
When a Paid Tool Is Worth It
A paid tool starts making sense when its additional features solve a real problem.
Perhaps keyword research is taking too long and a paid SEO platform can speed up competitor analysis. Maybe your email list has grown enough that you need better segmentation and automation. Or perhaps premium image-processing tools save several hours every month.
In those situations, the subscription is not simply another expense. It is buying back time or giving you capabilities that can support growth.
Before subscribing, ask yourself:
What will I be able to do with the paid version that I cannot reasonably do now?
If you cannot answer that question clearly, you may not need the upgrade.
Watch Out for Subscription Creep
A $10 or $20 monthly subscription may not seem significant on its own.
The problem appears when you have ten or fifteen of them.
Hosting, SEO software, email marketing, design tools, image optimization, social scheduling, backups, security, project management, and other services can quietly turn into a substantial annual expense.
Review your subscriptions periodically and look at what you actually use.
If you have not used an important paid feature in several months, consider whether that tool still deserves a place in your stack.
Pay for Results, Not Features
Software companies naturally promote long lists of features.
Your food blog does not need all of them.
A simpler tool that solves one important problem may be more valuable than an advanced platform where most features remain untouched.
Choose paid tools based on time saved, problems solved, useful data provided, or revenue supported rather than the size of the feature list.
Your tech stack should earn its place in your workflow. Whether a tool is free or paid matters less than whether you actually use it.
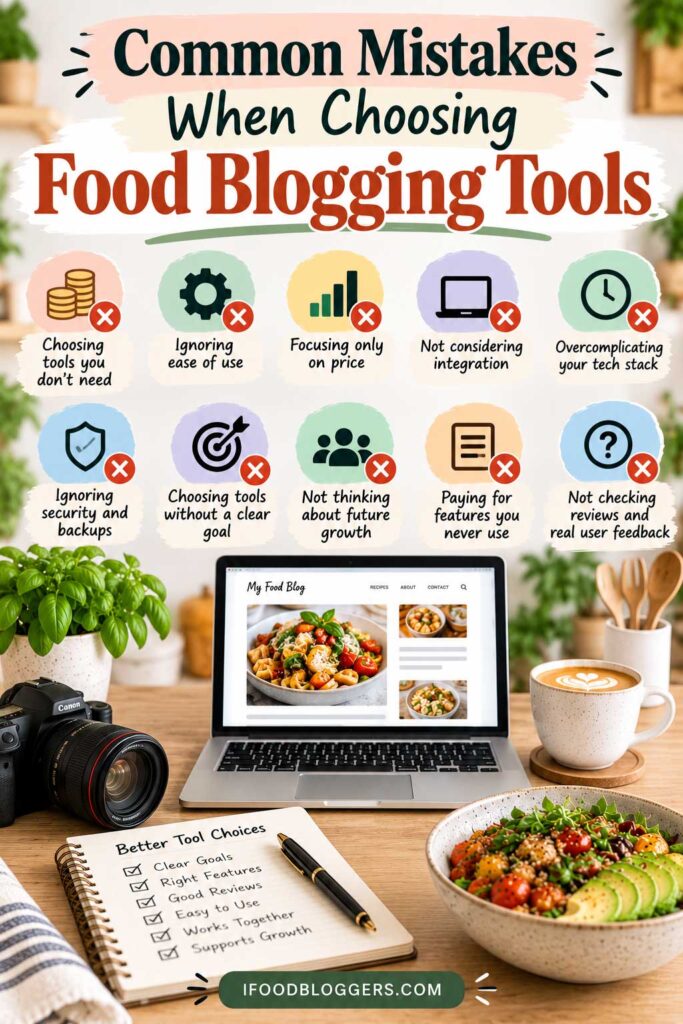
Common Mistakes When Choosing Food Blogging Tools
More software does not automatically mean a better food blog. In fact, the wrong tools can cost money, complicate your workflow, and distract you from the work that actually grows your site.
Here are the mistakes I would avoid.
Buying Too Many Tools Too Early
A new food blogger usually does not need an expensive SEO platform, advanced email automation, premium project management, multiple social schedulers, and several design subscriptions at the same time.
Start with the essentials and add tools as specific needs appear.
This keeps your costs lower and gives you time to understand what you actually need before committing to more subscriptions.
Choosing Tools Because Other Bloggers Use Them
Recommendations can be helpful, but another blogger’s workflow may look completely different from yours.
A full-time food publisher with a team, hundreds of thousands of monthly visitors, and several revenue streams may need software that provides very little value to a new site.
Choose tools based on your own traffic, budget, workflow, and goals rather than trying to copy someone else’s tech stack.
Paying for Features You Never Use
It is easy to compare software by counting features.
In practice, you may use only a small percentage of them.
Before upgrading, identify which premium features you actually need and how often you expect to use them. A less expensive tool that handles your core tasks well may be the better choice.
Using Multiple Tools for the Same Job
Overlapping software can make your workflow more complicated.
You probably do not need three project-management systems, multiple social schedulers, several SEO platforms, and two tools performing the same image-compression job.
If your recipe idea is sitting in Notion, the deadline is in Trello, and your notes are in a spreadsheet, the tools are creating work instead of removing it.
Whenever you add something new, ask whether it replaces an existing tool or simply duplicates functionality you already have.
Ignoring Website Performance
Plugins and third-party scripts can add useful features, but they can also increase the amount of work your website has to do.
This is particularly important for food blogs, where pages may already contain large images, recipe cards, advertising scripts, videos, analytics, and other elements.
Avoid installing plugins simply because they offer an interesting feature. Use the tools that provide meaningful value and remove software you no longer need.
Choosing the Cheapest Option Without Looking Ahead
Keeping costs under control is important, but the cheapest option is not always the least expensive over the long term.
For example, moving hundreds of recipes from one system to another can take far more time than choosing a suitable tool in the first place.
This matters particularly for core infrastructure such as hosting, recipe plugins, email platforms, and systems that become difficult to migrate once your blog grows.
You do not need the premium option from day one, but consider whether the tool can reasonably grow with you.
Expecting Tools to Replace Strategy
An SEO platform cannot make weak content rank simply because you pay for it.
A social scheduler cannot create an engaged audience on its own. An email platform cannot make readers subscribe if you give them no reason to join. A premium camera cannot replace learning basic food photography.
Tools support a good strategy. They do not create one for you.
Before buying another piece of software, make sure you understand the problem you are trying to solve.
Forgetting to Review Your Tech Stack
The tools that made sense two years ago may not be the tools you need today.
Prices change. Features change. Your traffic grows. Your workflow evolves. Sometimes a feature that once required a separate subscription becomes available in software you already use.
Review your tech stack periodically and ask a simple question:
Would I subscribe to this tool again today?
If the answer is no, it may be time to simplify.
The best food blogging tech stack is not the one with the most tools. It is the one where every tool has a clear purpose.
How Much Should You Spend on Food Blogging Tools?
There is no single correct amount to spend on food blogging tools.
A new blogger publishing a few recipes each month has very different needs from an established food website with significant traffic, an email list, advertising revenue, and a team of contributors.
The better question is whether the tools you pay for are appropriate for the current stage of your blog.
Beginner Food Blog: Often Around $10–$50 per Month
Your actual cost can be higher or lower depending on your hosting plan, theme, plugins, and whether you pay monthly or annually.
A new food blog can operate with a surprisingly small software budget.
Your main unavoidable expenses are usually your domain and hosting. Many other essential tools offer useful free versions, including Google Search Console, Google Analytics, Google Trends, Google Drive, Canva, and several WordPress plugins.
Depending on your hosting setup and any premium theme or plugin purchases, you may spend more during your first year. But you should not feel that you need hundreds of dollars in monthly software subscriptions just to start publishing recipes.
At this stage, put your money into a reliable website foundation and content creation rather than collecting tools.
Growing Food Blog: Often Around $50–$200 per Month
Once your traffic and content library begin growing, additional tools can start saving meaningful amounts of time.
You might pay for better hosting, an email marketing platform, premium recipe features, image optimization, a design subscription, or selected SEO tools.
You still do not need everything.
If a $100 monthly SEO subscription sits unused most of the month, it is not providing much value simply because your website is growing.
This is also a good stage to review annual plans carefully. They can reduce the effective monthly cost of software you know you will use, but paying annually for an uncertain tool can leave you locked into something you later abandon.
Established Food Blog: Costs Can Vary Widely
Once a food blog becomes a real revenue-producing business, software costs can vary widely depending on traffic, team size, email subscribers, hosting requirements, and the tools used to run the business.
Premium hosting, professional SEO platforms, larger email lists, photography software, automation, backup systems, security services, and team collaboration tools can easily push monthly costs beyond $200.
That is not necessarily a problem.
If a $50 tool saves several hours of work every month or helps protect a website generating thousands of dollars in revenue, the economics are very different from those of a brand-new blog.
The focus should gradually shift from “How little can I spend?” to “What produces the best return for the business?”
Calculate the Annual Cost
Monthly prices can make software seem cheaper than it really is.
A $29 monthly subscription costs $348 over a year. Three similar subscriptions can easily exceed $1,000.
Before adding another paid tool, calculate what it will cost you annually and ask whether you expect to receive at least that much value from it.
Also remember that some expenses increase as your blog grows. Email marketing costs may rise with your subscriber count, while hosting costs can increase as traffic and resource requirements grow.
Spend Where It Makes the Biggest Difference
For most food bloggers, the highest-priority expenses are the tools that support the core business: a reliable website, recipe publishing, content creation, audience growth, and protection of your work.
Everything else should earn its place.
You do not need the cheapest food blogging tech stack, and you certainly do not need the most expensive one.
You need a stack that makes sense for the size of your blog today and can evolve as the business grows.
Frequently Asked Questions About Food Blogging Tools
What tools do food bloggers need?
At a minimum, the essential food blogging tools include a website platform, reliable hosting, a recipe card plugin, analytics, search performance tools, image editing and optimization software, and a backup system.
As the blog grows, you may also want tools for keyword research, email marketing, Pinterest and social media scheduling, content planning, and collaboration.
You do not need to buy all of these tools when you start.
What is the most important tool for a food blogger?
There is no single tool that does everything, but your website platform and hosting form the foundation of your food blog.
For a self-hosted WordPress food blog, a reliable hosting provider and a good recipe plugin are particularly important. Free tools such as Google Search Console and Google Analytics should also be set up early so you can begin collecting performance data.
Can I start a food blog using mostly free tools?
Yes. Many essential food blogging tools are available for free.
Google Search Console, Google Analytics, Google Trends, Google Drive, and other free or freemium tools can cover a large portion of a beginner’s needs.
You will generally need to pay for your domain and hosting if you want to build a self-hosted WordPress site, but you do not need a large collection of paid subscriptions to begin publishing.
Do food bloggers need Semrush or Ahrefs?
No. Semrush and Ahrefs can provide valuable keyword, competitor, backlink, and SEO data, but neither is required to start a successful food blog.
Begin with free sources such as Google Search Console and Google Trends while you learn the fundamentals of SEO and keyword research.
A paid SEO platform becomes easier to justify when you have enough content and traffic to use its advanced data regularly.
Is Canva worth using for a food blog?
For many food bloggers, yes.
Canva makes it relatively easy to turn food photography into Pinterest pins, social graphics, lead magnets, media kits, and other visual assets.
The free version may be enough when you are starting. A paid plan becomes more attractive if its additional design and workflow features save you meaningful time.
Do I need an email marketing platform when starting a food blog?
You do not need advanced email automation on day one, but giving readers a way to subscribe early can pay off later.
Even a simple signup form allows interested readers to stay connected with your blog. As your audience grows, you can introduce newsletters, lead magnets, segmentation, and automated email sequences.
Starting early also means you are not waiting until you have substantial traffic before giving readers a way to subscribe.
How many food blogging tools do I really need?
Probably fewer than you think.
There is no benefit to maintaining a large tech stack if several tools perform the same function or rarely get used.
Start with tools that support publishing, SEO, analytics, images, backups, and the other essential parts of your workflow. Add specialized software when you can clearly explain what problem it solves.
Should I pay monthly or annually for blogging tools?
Annual billing can save money on tools you know you will use for a long time, but monthly billing provides more flexibility when you are still testing a platform.
Before paying for a full year, use the tool long enough to determine whether it genuinely fits your workflow.
A discount is not a saving if you end up paying for software you stop using after two months.
How often should I review my food blogging tech stack?
Reviewing your tools once or twice a year is a good habit, and you should also reconsider your setup whenever your workflow changes significantly.
Look for unused subscriptions, overlapping features, outdated plugins, unnecessary software, and tools that have become too expensive for the value they provide.
At the same time, identify repetitive tasks that are consuming more time as your blog grows. Those are often the areas where adding or upgrading a tool can make the biggest difference.
Build a Food Blogging Tech Stack That Grows With You
The best food blogging tools are not necessarily the most expensive ones or the platforms with the longest feature lists.
They are the tools that make it easier to create great content, understand your audience, get discovered, promote your recipes, and protect the work you have already done.
If you are starting a food blog, keep your tech stack simple. Begin with reliable hosting, WordPress, a good recipe plugin, Google Search Console, analytics, image optimization, backups, and a few free tools that support your everyday workflow.
Then let the problems you encounter tell you what tool you need next.
As traffic grows, you may reach a point where better email marketing, advanced keyword research, social scheduling, professional editing software, or more powerful hosting starts saving meaningful time or supporting additional revenue. That is the right time to consider upgrading.
Avoid collecting subscriptions simply because other bloggers recommend them. Every tool should solve a problem, save time, provide useful information, protect your website, or help grow your business.
Your food blogging tech stack will probably look different a year from now — and that is exactly how it should be.
Start with the essentials, learn what your blog actually needs, and build your stack one useful tool at a time.
Continue Building Your Food Blog
Your tech stack is only one part of building a successful food blog. Once the essential tools are in place, the next step is learning how to use them to improve your content, attract more readers, and create a more efficient publishing workflow.
If you are deciding where to invest next, these guides can help:
- Best Hosting for Food Bloggers — compare hosting options and learn what actually matters for a growing recipe website.
- Best Free Keyword Research Tools for Food Bloggers — find recipe keywords and content opportunities without immediately paying for expensive SEO software.
- Best Writing Tools for Food Bloggers — build a better workflow for drafting, editing, and polishing your content.
- Best Productivity Tools for Food Bloggers — organize recipes, deadlines, editorial calendars, and everyday blogging tasks.
- Best Content Discovery Tools for Food Bloggers — discover trends, questions, seasonal opportunities, and new ideas for your content calendar.
- Best Email Marketing Platforms for Food Bloggers — compare tools for building your email list and bringing readers back to your recipes.
- How to Get More Traffic to Your Food Blog — put your SEO, Pinterest, email, video, and content strategy together to grow your audience.
You do not need to tackle everything at once. Choose the area that is currently limiting your blog the most, improve that part of your system, and then move on to the next.