
A beautifully photographed dish can make someone stop scrolling, click on a recipe, or decide to try cooking it themselves. Good lighting and thoughtful food styling play a big part, but the camera lens you use can make a noticeable difference, too.
Some lenses are perfect for capturing an entire breakfast table from above. Others help you photograph a slice of chocolate cake with a softly blurred background or reveal the delicate layers of a freshly baked croissant.
The tricky part is knowing which lens is worth buying.
Should you choose a 35mm lens for overhead shots, an affordable 50mm prime for everyday recipes, or a dedicated macro lens for capturing tiny details? And is spending $1,000 on professional equipment really necessary?
For most food bloggers, it isn’t.
A relatively inexpensive prime lens can produce excellent results when paired with natural light, good composition, and the right camera settings. More expensive lenses offer additional capabilities, but those features aren’t always essential for creating attractive recipe photographs.
In this guide to the best lenses for food photography in 2026, we’ll compare affordable and professional options from Canon, Nikon, Sony, Fujifilm, and Sigma.
You’ll learn which focal lengths work best for overhead photography, plated dishes, restaurant meals, and close-up food details. We’ll also look at lens compatibility, useful features, and when upgrading your equipment actually makes sense.
Whether you’re starting your first food blog or improving an established photography setup, the goal is simple: find a lens that fits your camera, your budget, and the way you photograph food.
A good lens is only one part of your photography setup. If you’re building your first food blogging workspace, explore our guide to the best tools for food bloggers for useful equipment, editing software, and other blogging resources.
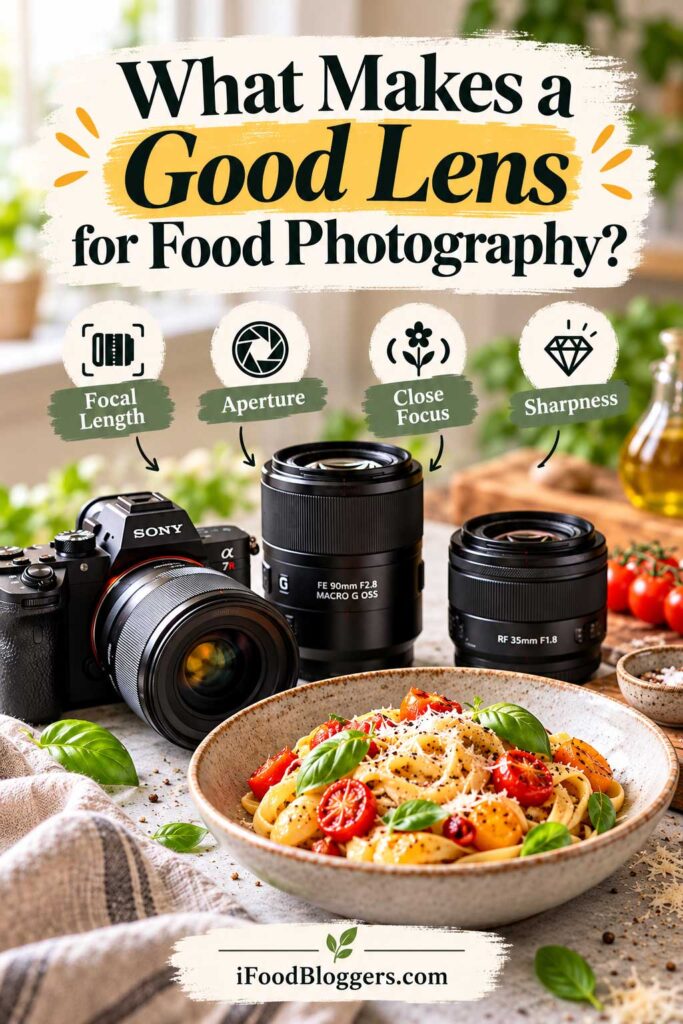
What Makes a Good Lens for Food Photography?
Not every camera lens is equally practical for photographing food.
A long telephoto lens might be excellent for wildlife, but trying to photograph an entire dinner plate with it in a small kitchen could be frustrating. Meanwhile, a compact 35mm or 50mm lens may handle most everyday recipe photographs with ease.
Before comparing specific models, it helps to understand the features that matter most.
Focal length determines how much of your scene fits into the frame from a given camera position. Wider lenses are convenient for overhead arrangements and larger tablescapes, while longer focal lengths work well for tighter compositions and isolating individual dishes.
Maximum aperture affects how much light enters the camera and how much background blur you can create. A lens with an f/1.8 aperture offers flexibility in lower light, although you’ll often use f/4, f/5.6, or even f/8 when you want more of a dish in focus.
Minimum focusing distance tells you how close the camera can focus on your subject. This becomes important when photographing garnishes, fresh herbs, pastry textures, and other small food details.
Magnification determines how large a small subject appears on the camera sensor. Dedicated macro lenses often provide 1:1 magnification, making them useful for detailed ingredient photographs that ordinary lenses may struggle to capture.
Sharpness and image quality matter, too. A good lens should reproduce fine details, natural colors, and appealing contrast. However, proper lighting and accurate focus are just as important as the lens’s optical performance.
Finally, think about where you usually take your photographs.
If you’re working beside a kitchen window with limited space, a compact prime or standard zoom may be far more convenient than a large professional macro lens.
You should also consider your camera’s sensor size. A 35mm lens provides a different field of view on a full-frame camera than it does on an APS-C model, which can significantly affect overhead compositions.
The best food photography lens isn’t necessarily the sharpest, fastest, or most expensive option. It’s the one that lets you capture your recipes consistently without making your photography setup unnecessarily complicated.
Affiliate Disclosure: Some links in this article may be affiliate links. If you make a purchase or sign up through one of these links, iFoodBloggers may earn a commission at no extra cost to you.
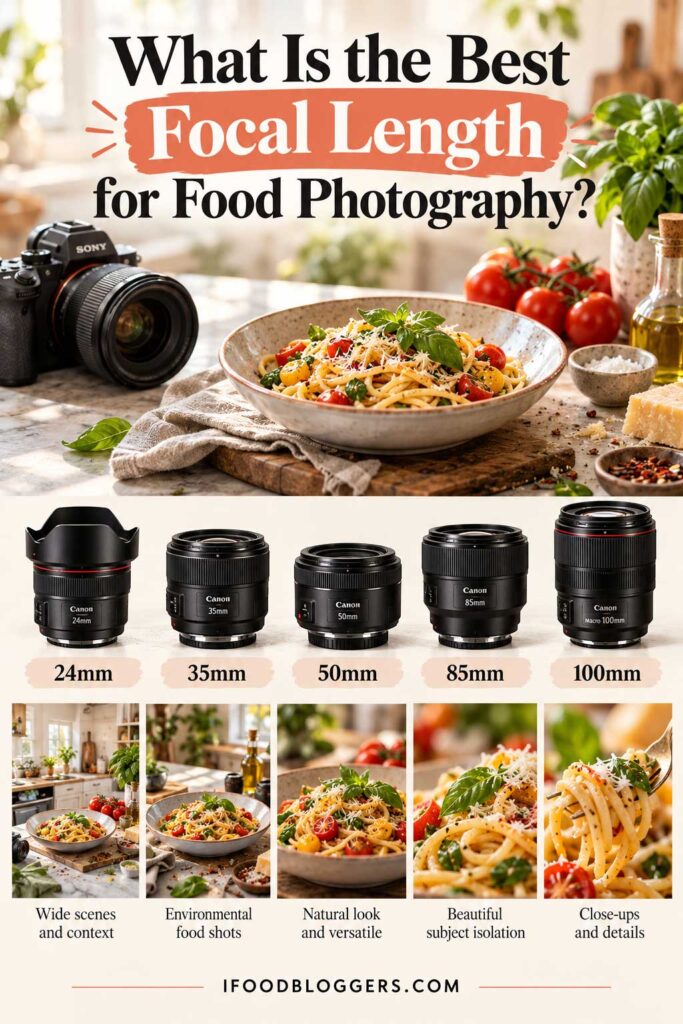
What Is the Best Focal Length for Food Photography?
Choosing the right focal length can make food photography much easier, especially when you’re working in a small kitchen or photographing recipes from different angles.
Focal length, measured in millimeters (mm), determines how much of a scene fits into your photograph from a given camera position. A wider lens captures more of the table, while a longer lens helps you frame individual dishes and isolate small details.
For most food bloggers, focal lengths between 35mm and 100mm cover nearly everything from overhead recipe shots to detailed close-ups. Wider lenses can also be useful for large tablescapes.
Food Photography Focal Length Comparison
The following recommendations assume you’re using a full-frame camera.
| Focal Length | Best For | Main Limitation |
|---|---|---|
| 24mm | Large overhead arrangements, tablescapes | Exaggerated perspective at close distances |
| 35mm | Flat lays, ingredients, everyday recipes | Less convenient for tightly framed food portraits |
| 50mm | Plated dishes, desserts, general food photography | Can feel restrictive on APS-C cameras |
| 85mm | Desserts, drinks, soft backgrounds | Requires more shooting distance |
| 90–105mm Macro | Food textures, garnishes, ingredient details | Narrow field of view for wider scenes |
Each focal length offers a slightly different way of photographing food. Here’s where they work best.
24mm Lenses: Best for Wide Food Scenes
A 24mm lens is useful when you want to capture an entire table rather than a single dish.
Think of a Thanksgiving dinner surrounded by serving bowls, utensils, and decorations. A wider lens helps fit everything into the frame without requiring you to position the camera too far away.
It’s also convenient for overhead photography when you have limited space above your table.
The trade-off is perspective. Photographing food too closely with a wide-angle lens can make nearby ingredients appear disproportionately large. Keep important dishes away from the extreme edges when possible.
For everyday food blogging, I wouldn’t necessarily choose 24mm as my only lens, but it’s useful for large arrangements and kitchen scenes.
35mm Lenses: Best for Overhead Food Photography
A 35mm lens is one of the most versatile options for food bloggers using full-frame cameras.
Its moderately wide field of view works particularly well for overhead photographs, where you want to include the main dish alongside ingredients, utensils, and styling props.
For example, you could photograph a bowl of homemade pasta surrounded by tomatoes, fresh basil, Parmesan cheese, and a linen napkin without positioning your camera excessively high.
It’s also useful for capturing cooking steps and wider kitchen scenes.
If you regularly photograph recipes from above or work in a small space, 35mm is an excellent focal length to consider.
50mm Lenses: Best All-Around Choice for Food Bloggers
A 50mm prime lens is a popular starting point for food photography, and for good reason.
It’s versatile enough for plated meals, desserts, drinks, and many everyday recipe photographs. On a full-frame camera, its field of view feels comfortable for compositions taken from a 45-degree angle.
Many affordable 50mm lenses also feature a wide f/1.8 aperture, making it easier to create softly blurred backgrounds.
Imagine photographing a slice of chocolate cake with fresh raspberries. A 50mm lens can keep the cake prominent while allowing the surrounding scene to fade gently out of focus.
However, not every 50mm lens focuses particularly close. If you frequently photograph tiny garnishes or intricate food textures, check its magnification capabilities before purchasing.
For beginners using full-frame cameras, an affordable 50mm f/1.8 is one of the best-value options available.
85mm Lenses: Best for Soft Backgrounds and Plated Dishes
An 85mm lens is particularly effective for tighter food compositions.
It works beautifully for individual desserts, drinks, and restaurant-style dishes where you want the subject to stand out against a soft background.
For example, photographing a slice of cheesecake with an 85mm lens can create attractive separation between the dessert and the surrounding table.
The main limitation is working space.
To include an entire dish, you’ll generally need to position your camera farther away than you would with a 35mm or 50mm lens.
That can become inconvenient in small kitchens or crowded restaurants.
An 85mm lens is worth considering if you enjoy tightly framed food photographs, but it isn’t usually the most versatile first purchase.
90mm–105mm Macro Lenses: Best for Food Details
If you enjoy photographing intricate textures, a dedicated macro lens can open up new creative possibilities.
Many 90mm–105mm macro lenses provide true 1:1 magnification, allowing tiny subjects to be reproduced at life size on the camera sensor.
This makes them especially useful for capturing flaky pastry layers, sugar crystals, fresh herbs, and small garnishes.
Longer macro lenses also generally provide more working distance than shorter macro lenses at comparable magnification, leaving additional room for lighting and reflectors.
However, their narrow field of view makes large overhead compositions more difficult.
For experienced food photographers, pairing a 90mm or 100mm macro with a versatile 35mm or 50mm lens can cover a wide range of shooting situations.
Full-Frame vs. APS-C: Why Sensor Size Matters
Before purchasing a lens, remember that the same focal length provides a different field of view depending on your camera’s sensor size.
Most Nikon, Sony, and Fujifilm APS-C cameras use a crop factor of approximately 1.5×, while Canon APS-C cameras generally use 1.6×.
| Lens | Full Frame | 1.5× APS-C | Canon 1.6× APS-C |
|---|---|---|---|
| 24mm | 24mm | 36mm | 38.4mm |
| 35mm | 35mm | 52.5mm | 56mm |
| 50mm | 50mm | 75mm | 80mm |
| 100mm | 100mm | 150mm | 160mm |
These numbers describe the equivalent field of view. The actual focal length of the lens doesn’t change.
For example, a 50mm lens on a Canon APS-C camera provides a field of view similar to an 80mm lens on full frame.
That’s useful for tighter compositions but may feel restrictive when photographing overhead.
If you’re using an APS-C camera, a 23mm, 24mm, 30mm, or 35mm lens may be a more practical starting point, depending on how widely you want to frame your recipes.
Which Focal Length Should You Choose?
For most beginners, I’d recommend starting with a lens that provides a full-frame-equivalent field of view around 35mm–50mm.
That range works well for plated meals, overhead photographs, ingredients, and everyday food blogging.
Choose a wider lens if you frequently photograph large table arrangements, or consider a dedicated macro lens if close-up textures are your priority.
There’s no need to purchase several focal lengths immediately. Start with one that suits your usual photography setup, learn its strengths, and add specialized lenses when you genuinely need them.
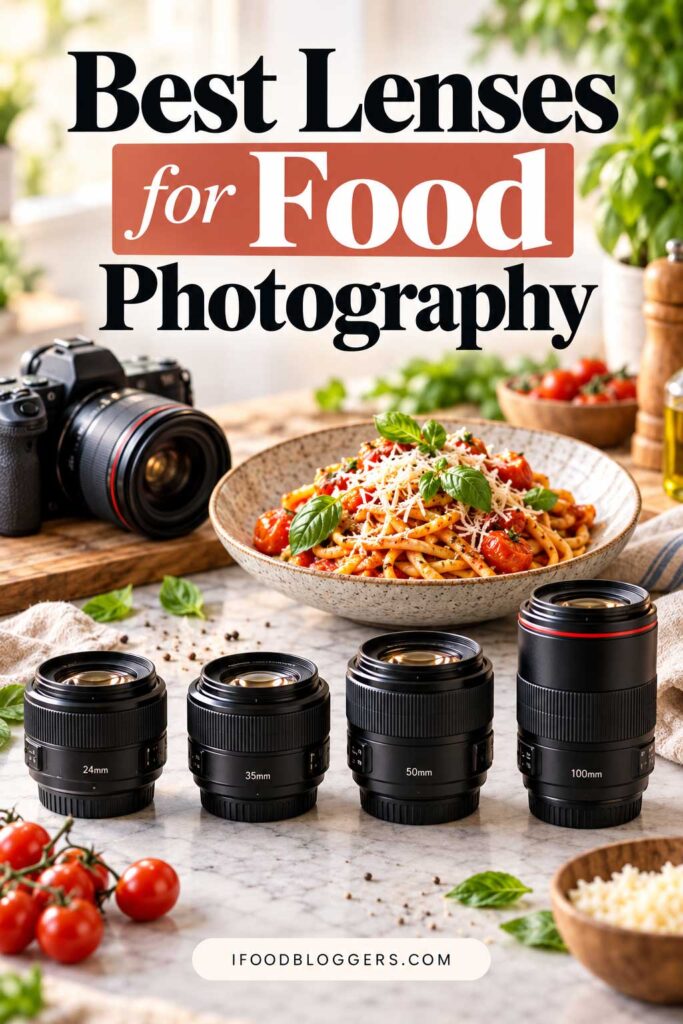
Best Lenses for Food Photography in 2026: Our Top Picks
The best lens for food photography depends on your camera, budget, and the types of images you create.
A compact 35mm prime may be perfect for overhead recipe photographs, while a 100mm macro lens is better suited to capturing fine details in pastries, desserts, and ingredients.
We’ve selected ten lenses from Canon, Nikon, Sony, Fujifilm, and Sigma, ranging from affordable everyday options to professional macro equipment.
These recommendations are based on manufacturer specifications and their suitability for different food photography needs, rather than independent hands-on testing.
Best Food Photography Lenses at a Glance
| Lens | Camera System | Best For |
|---|---|---|
| Canon RF 35mm f/1.8 Macro IS STM | Canon RF | Best versatile Canon lens |
| Canon RF 50mm f/1.8 STM | Canon RF | Best budget Canon lens |
| Sony FE 90mm f/2.8 Macro G OSS | Sony E | Best Sony lens for close-ups |
| Sony FE 100mm f/2.8 Macro GM OSS | Sony E | Best premium Sony macro |
| Nikon NIKKOR Z 40mm f/2 | Nikon Z | Best affordable Nikon lens |
| Nikon NIKKOR Z DX MC 35mm f/1.7 | Nikon Z DX | Best Nikon APS-C lens |
| Nikon NIKKOR Z MC 105mm f/2.8 VR S | Nikon Z | Best professional Nikon macro |
| Fujifilm XF 30mm f/2.8 Macro | Fujifilm X | Best Fujifilm all-around macro |
| Sigma 18–50mm f/2.8 DC DN | Selected APS-C mounts | Best versatile zoom |
| Canon RF 100mm f/2.8 L Macro IS USM | Canon RF | Best professional Canon macro |
Always confirm that a lens is compatible with your camera’s mount and sensor format before purchasing.
1. Canon RF 35mm f/1.8 Macro IS STM – Best Versatile Lens for Canon Food Bloggers
The Canon RF 35mm f/1.8 Macro IS STM is an excellent choice for food bloggers who want one lens for everyday recipes, overhead photographs, and occasional close-ups.
Its 35mm focal length provides a moderately wide field of view, making it convenient for photographing food in smaller kitchens.
The f/1.8 maximum aperture allows you to create attractive background blur, while the 0.5× magnification lets you capture details such as cake decorations, herbs, and fresh berries without switching to a dedicated macro lens.
According to Canon’s official specifications, the lens also includes optical image stabilization and focuses as close as 0.17 meters.
Its main limitation is that photographers who prefer tightly framed food portraits may find 35mm a little wide. On Canon APS-C cameras, it provides an approximately 56mm-equivalent field of view.
Key specs: 35mm | f/1.8 | 0.5× magnification | Optical stabilization
Best for: Canon photographers who want a versatile lens for flat lays, plated meals, and ingredient details.
2. Canon RF 50mm f/1.8 STM – Best Budget Lens for Canon Beginners
If you’re starting food photography on a budget, the Canon RF 50mm f/1.8 STM is worth considering.
This compact prime lens works particularly well for individual dishes, desserts, drinks, and photographs taken from a 45-degree angle.
Its wide f/1.8 aperture makes it easier to create softly blurred backgrounds, while the 0.25× maximum magnification provides some flexibility for close-ups.
The biggest attraction is its affordability compared with professional Canon lenses.
There are compromises, though. The lens lacks built-in optical stabilization, and its 50mm focal length can feel restrictive for overhead photography on Canon APS-C cameras.
Still, for everyday food blogging, it offers plenty of creative potential without a large investment.
Key specs: 50mm | f/1.8 | 0.25× magnification | No optical stabilization
Best for: Beginner Canon photographers who primarily photograph plated dishes, desserts, and everyday recipes.
3. Sony FE 90mm f/2.8 Macro G OSS – Best Sony Lens for Detailed Food Photography
The Sony FE 90mm f/2.8 Macro G OSS is designed for photographers who enjoy capturing intricate food details.
The lens provides true 1:1 magnification, a minimum focusing distance of 0.28 meters, and built-in Optical SteadyShot stabilization, as confirmed by Sony’s official specifications.
That makes it particularly useful for photographing flaky pastry layers, chocolate textures, tiny garnishes, and droplets of water on fresh fruit.
The 90mm focal length also provides more working distance than shorter macro lenses at comparable magnification, leaving additional room for lighting and reflectors.
Sony’s built-in Optical SteadyShot stabilization is another useful feature when photographing handheld.
The trade-off is its narrow field of view. You’ll need considerably more space for overhead photographs or larger tabletop arrangements.
Key specs: 90mm | f/2.8 | 1:1 macro | Optical SteadyShot
Best for: Sony photographers specializing in close-ups, desserts, ingredient textures, and commercial food imagery.
4. Sony FE 100mm f/2.8 Macro GM OSS – Best Premium Sony Macro Lens
Introduced in 2025, the Sony FE 100mm f/2.8 Macro GM OSS is a premium option for photographers who want advanced close-up capabilities.
Its standout feature is 1.4× magnification, allowing photographers to capture subjects at greater than life size.
This makes it possible to reveal extremely small food details, such as individual sugar crystals, fine chocolate decorations, or the intricate surface of a raspberry.
The lens also combines Sony’s G Master optical design with built-in stabilization and advanced focusing controls.
However, those specialized capabilities come at a premium price.
For everyday recipe photography, a less expensive standard prime or macro lens may offer better value.
Key specs: 100mm | f/2.8 | 1.4× magnification | Optical stabilization
Best for: Professional Sony photographers creating highly detailed commercial food photographs and specialized macro images.
5. Nikon NIKKOR Z 40mm f/2 – Best Affordable Nikon Food Photography Lens
The Nikon NIKKOR Z 40mm f/2 is a practical option for food bloggers who want something affordable, compact, and easy to use.
Its 40mm focal length sits comfortably between 35mm and 50mm, making it suitable for plated meals, modest overhead arrangements, and everyday recipe photography on full-frame Nikon Z cameras.
The f/2 maximum aperture provides flexibility when photographing beside a window, while the lightweight design makes it convenient for both home and restaurant photography.
Its biggest limitation is close-focusing performance.
With a maximum magnification of approximately 0.17×, it isn’t designed for detailed macro photography.
On Nikon DX cameras, the field of view is approximately equivalent to 60mm on full frame.
Key specs: 40mm | f/2 | 0.17× magnification | Nikon Z mount
Best for: Nikon photographers looking for a lightweight, affordable lens for regular food blogging.
6. Nikon NIKKOR Z DX MC 35mm f/1.7 – Best Nikon APS-C Lens for Food Photography
The Nikon NIKKOR Z DX MC 35mm f/1.7 is an interesting choice for food bloggers using Nikon APS-C mirrorless cameras.
Released in 2025, it combines a standard focal length with impressive close-focusing capabilities.
On a Nikon DX camera, its 35mm focal length provides an approximately 52.5mm-equivalent field of view, making it useful for individual dishes, desserts, and everyday recipes.
The lens offers 0.67× actual magnification.”
According to Nikon’s official specifications, this lens offers 0.67× actual magnification and focuses as close as 0.16 meters. That gives Nikon DX photographers useful close-up capabilities without requiring a separate professional macro lens.
Its f/1.7 maximum aperture also provides flexibility for general photography, although the widest available aperture becomes smaller at very close focusing distances.
The main drawback is its short working distance when photographing at high magnification, which can make positioning lights more difficult.
Key specs: 35mm | f/1.7 | 0.67× magnification | Nikon Z DX
Best for: Nikon APS-C users who want one compact lens for everyday food photography and close-ups.
7. Nikon NIKKOR Z MC 105mm f/2.8 VR S – Best Professional Nikon Macro Lens
The Nikon NIKKOR Z MC 105mm f/2.8 VR S is designed for photographers who prioritize detailed close-up image quality.
The lens provides true 1:1 macro magnification and built-in vibration reduction, making it especially useful for detailed food close-ups. Nikon’s official specifications confirm its 105mm focal length, f/2.8 maximum aperture, and full-frame Nikon Z compatibility.
The lens features Nikon’s premium S-Line optical construction and built-in vibration reduction.
It’s well suited to professional cookbook photography, commercial food imagery, and detailed photographs of baked goods and ingredients.
However, its relatively large size, price, and narrow field of view make it less convenient as an everyday lens for small kitchens.
Key specs: 105mm | f/2.8 | 1:1 macro | Vibration reduction
Best for: Nikon photographers who regularly create professional food close-ups and commercial images.
8. Fujifilm XF 30mm f/2.8 R LM WR Macro – Best Fujifilm Lens for Food Photography
The Fujifilm XF 30mm f/2.8 R LM WR Macro offers an appealing combination of everyday versatility and dedicated macro capabilities.
Designed for Fujifilm X-series APS-C cameras, its 30mm focal length provides an approximately 46mm-equivalent field of view.
That’s useful for plated meals, tabletop arrangements, and everyday recipes.
According to Fujifilm’s official specifications, this lens offers true 1:1 macro magnification and a minimum focusing distance of 10 centimeters, measured from the camera’s sensor plane.
Its compact, weather-resistant construction is another advantage.
The main limitation is the short working distance required for maximum magnification. Photographing tiny subjects may require careful lighting to avoid unwanted shadows.
Key specs: 30mm | f/2.8 | 1:1 macro | Weather-resistant construction
Best for: Fujifilm food bloggers who want one lens for everyday recipes and detailed ingredient photographs.
9. Sigma 18–50mm f/2.8 DC DN Contemporary – Best Zoom Lens for APS-C Food Bloggers
If you prefer the convenience of a zoom lens, the Sigma 18–50mm f/2.8 DC DN Contemporary is an excellent option for compatible APS-C cameras.
Its focal length range covers approximately 27–75mm in full-frame terms on a 1.5× crop-sensor camera.
At the wider end, you can photograph overhead arrangements and cooking steps. Zooming toward 50mm allows tighter compositions of individual dishes and desserts.
The constant f/2.8 maximum aperture provides flexibility throughout the zoom range. Sigma’s official specifications also confirm close focusing at 12.1 centimeters at the wide end and versions for Sony E, Fujifilm X, Canon RF, and L-Mount cameras.
It also offers useful close-focusing capabilities, reaching approximately 1:2.8 magnification at 18mm.
The main trade-off is that it doesn’t provide the wider maximum aperture of a fast prime or the magnification of a dedicated macro lens.
Sigma offers this APS-C zoom in Sony E, Fujifilm X, Canon RF, and L-Mount versions. Confirm the exact version before ordering.
Key specs: 18–50mm | Constant f/2.8 | APS-C | Approximately 1:2.8 maximum magnification
Best for: Food bloggers who need one flexible lens for recipes, overhead photography, and cooking videos.
10. Canon RF 100mm f/2.8 L Macro IS USM – Best Professional Canon Food Photography Lens
The Canon RF 100mm f/2.8 L Macro IS USM is a specialized lens for detailed food and commercial photography.
Its maximum magnification of 1.4×.”
According to Canon’s official specifications, this professional macro lens offers up to 1.4× magnification, allowing photographers to capture tiny food details at greater than life size.
This makes it useful for photographing delicate pastry decorations, tiny garnishes, and intricate ingredient textures.
The 100mm focal length provides additional working distance compared with shorter macro lenses, while optical image stabilization helps reduce handheld camera shake.
One distinctive feature is Canon’s spherical aberration control ring, which allows photographers to adjust the appearance of foreground and background blur.
However, its size, price, and relatively narrow field of view make it better suited to specialized work than everyday recipe photography.
Key specs: 100mm | f/2.8 | 1.4× magnification | Optical stabilization
Best for: Professional Canon photographers specializing in detailed food images, commercial projects, and advanced macro photography.
Which Food Photography Lens Is the Best Overall?
If you’re buying your first food photography lens, prioritize versatility and compatibility rather than professional features you may rarely use.
For Canon full-frame photographers, the RF 35mm f/1.8 Macro IS STM offers a strong balance of everyday usability and close-focusing capabilities.
The Nikon Z 40mm f/2 and Canon RF 50mm f/1.8 STM are affordable alternatives for beginners, while Fujifilm photographers may appreciate the flexibility of the XF 30mm f/2.8 Macro.
If you frequently switch between different camera angles, the Sigma 18–50mm f/2.8 offers the convenience of a zoom.
For dedicated close-up photography, the Sony FE 90mm f/2.8 Macro G OSS, Nikon Z MC 105mm f/2.8 VR S, and Canon RF 100mm f/2.8 L Macro IS USM provide specialized capabilities.
Ultimately, choose a lens that matches your camera and the photographs you create most often. Good lighting, thoughtful composition, and consistent technique will still matter more than owning the most expensive equipment.
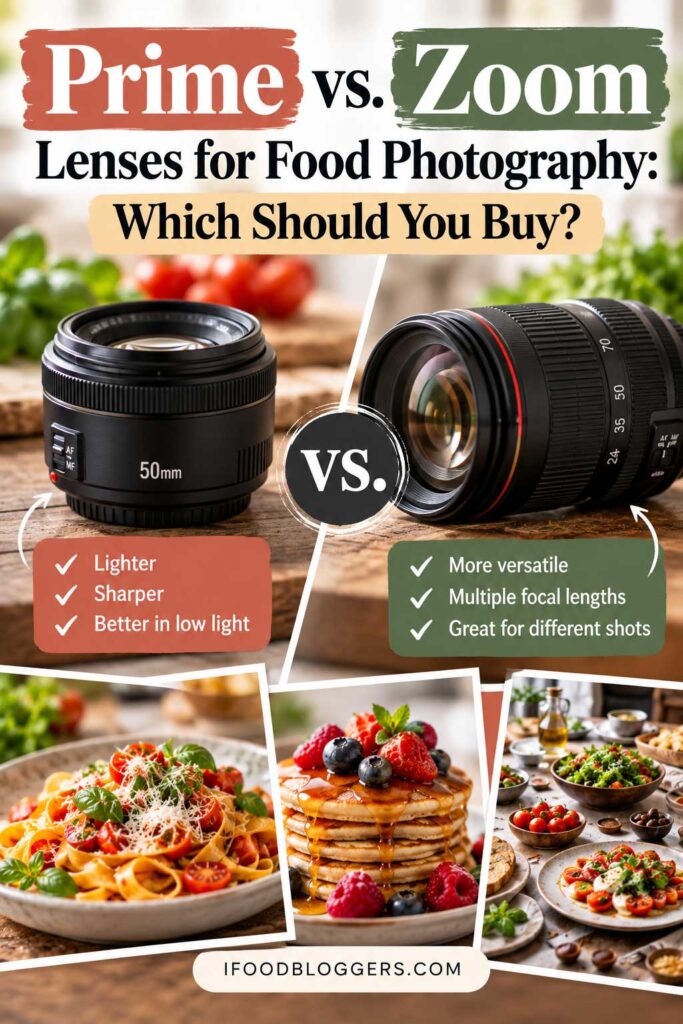
Prime vs. Zoom Lenses for Food Photography: Which Should You Buy?
When choosing a food photography lens, one of the first decisions is whether to buy a prime or zoom lens.
A prime lens has a fixed focal length, such as 35mm or 50mm. A zoom lens allows you to change focal lengths without switching equipment.
Both can produce excellent food photographs. The better choice depends on your shooting space, photography style, and how frequently you change compositions.
Why Choose a Prime Lens for Food Photography?
Prime lenses are popular among food photographers because many offer wide maximum apertures, excellent image quality, and compact designs at reasonable prices.
An affordable 50mm f/1.8, for example, can create attractive background blur when photographing desserts, drinks, or individual dishes.
The wider aperture also provides flexibility when working with natural window light or photographing food in dimly lit restaurants.
However, a wide aperture isn’t always necessary. For overhead arrangements and complete dishes, you may prefer f/4 to f/8 to keep more of the food in focus.
The biggest limitation is the fixed focal length. If you need a wider composition, you’ll have to move your camera or change lenses.
That can be inconvenient when working in a small kitchen or using an overhead tripod.
Best for: Food bloggers who prefer consistent compositions, lightweight equipment, and creative control over background blur.
When Is a Zoom Lens Better for Food Photography?
A zoom lens is particularly useful when photographing an entire recipe from start to finish.
You might begin with a wide shot of the ingredients, photograph the preparation process, and finish with a tighter composition of the completed dish.
With a zoom lens, you can adjust your framing without changing equipment.
This flexibility is especially convenient for overhead photography, cooking tutorials, restaurant content, and food videos.
A standard zoom, such as the Sigma 18–50mm f/2.8 for compatible APS-C cameras, can handle many everyday food photography situations.
Some affordable zooms have smaller maximum apertures than prime lenses, particularly at longer focal lengths. However, modern constant-aperture zooms offer impressive image quality and flexibility.
Best for: Food bloggers who frequently switch between wide arrangements, cooking steps, and close-up compositions.
Prime vs. Zoom Lenses: Food Photography Comparison
| Feature | Prime Lens | Zoom Lens |
|---|---|---|
| Focal Length | Fixed | Adjustable |
| Maximum Aperture | Often wider | Depends on the model |
| Background Blur | Excellent with fast primes | Excellent with suitable settings |
| Image Quality | Often excellent for the price | Modern zooms can be equally sharp |
| Overhead Photography | May require repositioning | Easier framing adjustments |
| Portability | Many are compact and lightweight | Varies by model |
| Best For | Individual dishes and consistent compositions | Recipes, tutorials, and varied compositions |
Neither lens type guarantees better photographs. Lighting, composition, focusing technique, and food styling remain just as important.
Should Beginners Buy a Prime or Zoom Lens First?
If you already own a kit zoom, start by using it.
Photograph several recipes and pay attention to which focal lengths you prefer. You might discover that your existing lens handles most situations perfectly well.
If you want better low-light flexibility or softer backgrounds, an affordable prime lens could be a worthwhile upgrade.
For full-frame cameras, a 35mm or 50mm prime is a practical starting point. APS-C photographers may prefer a 23mm, 30mm, or 35mm lens, depending on their preferred framing.
If you regularly photograph cooking instructions, overhead arrangements, and videos, a standard zoom may be more convenient.
You can also combine both lens types as your photography develops. A versatile zoom can handle everyday recipes, while a dedicated macro lens can capture detailed ingredient textures.
There’s no need to build a large lens collection immediately.
Start with the equipment that fits your everyday photography workflow, and add specialized lenses when you have a clear reason to use them.
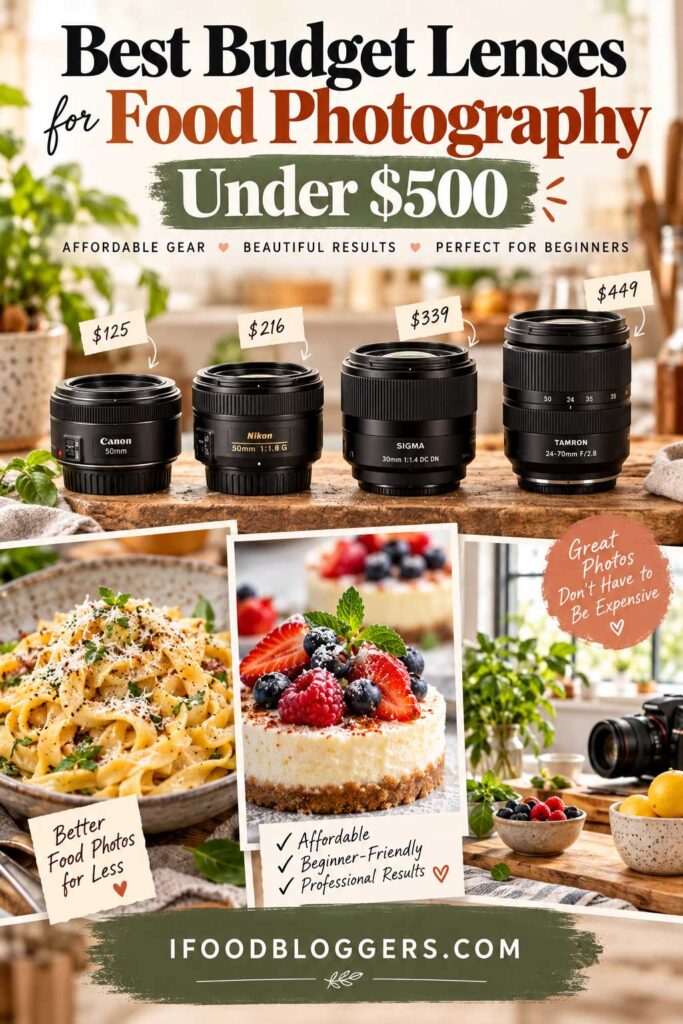
Best Budget Lenses for Food Photography Under $500
You don’t need an expensive professional lens to take attractive food photographs. Several affordable prime and macro lenses offer excellent capabilities for everyday recipe photography.
For beginners, spending $200–$500 on a suitable lens can be a smart investment, especially if you’re upgrading from a basic kit zoom.
The important thing is choosing a lens that works with your camera and the type of food photography you enjoy. A bright 50mm prime might be perfect for desserts, while a wider lens could make overhead photography much easier.
Best Affordable Food Photography Lenses Compared
These eight lenses are worth comparing if you’re shopping on a limited budget.
| Lens | Camera System | Best For |
|---|---|---|
| Canon RF 50mm f/1.8 STM | Canon RF | Affordable everyday photography |
| Nikon Z 40mm f/2 | Nikon Z | Versatile recipe photography |
| Sony FE 50mm f/1.8 | Sony E | Budget full-frame photography |
| Fujifilm XC 35mm f/2 | Fujifilm X | Beginner Fujifilm photographers |
| Sigma 30mm f/1.4 DC DN | Selected APS-C mounts | Low-light food photography |
| Nikon Z DX 24mm f/1.7 | Nikon Z DX | Overhead food photography |
| Nikon Z DX MC 35mm f/1.7 | Nikon Z DX | Everyday food and close-ups |
| Sony E 30mm f/3.5 Macro | Sony E APS-C | Affordable true macro photography |
These models are generally positioned as budget-friendly options, but retail prices change. Confirm current pricing, availability, and compatibility before purchasing, particularly if you’re working with a strict $500 limit.
We’ve already covered the Canon RF 50mm f/1.8, Nikon Z 40mm f/2, and Nikon Z DX MC 35mm f/1.7 in our main recommendations. The following alternatives are also worth considering.
Sony FE 50mm f/1.8 – Best Budget Sony Full-Frame Lens
The Sony FE 50mm f/1.8 is an affordable option for photographers using Sony full-frame mirrorless cameras.
Its 50mm focal length works well for individual dishes, drinks, and desserts, while the f/1.8 maximum aperture allows you to create attractive background blur.
The main compromise is autofocus performance. It’s slower and more audible than some newer Sony lenses, which may be noticeable when recording videos.
For stationary recipe photographs, however, this is often less of a concern.
On Sony APS-C cameras, the lens provides an approximately 75mm-equivalent field of view, making it better suited to tighter compositions than large overhead arrangements.
Best for: Sony full-frame beginners who want an affordable lens for plated meals and desserts.
Fujifilm XC 35mm f/2 – Best Affordable Fujifilm Lens
The Fujifilm XC 35mm f/2 is a compact, lightweight prime lens that provides an approximately 53mm-equivalent field of view on Fujifilm X-series cameras.
It’s well suited to everyday food photography, including plated meals, cakes, and beverages.
The f/2 maximum aperture provides useful flexibility for natural-light photography, while its simple design helps keep the price relatively accessible.
Compared with premium Fujifilm lenses, it has more basic exterior construction, no dedicated aperture ring, and no weather-resistant sealing.
It also lacks specialized macro capabilities.
For food bloggers who mostly photograph recipes indoors, these compromises may be perfectly reasonable.
Best for: Beginner Fujifilm photographers looking for an affordable everyday prime lens.
Sigma 30mm f/1.4 DC DN Contemporary – Best for Low-Light Food Photography
The Sigma 30mm f/1.4 DC DN Contemporary is particularly appealing for APS-C photographers who frequently work with natural light or photograph food inside restaurants.
Its wide f/1.4 maximum aperture allows more light into the camera and provides excellent flexibility for creating softly blurred backgrounds.
On most APS-C cameras, the 30mm focal length offers a field of view similar to a 45mm lens on full frame.
That makes it useful for everyday plated dishes without feeling excessively narrow.
However, photographing at f/1.4 produces a shallow depth of field. For complete dishes, stopping down to f/2.8 or f/4 may give you better results.
Sigma offers this lens in several camera mounts, so confirm that you’re buying the correct version.
Best for: APS-C photographers who enjoy restaurant photography, natural light, and soft background blur.
Nikon Z DX 24mm f/1.7 – Best Budget Lens for Overhead Photography
If you primarily photograph recipes from above, the Nikon Z DX 24mm f/1.7 deserves consideration.
Designed for Nikon DX mirrorless cameras, it provides an approximately 36mm-equivalent field of view.
That makes it convenient for photographing complete dishes surrounded by ingredients, utensils, and styling props without positioning the camera excessively high.
The f/1.7 maximum aperture also offers flexibility for everyday food photographs and low-light situations.
Its main limitation is perspective at close distances. When shooting from an angle, getting too close can make nearby ingredients appear disproportionately large.
Best for: Nikon DX food bloggers who regularly create flat lays, overhead recipes, and wider tabletop arrangements.
Sony E 30mm f/3.5 Macro – Best Affordable True Macro Lens
The Sony E 30mm f/3.5 Macro is an interesting choice for Sony APS-C photographers who want to explore detailed close-up photography.
Unlike many affordable standard primes, it offers true 1:1 macro magnification.
This makes it useful for photographing small garnishes, fresh berries, pastry textures, and other intricate food details.
Its 30mm focal length provides an approximately 45mm-equivalent field of view, allowing it to handle everyday food photographs as well.
However, the short working distance at maximum magnification can make lighting difficult. You may need to position the lens extremely close to the subject, potentially casting unwanted shadows.
The f/3.5 maximum aperture also offers less low-light flexibility than faster prime lenses.
Best for: Sony APS-C photographers who want genuine macro capabilities without investing in a premium 90mm or 100mm macro lens.
Should You Spend the Full $500 on a Food Photography Lens?
Not necessarily.
If you’re just starting, an affordable prime lens may provide everything you need for recipe photography.
Instead of spending your entire budget on a lens, consider setting aside money for a sturdy tripod, a reflector, or reusable food photography backgrounds.
If you’re still planning your first food blog, choosing the right website platform matters just as much as your equipment budget. Compare the best blogging platforms for food bloggers before getting started.
These accessories can make a noticeable difference in the consistency of your photographs.
Buying used equipment is another option. A well-maintained lens can remain useful for years, and reputable camera retailers often sell inspected used equipment with return policies.
Before purchasing used gear, check the lens elements, autofocus performance, electronic connections, and compatibility with your camera.
For most beginners, I’d prioritize a versatile everyday lens over specialized equipment.
Choose a fast prime if you frequently photograph in low light, a wider lens for overhead arrangements, or a macro lens when detailed close-ups are your main priority.
You don’t need to spend the full $500 to improve your food photography. Choose a lens that solves a real limitation in your current setup, and invest the rest in developing your lighting and composition skills.
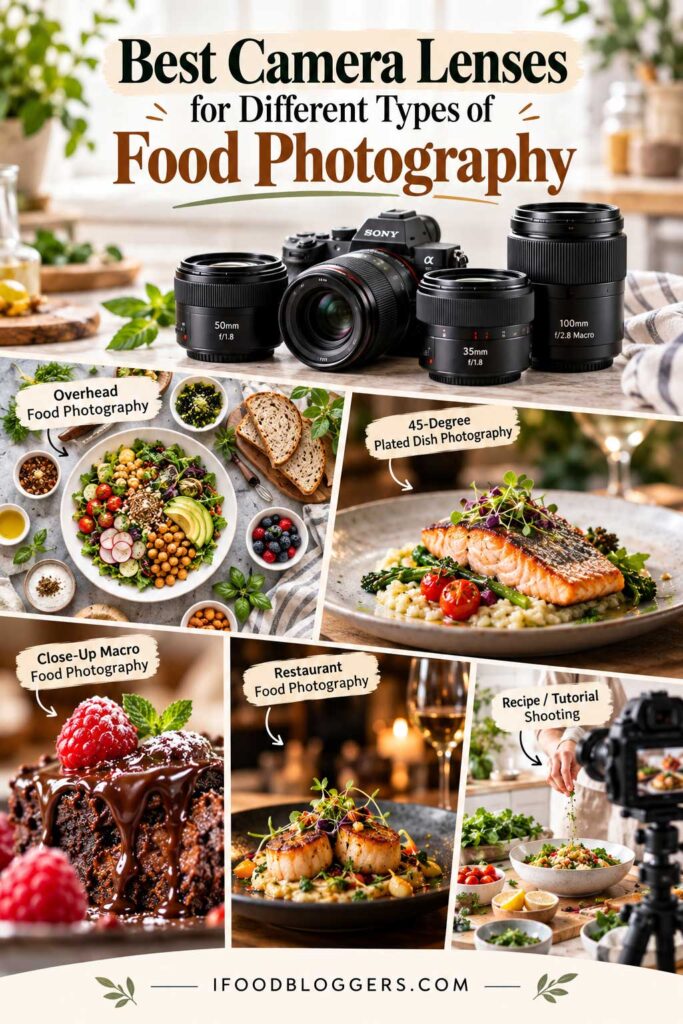
Best Camera Lenses for Different Types of Food Photography
Different food photography styles benefit from different lenses.
An overhead photograph of a family dinner requires a wider field of view than a close-up image of chocolate frosting. Restaurant photography introduces low-light challenges, while cooking tutorials require flexibility as you move between preparation steps and finished dishes.
The good news is that you don’t need a separate lens for every situation. Understanding which focal lengths work best for your preferred compositions will help you get more from the equipment you already own.
Best Lenses for Overhead Food Photography
Overhead photography, also known as flat lay photography, is especially popular for recipes featuring salads, smoothie bowls, pizzas, and ingredient arrangements.
For full-frame cameras, a 35mm lens is a practical choice because it captures a relatively wide scene without requiring excessive distance between the camera and the table.
APS-C photographers can achieve a similar field of view with a 23mm or 24mm lens.
A standard zoom also works well, particularly when your camera is mounted on an overhead tripod and you want to adjust the framing without changing its position.
Recommended lenses: Canon RF 35mm f/1.8 Macro IS STM, Nikon Z DX 24mm f/1.7, and Sigma 18–50mm f/2.8 DC DN Contemporary.
For most overhead photographs, start around f/5.6 or f/8 to keep the main dish and surrounding ingredients reasonably sharp.
Leave a little extra space around your composition if you plan to create landscape blog images or vertical Pinterest graphics from the same photograph.
Best Lenses for 45-Degree Food Photography
Photographing food from approximately 45 degrees reveals both the top and sides of a dish.
It’s particularly effective for pasta, cakes, sandwiches, salads, and plated restaurant meals where height and texture are important.
A 50mm lens on a full-frame camera provides a comfortable field of view for these compositions. An 85mm lens can also work beautifully when you want tighter framing and softer backgrounds, although it requires more shooting distance.
Recommended lenses: Canon RF 50mm f/1.8 STM, Nikon Z 40mm f/2, and Sony FE 50mm f/1.8.
Experiment with apertures between f/2.8 and f/5.6. Wider apertures can emphasize a particular ingredient, while narrower settings help keep more of the dish in focus.
For recipe photographs, make sure readers can clearly see the food rather than allowing too much of it to disappear into background blur.
Best Macro Lenses for Food Close-Ups
Macro lenses are particularly useful when you want to highlight intricate details such as flaky pastry layers, sugar crystals, tiny garnishes, or droplets of water on fruit.
Many dedicated macro lenses provide true 1:1 magnification, allowing small subjects to be reproduced at life size on the camera sensor.
For full-frame cameras, macro lenses around 90mm–105mm are especially useful because they generally provide more working distance than shorter macro lenses at similar magnification.
That additional space makes positioning lights and reflectors easier.
Recommended lenses: Sony FE 90mm f/2.8 Macro G OSS, Nikon Z MC 105mm f/2.8 VR S, and Canon RF 100mm f/2.8 L Macro IS USM.
At high magnification, depth of field becomes extremely shallow. Using a tripod and carefully adjusting focus can help you capture sharper details.
For stationary subjects requiring greater depth of field, focus stacking is another technique worth exploring.
Best Lenses for Restaurant Food Photography
Restaurant photography often means working with limited space, unpredictable lighting, and little time to arrange your subject.
A compact prime lens with a wide maximum aperture is usually a convenient choice.
On full-frame cameras, a 35mm lens lets you include some of the restaurant environment, while a 50mm lens provides tighter framing for individual dishes.
Lenses with maximum apertures around f/1.4–f/2 can also be helpful when photographing food in dim lighting.
Recommended lenses: Canon RF 35mm f/1.8 Macro IS STM, Nikon Z 40mm f/2, and Sony FE 35mm f/1.8.
Start around f/2 or f/2.8 when lighting is limited, but adjust the aperture if you need more of the dish in focus.
Remember that image stabilization reduces camera shake but won’t freeze moving hands or pouring liquids. Those situations still require an appropriate shutter speed.
Whenever possible, use available window light rather than harsh direct flash.
Best Lenses for Food Blogging and Recipe Tutorials
A complete recipe post often requires several types of photographs, including ingredients, preparation steps, cooking instructions, and the finished dish.
For this type of work, a standard zoom lens offers considerable flexibility.
An 18–50mm zoom on an APS-C camera or a 24–70mm zoom on full frame allows you to move between wider kitchen scenes and tighter food compositions without changing lenses.
Recommended lenses: Sigma 18–50mm f/2.8 DC DN Contemporary, Nikon Z 24–70mm f/4 S, and Canon RF 24–70mm f/2.8 L IS USM.
However, you don’t need an expensive professional zoom to photograph recipes successfully.
A basic kit lens can produce clear instructional images when paired with good lighting and a stable camera.
For step-by-step recipe photographs, prioritize consistent angles, natural colors, and enough depth of field to show readers exactly what’s happening.
Best Lenses for Food Photography Videos and Reels
Food bloggers creating Instagram Reels, Pinterest videos, or YouTube cooking tutorials should consider more than focal length alone.
Quiet autofocus, smooth focus transitions, and manageable lens weight can make video recording easier.
A standard zoom is convenient when switching between overhead cooking scenes and close-up preparation shots.
For fixed overhead setups, a wider prime lens may be all you need.
Recommended lenses: Sigma 18–50mm f/2.8 DC DN Contemporary, Sony FE 35mm f/1.8, and Nikon Z 24–70mm f/4 S.
For overhead cooking videos, a full-frame-equivalent focal length around 24mm–35mm provides room to include the ingredients and your hands.
If you’re filming vertical 9:16 videos, compose carefully so that important actions remain visible.
Also check whether your chosen lens produces noticeable focus breathing or autofocus noise, particularly when recording close-up cooking demonstrations.
Best Lenses for Professional Cookbook Photography
Cookbook photography requires consistent image quality, lighting, and composition across an entire collection of recipes.
A standard prime lens can handle most plated meals, while a dedicated macro lens adds variety through detailed photographs of ingredients, pastries, and garnishes.
For example, a rustic family cookbook may benefit from wider compositions showing serving dishes and table settings.
A pastry cookbook might rely more heavily on close-up images that emphasize delicate textures.
Recommended lenses: Canon RF 50mm f/1.8 STM, Sony FE 90mm f/2.8 Macro G OSS, and Nikon Z MC 105mm f/2.8 VR S.
Professional cookbook photography doesn’t necessarily require the most expensive equipment. Consistent lighting, thoughtful styling, and a recognizable visual approach are equally important.
Best Lenses for Pinterest and Social Media Food Photography
Food photography for Pinterest and Instagram often requires different crops from traditional blog photographs.
Pinterest graphics typically use a vertical format, while Instagram posts may use square or portrait compositions.
A versatile 35mm or 50mm-equivalent lens allows you to experiment with framing without changing equipment.
Recommended lenses: Canon RF 35mm f/1.8 Macro IS STM, Nikon Z 40mm f/2, and Sigma 18–50mm f/2.8 DC DN Contemporary.
When photographing recipes for multiple platforms, capture both landscape and portrait versions whenever possible.
Beautiful food photographs can also help attract new readers. Learn how to turn your recipe images into website visits with our guide on how to get more traffic to your food blog.
Leave some negative space around the dish if you plan to add text overlays to your Pinterest graphics.
A little planning during the photography session can save considerable editing time later.
Best Food Photography Lenses by Shooting Style
Here’s a quick comparison of which focal lengths work best for different food photography situations.
The recommendations below use full-frame-equivalent focal lengths for easier comparison.
| Photography Style | Recommended Focal Length | Best Lens Type |
|---|---|---|
| Overhead food photography | 24–50mm | Wide or standard prime/zoom |
| 45-degree food photography | 40–85mm | Standard or short telephoto |
| Detailed food close-ups | 90–105mm | Dedicated macro |
| Restaurant photography | 35–50mm | Fast prime |
| Recipe tutorials | 24–70mm | Standard zoom |
| Food videos and Reels | 24–50mm | Prime or standard zoom |
| Cookbook photography | 35–105mm | Prime and macro combination |
| Pinterest and social media | 35–50mm | Standard prime or zoom |
These ranges are starting points rather than strict rules.
A 50mm lens can work beautifully for overhead photography when you have enough space, while a 35mm lens with good close-focusing capabilities can capture impressive ingredient details.
For most food bloggers, one versatile prime or standard zoom can handle everyday recipes, cooking tutorials, and social media photographs.
A dedicated macro lens becomes worth considering when detailed close-ups are a regular part of your work.
Once you’ve created your photographs, the next challenge is helping readers discover your recipes. Our guide to the best SEO tools for food bloggers covers tools for monitoring search performance and finding opportunities to improve your content.
How to Choose the Best Lens for Food Photography: Complete Buying Guide
With so many camera lenses available, it’s easy to get distracted by specifications that may not matter for your photography.
A lens might offer an impressive f/1.4 aperture, professional optical construction, or advanced image stabilization. But none of those features automatically makes it the right choice for photographing recipes.
Before purchasing, focus on six factors that can make a meaningful difference to your food photography.
1. Check Camera Compatibility and Sensor Size
Before comparing image quality or price, make sure the lens works with your camera.
Modern mirrorless cameras use different lens mounts. Canon EOS R cameras use RF, Nikon mirrorless cameras use Z, Sony uses E, and Fujifilm X-series cameras use the X mount.
Third-party manufacturers such as Sigma offer lenses for several systems, but you must purchase the correct mount version.
Sensor size also matters.
Full-frame lenses can generally be used on compatible APS-C cameras, but the smaller sensor captures a narrower field of view. Conversely, using an APS-C lens on a compatible full-frame camera may require crop mode, reducing the usable image area.
If you’re considering older DSLR lenses, you may also need an adapter. Compatibility and autofocus functionality can vary depending on the lens and adapter combination.
Before buying: Confirm your camera model, lens mount, sensor coverage, and any required adapters.
2. Choose a Focal Length That Fits Your Shooting Space
We’ve already compared the most useful food photography focal lengths, but there’s one practical consideration worth emphasizing: the space where you photograph recipes.
A 35mm lens on a full-frame camera is convenient for overhead arrangements and wider food scenes. A 50mm lens works well for individual dishes, while longer focal lengths are useful for tighter compositions.
However, longer lenses generally require more shooting distance to fit the same subject into the frame.
If you photograph food on a small kitchen table, a 100mm lens may feel restrictive when you’re trying to capture an entire arrangement.
For beginners, a full-frame-equivalent field of view around 35mm–50mm is a sensible starting point.
If you already own a kit zoom, experiment with different focal lengths before purchasing another lens.
3. Understand Maximum Aperture and Depth of Field
A lens’s maximum aperture determines how much light it can gather when used wide open and influences the shallowest depth of field you can achieve.
Lenses with apertures such as f/1.4, f/1.8, or f/2 are particularly useful for low-light photography and creating softly blurred backgrounds.
However, food photography doesn’t always benefit from extremely shallow depth of field.
If you’re photographing an entire plate of food, using f/1.8 may leave important ingredients noticeably blurred.
For many everyday recipe photographs, apertures between f/4 and f/8 provide a useful balance between sharpness and background separation.
A lens with an f/2.8 maximum aperture may therefore be perfectly suitable, especially when you’re working with a tripod and consistent lighting.
Before buying: Consider whether you genuinely need a wide maximum aperture or simply want a lens that performs well at the settings you normally use.
4. Compare Close-Focusing Distance and Macro Magnification
Food photographers often want to capture small details, from fresh herbs and cake decorations to the texture of baked bread.
That’s why close-focusing performance deserves attention.
Minimum focusing distance tells you how close the camera can focus on a subject. It’s generally measured from the camera’s sensor plane rather than the front of the lens.
Working distance describes the space between the front of the lens and the subject. This becomes especially important when arranging lights for close-up photography.
Maximum magnification is another useful specification.
| Magnification | Food Photography Use |
|---|---|
| 0.2×–0.25× | Everyday dishes and moderate close-ups |
| 0.5× | Desserts, garnishes, and ingredient details |
| 1:1 | Detailed macro photography |
| 1.4× | Extreme close-ups of small subjects |
You don’t necessarily need true 1:1 macro magnification for a food blog.
A lens offering 0.25× or 0.5× may already capture the details you need.
If you frequently photograph very small ingredients, however, a dedicated macro lens may be worth considering.
5. Consider Sharpness and Image Stabilization
Sharpness matters when photographing food, particularly when you want to reveal delicate textures and fine details.
However, a premium lens won’t compensate for inaccurate focusing, camera movement, or poor lighting.
When comparing lenses, look at sample photographs taken at the apertures you’re likely to use.
For overhead arrangements, consistent sharpness across the frame can be valuable. For tightly framed desserts with soft backgrounds, edge sharpness may be less important.
Image stabilization is another feature worth considering.
Some lenses include optical stabilization, while certain camera bodies offer sensor-based stabilization.
Both can help reduce camera shake when photographing handheld, particularly in lower light.
However, stabilization cannot freeze moving subjects such as pouring sauces or falling ingredients.
If you primarily photograph stationary food with a tripod, stabilization may be less important than focal length, close-focusing ability, or overall image quality.
6. Balance Autofocus, Size, and Long-Term Value
A food photography lens should be comfortable to use in your normal working environment.
For traditional recipe photographs, extremely fast autofocus usually isn’t essential because most dishes remain stationary.
However, if you create cooking videos or social media Reels, quiet autofocus and smooth focusing transitions become more important.
Lens size and weight also deserve attention.
A heavy professional lens may be inconvenient when mounted on an overhead tripod, especially if you’re using a horizontal camera arm. Always make sure your support equipment can safely handle the weight.
Finally, consider how long you expect to use the lens.
A quality lens can remain useful through multiple camera upgrades, provided it stays compatible with your equipment.
If you expect to move from APS-C to full frame, purchasing a full-frame-compatible lens might offer greater flexibility. But if you’re happy with your APS-C system, there’s no reason to pay extra for features you don’t need.
The smartest investment is a lens that suits your current photography while leaving room for your skills to develop.
Food Photography Lens Buying Checklist
Before purchasing, use this quick comparison to identify which features matter most.
| Feature | What to Check | Priority |
|---|---|---|
| Camera compatibility | Lens mount and sensor format | Essential |
| Focal length | Field of view and working space | Essential |
| Maximum aperture | Low-light performance and background blur | High |
| Close-focusing ability | Minimum distance and magnification | High |
| Image quality | Sharpness and optical performance | High |
| Image stabilization | Handheld shooting requirements | Medium |
| Autofocus | Speed, noise, and video performance | Medium |
| Size and weight | Portability and tripod support | Medium |
| Price and upgrade potential | Budget and long-term compatibility | High |
These priorities can change depending on your photography style.
Someone photographing intricate pastry details may care most about magnification, while a restaurant photographer might prioritize a bright aperture and lightweight equipment.
If you’re just starting, focus on compatibility, a versatile focal length, and a price that leaves room in your budget for lighting and other essential accessories.
When possible, try different focal lengths using your existing zoom lens before making a decision.
The right food photography lens should make your workflow easier and help you capture the images you want—not introduce unnecessary complexity or expense.
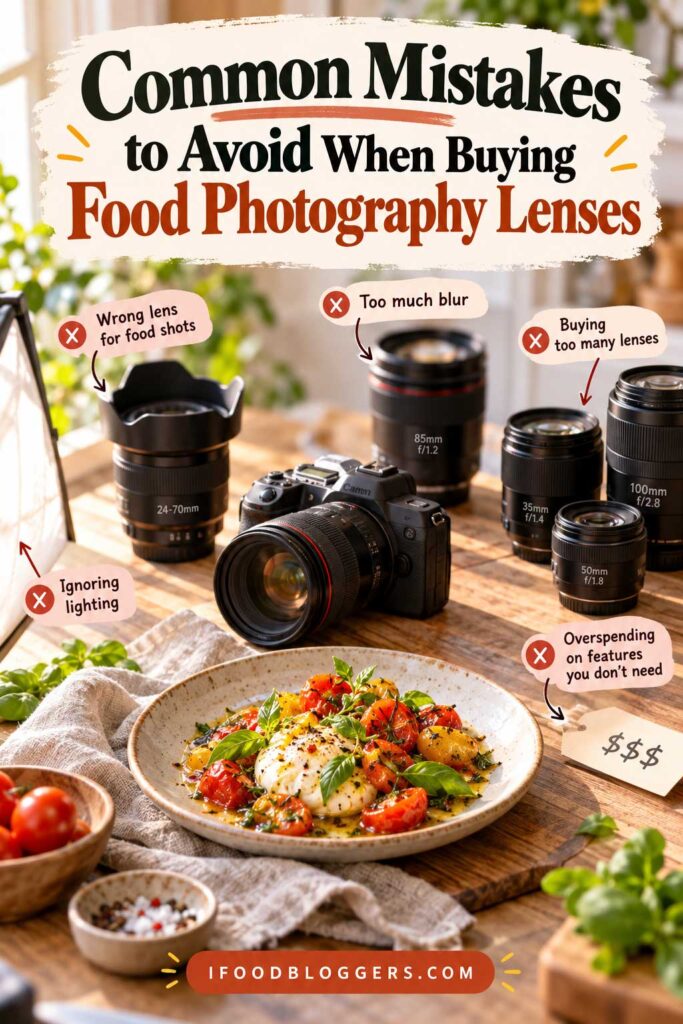
Common Mistakes to Avoid When Buying Food Photography Lenses
Buying a new camera lens can be exciting, but an expensive upgrade won’t necessarily improve your food photographs.
A lens might receive excellent reviews and produce impressive sample images, yet still be a poor fit for your camera or photography setup.
Before spending money, here are five mistakes worth avoiding.
1. Buying an Expensive Lens Before You Actually Need It
Professional food photography doesn’t always require professional-priced equipment.
An affordable 35mm or 50mm prime lens can produce excellent recipe photographs when combined with good lighting, thoughtful composition, and accurate focusing.
Before investing in a premium lens, identify what your current equipment cannot accomplish.
If you struggle to capture small ingredient details, a macro lens might help. If your photographs look flat because of poor lighting, however, purchasing a sharper lens probably won’t solve the problem.
Buy equipment to address a specific limitation, not simply because a more expensive model exists.
2. Choosing the Wrong Lens for Your Camera or Shooting Space
A lens that’s perfect for one photographer may be inconvenient for another.
For example, a 50mm lens offers a versatile field of view on a full-frame camera, but on a Canon APS-C camera, it provides an approximately 80mm-equivalent field of view.
That narrower framing can make overhead photography difficult in a small kitchen.
Longer lenses also require more shooting distance when photographing an entire dish.
Camera compatibility is equally important. Always confirm the lens mount, sensor format, and any adapter requirements before purchasing.
If you already own a kit zoom, try different focal lengths to discover which ones work best in your photography space.
3. Assuming Wider Apertures and Macro Features Are Always Better
It’s easy to become impressed by specifications such as f/1.4 apertures and 1:1 macro magnification.
However, those features aren’t essential for every food photographer.
A very wide aperture can create beautiful background blur, but it can also leave important parts of a dish out of focus.
Similarly, a dedicated macro lens is excellent for photographing tiny garnishes and intricate textures, but it may be unnecessary for everyday recipe photographs.
Some lenses advertised as macro models also offer less than true 1:1 magnification.
Before buying, check the maximum aperture, magnification, and close-focusing capabilities rather than relying on product descriptions alone.
Choose features you’ll actually use.
4. Overlooking Lighting and Photography Technique
A better lens cannot compensate for every photography problem.
If your food looks flat, experiment with soft side lighting. If your photographs are blurry, check shutter speed, focus accuracy, and camera stability.
A simple reflector can help soften shadows, while a tripod makes it easier to produce consistent overhead photographs.
Even small changes in food styling and camera position can make a noticeable difference.
Before replacing your lens, spend some time improving how you use your existing equipment.
You may discover that better lighting and composition make a greater difference than another expensive purchase.
Your photographs also need to perform well on your website. Oversized image files and poor image optimization can affect page performance. Our guide to SEO mistakes food bloggers should avoid explains other common problems worth fixing.
5. Buying Too Many Lenses Before Mastering One
When researching food photography equipment, it’s tempting to buy a separate lens for overhead shots, desserts, ingredient details, and cooking videos.
But most beginners don’t need an extensive collection.
A versatile prime or standard zoom can handle many everyday recipe photographs.
Start by learning how your lens performs at different apertures, focusing distances, and camera angles.
As your photography develops, you’ll begin noticing specific limitations.
Perhaps you need greater magnification for pastry details or a wider field of view for large tablescapes.
Those are sensible reasons to consider another lens.
Until then, mastering one lens can be more valuable than constantly switching between several.
How to Avoid Wasting Money on Food Photography Equipment
Before purchasing a new lens, ask yourself what you want to improve.
If your current lens is too narrow for overhead shots, look for a wider focal length. If you want detailed ingredient photographs, compare macro capabilities. If you struggle in low light, consider a lens with a wider maximum aperture.
And if you’re happy with your equipment but disappointed with your photographs, focus on lighting, composition, and camera technique first.
Whenever possible, compare sample images, rent a lens, or buy from a retailer with a reasonable return policy.
The best lenses for food photography are the ones that help you create the images you need—not necessarily the most expensive models on the market.
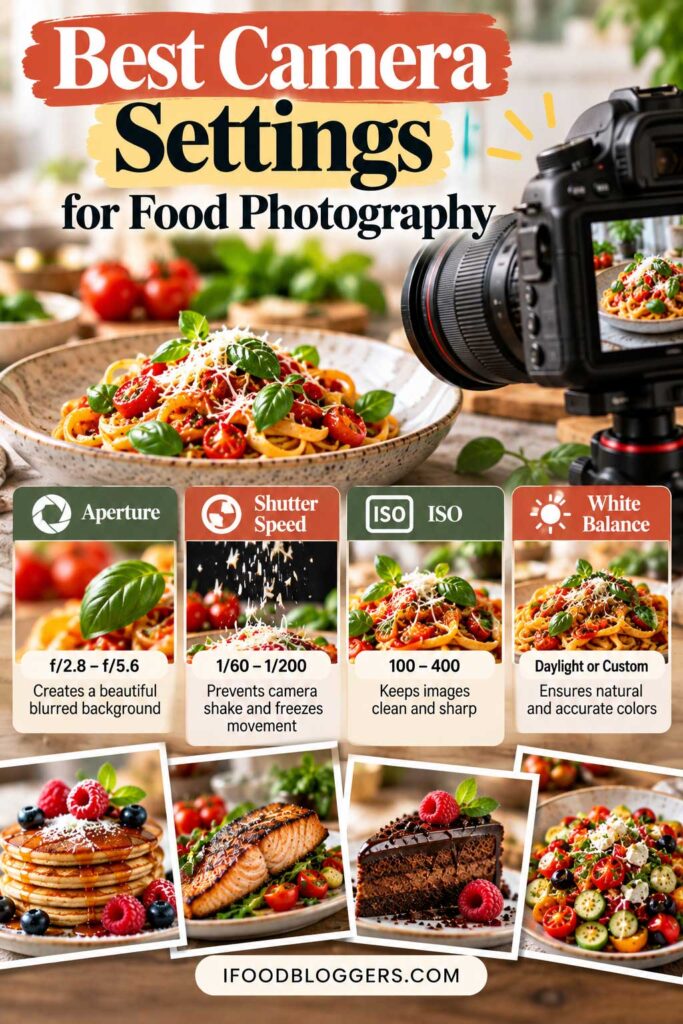
Best Camera Settings for Food Photography With Different Lenses
Even the best lenses for food photography won’t deliver great results if your camera settings don’t match the subject.
A 50mm f/1.8 lens can create beautiful background blur, but shooting an entire dish at f/1.8 might leave important ingredients out of focus. Similarly, a 100mm macro lens can capture incredible detail, but getting sharp close-ups requires careful focusing and camera stability.
Fortunately, food photography gives you plenty of time to experiment because most subjects remain stationary.
Understanding a few basic settings will help you get better results from almost any suitable lens.
Understanding Aperture, Shutter Speed, and ISO
Three camera settings work together to control exposure and how your food photographs look.
Aperture controls the amount of light passing through the lens and affects depth of field. A wide aperture, such as f/1.8, creates a shallower area of focus, while f/5.6 or f/8 generally keeps more of the dish sharp.
Shutter speed determines how long the camera collects light. Slower speeds can work well for stationary food photographed on a tripod, while faster speeds help freeze movement when you’re pouring sauces or sprinkling ingredients.
ISO adjusts the camera’s signal amplification and recorded image brightness. Higher settings are useful in low light but can introduce more visible noise.
For everyday food photography, these are useful starting points:
- f/2.8–f/5.6: Individual dishes and 45-degree photographs.
- f/5.6–f/8: Overhead arrangements and recipe instructions.
- f/8–f/11: Detailed macro photography when greater depth of field is needed.
- 1/125 second or faster: A reasonable starting point for handheld food photographs.
- 1/500 second or faster: Pouring sauces, falling ingredients, and other moving subjects.
Whenever possible, start near your camera’s base ISO and increase it when additional exposure flexibility is needed.
These settings aren’t strict rules. Your lighting, lens, camera sensor, and focusing distance will influence the final result.
Recommended Camera Settings for Different Food Photography Styles
Use this table as a quick reference when photographing different subjects.
| Photography Style | Aperture | Shutter Speed | ISO | Focus |
|---|---|---|---|---|
| Overhead photography | f/5.6–f/8 | 1/125 handheld; slower on tripod | 100–400 | Single-point AF |
| 45-degree food photography | f/2.8–f/5.6 | 1/125–1/250 | 100–800 | Single-point AF |
| Food close-ups | f/4–f/8 | 1/125–1/250 | 100–800 | Single-point AF or manual |
| Extreme macro | f/8–f/11 | 1/160–1/250 handheld; slower on tripod | 100–800 | Manual focus |
| Restaurant photography | f/1.8–f/2.8 | 1/125–1/250 | 800–3200 | Single-point AF |
| Food action shots | f/2.8–f/5.6 | 1/500–1/1000 | As needed | Continuous AF or prefocus |
| Cookbook photography | f/4–f/8 | Depends on lighting | Base ISO | Single-point AF or manual |
| Cooking videos at 30 fps | f/2.8–f/5.6 | Around 1/60 | As needed | Continuous video AF |
These are approximate starting settings, not guaranteed exposures. Adjust them to match your lighting and desired composition.
For overhead photographs, prioritize enough depth of field to keep the important ingredients sharp. A tripod makes it easier to use lower ISO settings and slower shutter speeds.
When photographing individual dishes at a 45-degree angle, experiment with wider apertures to create background separation without losing too much detail.
For restaurant photography, don’t be afraid to increase ISO if it helps maintain a shutter speed fast enough for sharp handheld photographs.
Camera Settings for Macro Food Photography
Macro photography requires particular attention to focus because depth of field becomes extremely shallow at high magnification.
Even at f/8, only a small portion of a strawberry, pastry, or garnish may appear sharp.
Using a tripod and manual focus can help you control exactly which details are captured.
Many mirrorless cameras also offer focus magnification, allowing you to inspect fine details before taking the photograph.
If you need more of a stationary subject in focus, try focus stacking.
This technique involves capturing several photographs at different focusing distances and combining them into one image with greater apparent depth of field.
Focus stacking is especially useful for detailed photographs of spices, baked goods, and small food decorations.
Camera Settings for Food Action Shots and Videos
Food photography becomes more challenging when your subject moves.
Pouring honey over pancakes, tossing vegetables, or sprinkling powdered sugar onto a dessert requires a faster shutter speed than photographing a stationary dish.
Start around 1/500 second for moderate movement and experiment with 1/1000 second or faster for quick splashes or falling ingredients.
Continuous shooting mode can help you capture the exact moment you want.
For repeatable actions, consider prefocusing on the area where the movement will occur.
Video requires a slightly different approach.
When recording cooking tutorials at 30 frames per second, a shutter speed around 1/60 second generally produces natural-looking motion blur.
For 60 fps recording, approximately 1/125 second is a common starting point.
Artificial lighting may require shutter-speed adjustments to prevent flicker or banding.
For overhead cooking videos, an aperture around f/4 or f/5.6 can help keep your hands and ingredients reasonably sharp.
Use continuous autofocus when subjects move toward and away from the camera, or manual focus when the working distance remains consistent.
Should You Shoot in Manual Mode or Aperture Priority?
Both exposure modes work well for food photography.
Aperture priority (A or Av) is convenient for beginners because you choose the aperture while the camera adjusts shutter speed.
It’s particularly useful when photographing beside a window where lighting changes throughout the day.
Just monitor the shutter speed to avoid camera shake.
Manual mode (M) provides greater control and consistency when lighting remains stable.
For example, if you’re photographing several recipes using the same studio lighting setup, manual exposure can help maintain a consistent appearance between images.
For beginners, I’d recommend learning aperture priority first and experimenting with manual mode as you become more comfortable.
Should Food Photographers Use RAW or JPEG?
If you regularly edit food photographs, shooting in RAW provides more flexibility when adjusting exposure, white balance, highlights, and shadows.
This is particularly helpful when photographing food under mixed lighting or near bright windows.
RAW files require processing and take up more storage space, but they’re useful for maintaining natural food colors and recovering detail when possible.
JPEG is still perfectly suitable for food photography when exposure and white balance are correct.
Many cameras also offer RAW+JPEG recording, allowing you to keep both versions.
For food bloggers who regularly edit photographs in Lightroom or similar software, RAW is generally worth considering.
Before uploading your photographs, remember to optimize them for your website. Use descriptive filenames, helpful alt text, and appropriately sized image files. Google’s Image SEO best practices explain how to make images easier for search engines to discover and understand.
How to Get Sharper Food Photographs With Any Lens
If your photographs aren’t as sharp as you’d like, check your technique before considering another lens.
Make sure you’re focusing on the most important part of the dish rather than a nearby plate, utensil, or background prop.
Use a shutter speed appropriate for your focal length and camera stability. A tripod can be particularly helpful for overhead photographs and close-ups.
Also pay attention to aperture.
Shooting an entire plate at f/1.4 may leave much of the food outside the area of acceptable sharpness. Stopping down to f/4 or f/5.6 often provides a more useful result.
Good lighting makes all of these adjustments easier.
Finally, inspect your images at a larger size to make sure the intended subject is actually in focus.
Food Photography Camera Settings Cheat Sheet
Here are practical example settings for common food photography subjects.
| Subject | Lens Type | Aperture | Shutter Speed | ISO |
|---|---|---|---|---|
| Bowl of pasta | 50mm prime | f/4 | 1/125 | 200 |
| Overhead salad | 35mm prime | f/8 | 1/125 | 400 |
| Chocolate cake | 50mm prime | f/2.8 | 1/160 | 200 |
| Fresh strawberries | Macro lens | f/8 | 1/200 | 400 |
| Restaurant dinner | 35mm prime | f/2 | 1/125 | 1600 |
| Pancakes with syrup | 50mm prime | f/4 | 1/500 | 800 |
| Baking ingredients | Standard zoom | f/5.6 | 1/125 | 400 |
| Detailed pastry texture | Macro lens | f/8 | Tripod-dependent | 100 |
These examples are illustrative starting points. Actual exposure settings depend on available light, camera equipment, and the effect you’re trying to achieve.
As you practice, you’ll become more comfortable adjusting aperture, shutter speed, and ISO to suit different recipes.
You might use f/2.8 for a softly blurred dessert photograph, then switch to f/8 for an overhead arrangement where more ingredients need to remain sharp.
The most important thing is understanding how your settings affect the image.
Once you can control exposure, focus, and depth of field confidently, you’ll be able to capture better food photographs without constantly upgrading your equipment.
Do You Really Need a Macro Lens for Food Photography?
Macro lenses appear frequently in recommendations for the best lenses for food photography, particularly when photographers want to capture detailed images of pastries, desserts, and fresh ingredients.
But do you actually need one for your food blog?
For most beginners, the answer is no.
A standard 35mm or 50mm lens can produce excellent photographs of finished dishes, overhead arrangements, and cooking instructions.
A dedicated macro lens becomes more useful when you regularly photograph small ingredients or intricate textures that your existing lens cannot capture closely enough.
Standard Lens vs. Macro Lens for Food Photography
The main difference between a standard lens and a macro lens is magnification.
A traditional true macro lens can reproduce a subject at 1:1 magnification, meaning a 10mm ingredient occupies 10mm on the camera sensor.
That makes macro lenses especially useful for photographing tiny garnishes, flaky pastry layers, chocolate decorations, and individual sugar crystals.
Standard lenses generally offer less magnification, although some have surprisingly good close-focusing capabilities.
For example, the Canon RF 35mm f/1.8 Macro IS STM offers 0.5× magnification, making it suitable for moderate food close-ups without requiring a dedicated 1:1 macro lens.
A macro lens can also photograph an entire dish, provided you have enough space to achieve the desired framing.
The question isn’t whether macro lenses produce better photographs. It’s whether you need their additional magnification.
When Is a Macro Lens Worth Buying?
If you primarily publish everyday recipes, a standard prime or zoom will usually handle most of your photography needs.
You can photograph ingredients, preparation steps, plated meals, and featured images without specialized macro equipment.
However, a macro lens becomes more valuable when close-up photography is a regular part of your work.
A baking blogger might want to emphasize the delicate layers of croissants or the texture of sourdough bread. A commercial food photographer may need detailed images of small decorations, product surfaces, or individual ingredients.
In these situations, a dedicated macro lens provides greater flexibility without requiring extensive cropping.
If you only need extreme close-ups occasionally, renting a macro lens may be more economical than buying one.
What Is the Best Macro Focal Length for Food Photography?
Macro lenses come in different focal lengths, each with practical advantages.
Shorter macro lenses, such as the Fujifilm XF 30mm f/2.8 Macro, can handle both everyday food photographs and detailed close-ups.
However, achieving maximum magnification with a shorter macro lens may require positioning the camera very close to the subject, leaving little room for lighting.
Longer macro lenses around 90mm–105mm generally provide greater working distance at comparable magnification.
That makes them particularly useful when photographing small ingredients with reflectors or artificial lighting.
The trade-off is a narrower field of view, which can be inconvenient for larger tabletop arrangements.
For dedicated macro photography, 90mm–105mm is an excellent range. If you want one lens for everyday recipes and occasional close-ups, a shorter macro lens may be more practical.
How to Take Close-Up Food Photos Without a Macro Lens
Before investing in specialized equipment, try using your existing lens at its minimum focusing distance.
You may discover that it already captures enough detail for your food blog.
If you need greater magnification, several alternatives are worth considering.
| Option | Main Advantage | Main Limitation |
|---|---|---|
| Existing standard lens | No additional cost | Limited by its close-focusing ability |
| Cropping | Simple and free | Reduces the remaining image resolution |
| Extension tubes | Increase magnification without adding optical glass | Restrict focusing range and can reduce effective light |
| Close-up filters | Easy to attach for occasional close-ups | Optical quality varies |
| Dedicated macro lens | Designed for detailed high-magnification photography | Additional expense and equipment |
Extension tubes fit between the camera and lens, allowing the lens to focus closer. They’re a relatively affordable way to experiment with macro photography, although you should confirm electronic compatibility with your camera system.
Close-up filters, also called diopters, attach to the front of a compatible lens. They can provide additional magnification, but inexpensive versions may introduce softness or color fringing.
Cropping is another practical option, especially when your images are intended for websites rather than large prints. However, excessive cropping reduces resolution and cannot recover details that weren’t captured in the original photograph.
Good lighting also makes a difference. Soft side lighting can emphasize the texture of bread crust, pastries, and fresh produce without requiring extreme magnification.
Common Challenges of Macro Food Photography
Macro photography introduces a few challenges that aren’t always obvious when comparing lenses.
At high magnification, depth of field becomes extremely shallow. Even at f/8, only a small portion of your subject may appear sharp.
Small camera movements can also shift the focus away from the intended detail.
A stable tripod, careful manual focusing, and focus magnification can help. For stationary subjects, focus stacking allows you to combine several images focused at different distances.
Lighting requires additional attention, particularly with shorter macro lenses that position the front of the lens close to the food.
Finally, remember that an extreme close-up doesn’t replace a clear photograph of the complete dish.
Readers still need to see what the finished recipe looks like.
Should Food Bloggers Buy a Macro Lens?
If you’re starting a food blog, prioritize a versatile everyday lens before investing in dedicated macro equipment.
For most recipe photography, a 35mm or 50mm-equivalent field of view provides plenty of flexibility.
As your photography develops, you may discover that detailed close-ups are becoming an important part of your content.
At that point, a dedicated macro lens could be a worthwhile upgrade.
The Sony FE 90mm f/2.8 Macro G OSS, Nikon Z MC 105mm f/2.8 VR S, and Canon RF 100mm f/2.8 L Macro IS USM are options for photographers who need specialized close-up capabilities.
But for everyday recipes, your current lens may already be enough.
Buy a macro lens when you regularly need greater magnification—not simply because professional food photographers use one.
Frequently Asked Questions About Food Photography Lenses
Still deciding which lens is right for your camera? Here are quick answers to some of the most common questions about food photography lenses.
What Is the Best Lens for Food Photography?
For most food bloggers, a 35mm or 50mm-equivalent prime lens is an excellent starting point. These focal lengths work well for everyday recipes, plated dishes, and many overhead compositions. The best choice depends on your camera’s sensor size and available shooting space.
Is a 35mm or 50mm Lens Better for Food Photography?
On a full-frame camera, a 35mm lens is generally more convenient for overhead photographs and wider tabletop arrangements. A 50mm lens works particularly well for individual dishes, desserts, and 45-degree compositions. If you photograph food in a small kitchen, the wider 35mm option may be more practical.
What Lens Do Professional Food Photographers Use?
Professional food photographers commonly use standard primes, versatile zooms, and dedicated macro lenses. A 50mm lens works well for plated dishes, while 90mm–105mm macro lenses are popular for detailed ingredient and commercial food photography. The choice depends on the assignment rather than professional status alone.
What Is the Best Lens for Overhead Food Photography?
A 35mm lens is an excellent starting point for overhead food photography on a full-frame camera. For APS-C cameras, a 23mm or 24mm lens provides a similar field of view. A standard zoom is also convenient when you want to adjust framing without repositioning an overhead tripod.
Do I Need a Macro Lens for Food Photography?
No. A standard prime or zoom lens is sufficient for most everyday recipe photographs. A dedicated macro lens becomes useful when you regularly photograph tiny garnishes, intricate textures, or small ingredients that require greater magnification.
Can I Use a Kit Lens for Food Photography?
Absolutely. A kit zoom can produce excellent food photographs when paired with good lighting, accurate focus, and thoughtful composition. Before upgrading, experiment with different focal lengths and identify what your existing lens actually struggles to capture.
What Is the Best Aperture for Food Photography?
For individual dishes, f/2.8–f/5.6 is a useful starting range. Overhead arrangements often benefit from f/5.6–f/8, while detailed macro photography may require narrower apertures or focus stacking. The ideal setting depends on how much of your subject you want in focus.
Is a Prime or Zoom Lens Better for Food Photography?
Prime lenses are often compact, affordable, and available with wide maximum apertures. Zoom lenses provide greater framing flexibility, making them convenient for recipe tutorials, overhead photographs, and cooking videos. Both can deliver excellent results.
What Is the Best Food Photography Lens for Beginners?
An affordable standard prime is a practical first upgrade. The Canon RF 50mm f/1.8 STM, Nikon Z 40mm f/2, Sony FE 50mm f/1.8, and Fujifilm XC 35mm f/2 are worth considering for compatible cameras. Always check your camera’s mount and sensor size before purchasing.
Can I Take Professional Food Photos With an APS-C Camera?
Yes. APS-C cameras can produce excellent images for food blogs, social media, cookbooks, and commercial projects. Choosing the appropriate focal length, controlling lighting, and focusing accurately matter more than simply using a full-frame camera.
What Is the Best Lens for Food Photography in Low Light?
A prime lens with a maximum aperture of f/1.4, f/1.8, or f/2 provides useful low-light flexibility. For restaurant photography, a compact 35mm or 50mm-equivalent lens is often practical. Remember that wider apertures also reduce depth of field.
How Much Should I Spend on a Food Photography Lens?
Beginners don’t need to invest in premium equipment. Affordable prime lenses can handle most everyday recipe photography, leaving room in the budget for a tripod, lighting, and backgrounds. Spend more when a specific feature, such as greater magnification or a more versatile zoom range, will genuinely improve your workflow.
Final Thoughts: Which Food Photography Lens Should You Buy?
Choosing the best lenses for food photography doesn’t have to be complicated or expensive.
For most food bloggers, an affordable 35mm or 50mm-equivalent prime lens is an excellent starting point. It provides enough flexibility for everyday recipes, plated meals, desserts, and many overhead photographs.
If you’re using a Canon full-frame camera, the RF 35mm f/1.8 Macro IS STM offers a useful combination of versatility and close-focusing capabilities. Nikon photographers may prefer the compact Z 40mm f/2, while Fujifilm users can consider the XF 30mm f/2.8 Macro.
For detailed ingredient photography, a dedicated 90mm–105mm macro lens can be a worthwhile upgrade.
But remember, a more expensive lens won’t automatically produce better food photographs.
Good lighting, thoughtful composition, and accurate focusing often make a greater difference than upgrading your equipment.
Before buying another lens, consider what your current setup is missing. Do you need wider overhead shots, softer backgrounds, or better close-up capabilities?
Choose a lens that solves that particular problem rather than investing in features you may rarely use.
Most importantly, focus on creating photographs that make your recipes look inviting and help readers imagine preparing them at home.
Start with one versatile lens, master your lighting and composition, and upgrade only when your photography genuinely needs it.
Read Next: More Helpful Guides for Food Bloggers
Ready to take your food blog further? These helpful guides cover the tools, plugins, and strategies you need to create better content, attract more readers, and grow your website.
- Best Tools for Food Bloggers – Discover essential equipment, software, and resources to simplify your food blogging workflow.
- Best WordPress Recipe Plugins for Food Blogs – Find the right plugins to create attractive, organized, and user-friendly recipe cards.
- How to Get More Traffic to Your Food Blog – Explore practical ways to attract visitors through Google, Pinterest, and other traffic sources.
- Best SEO Tools for Food Bloggers – Compare useful tools for keyword research, search optimization, and tracking your blog’s performance.