
Running a food blog involves much more than cooking and publishing recipes.
In a typical week, you might be researching keywords, testing recipes, photographing food, editing images, writing articles, creating Pinterest graphics, scheduling social media posts, sending newsletters, tracking expenses, and planning what to publish next.
Without a good system, those small tasks can quickly consume hours of your time.
That is where the right productivity tools for food bloggers can make a major difference.
The goal is not to use dozens of apps. Adding too many tools can actually make your workflow more complicated. A better approach is to choose a small group of tools that help you organize your content, automate repetitive tasks, speed up photo editing, manage promotions, and publish more consistently.
In this guide, we’ll look at some of the best tools for food bloggers who want to improve productivity across content planning, photography, design, SEO, email marketing, accounting, task management, and automation.
If you are still building the foundation of your site, our guide to the best hosting for food bloggers can help you choose a hosting setup that supports your blog as it grows.
Some of these tools offer useful free plans, while others make more sense once your blog is growing and the time they save can justify the cost.
Why Productivity Matters for Food Bloggers
One of the biggest challenges with food blogging is that a single recipe can involve many different steps.
You may need to develop and test the recipe, buy ingredients, cook it, photograph it, edit the photos, write the article, optimize it for search engines, create Pinterest pins, send an email newsletter, and promote the finished post.
Doing everything manually can make publishing even one recipe surprisingly time-consuming.
A better workflow creates repeatable systems.
Instead of designing every Pinterest graphic from scratch, you can create reusable Canva templates. Instead of editing every food photo individually, you can use Lightroom presets and batch editing. Instead of trying to remember every upcoming article, you can manage your publishing calendar in Notion, Trello, or Google Calendar.
Small improvements like these can save hours over the course of a month and give you more time to focus on recipe development, photography, content quality, and growing your blog.
Affiliate Disclosure: Some links in this article may be affiliate links. If you make a purchase or sign up through one of these links, iFoodBloggers may earn a commission at no extra cost to you.
Quick Comparison: Best Productivity Tools for Food Bloggers
| Tool | Best For |
|---|---|
| Canva | Pinterest pins, graphics, templates, and social content |
| Adobe Lightroom | Food photography editing and organization |
| Notion | Content calendars, SOPs, and blog organization |
| Trello | Simple editorial workflows and task tracking |
| Google Drive | Recipe files, spreadsheets, and collaboration |
| ChatGPT | Brainstorming, content planning, and workflow support |
| Grammarly | Editing and proofreading |
| GetResponse | Email marketing and automation |
| Wave | Accounting and invoicing |
| Zapier | Automating repetitive tasks |
| Google Calendar | Editorial scheduling and deadlines |
| Dropbox | Photo backups and file storage |
| Tailwind | Pinterest scheduling and content batching |
| Google Keep | Quick recipe ideas and notes |
| Google Search Console | SEO opportunities and content priorities |
| Google Analytics | Traffic analysis and content performance |
| Loom | Tutorials, SOPs, and team training |
| Rank Math | On-page SEO checks in WordPress |
| WP Recipe Maker | Recipe cards and structured recipe publishing |
You certainly do not need every tool on this list.
For most food bloggers, the best approach is to choose a few tools that solve the biggest bottlenecks in your current workflow and add others only when they provide a clear benefit.
Let’s look at each tool and where it can save you the most time.
1. Canva – Best for Pinterest Graphics and Visual Content
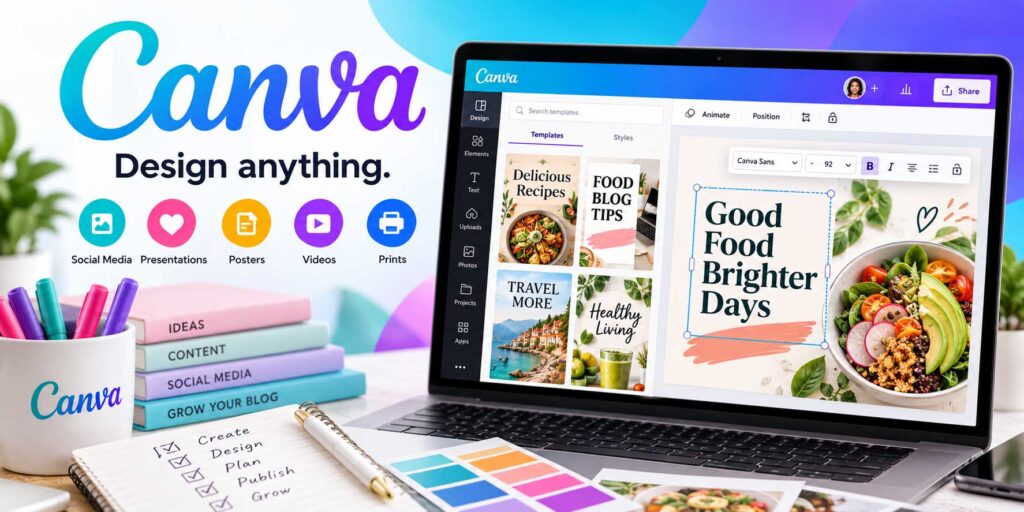
Canva is one of the most useful productivity tools for food bloggers because it can handle a large part of your visual content workflow in one place.
Instead of creating every Pinterest pin, Instagram post, featured image, recipe graphic, or lead magnet from scratch, you can build reusable templates and simply replace the photo, headline, and supporting text each time you publish something new.
For food bloggers, that can save a significant amount of time.
Canva works especially well for creating Pinterest pins, social media graphics, blog featured images, newsletter graphics, media kits, printable recipe collections, ebooks, lead magnets, YouTube thumbnails, and simple promotional videos.
One of its biggest productivity advantages is consistency.
For example, you might create five or ten Pinterest templates that match your food blog’s branding. Whenever you publish a new recipe, you can duplicate the appropriate design, replace the food photo, update the headline, and have several new pins ready without starting from a blank canvas.
That is much faster than designing every graphic individually.
Canva can also be useful if you manage more than one website or social account. Keeping your brand colors, fonts, logos, and reusable design elements organized makes it easier to maintain a consistent visual identity across everything you publish.
How Food Bloggers Can Save Time With Canva
A simple workflow is to create reusable templates for different types of content, such as recipes, roundups, cooking tips, and seasonal posts.
You can then create matching designs for Pinterest, Instagram, Facebook, or email promotions.
When a new recipe goes live, duplicate the appropriate templates, replace the image and text, and export the finished graphics.
Batching this work can save even more time.
Instead of opening Canva every time you publish a post, you could create promotional graphics for several recipes during one dedicated session.
Canva Free vs. Canva Pro
Canva Free is enough for many new food bloggers and includes a wide selection of templates, fonts, graphics, and basic design tools.
Canva Pro becomes more useful as your blog grows because it adds premium assets, stronger brand-management features, background removal, resizing tools, and other features that can speed up repetitive design work.
You do not necessarily need the paid version when you are starting out.
Begin with the free plan, build a repeatable design system, and upgrade only when the additional features can genuinely save you time.
Best for: Pinterest graphics, social media content, lead magnets, media kits, featured images, and reusable blog design templates.

2. Adobe Lightroom — Best for Editing Food Photography Faster
High-quality photography is a major part of most successful food blogs, but editing dozens of recipe photos can quickly become one of the most time-consuming parts of the publishing process.
Adobe Lightroom can make that workflow much faster.
Food bloggers can use Lightroom to organize, edit, rate, and export large batches of images without opening every photo individually in a separate program.
That makes it especially useful after a recipe shoot when you may have dozens—or even hundreds—of images to review.
Why Lightroom Is Useful for Food Bloggers
Lightroom gives you detailed control over exposure, white balance, shadows, highlights, contrast, color, cropping, sharpening, noise reduction, lens corrections, and selective adjustments.
These tools are especially useful for food photography because even small changes in brightness, warmth, contrast, and color can make ingredients look more natural and appealing.
For example, a slightly underexposed bowl of pasta or soup can often be corrected quickly without rebuilding the entire edit from scratch.
Use Presets to Speed Up Your Workflow
One of Lightroom’s biggest productivity advantages is the ability to create and reuse presets.
A preset saves a group of editing settings so you can apply a similar look to multiple photos with one click.
Food bloggers might create separate presets for bright natural-light recipes, darker moody photography, baked goods, overhead shots, restaurant images, or indoor kitchen photography.
You will usually still need to make small adjustments, but starting with a preset can save a significant amount of editing time and help maintain a more consistent visual style across your blog.
Edit Photos in Batches
Another major time saver is batch editing.
Instead of adjusting every image independently, you can edit one photo and synchronize appropriate settings across several similar images from the same shoot.
For example, if you photographed a recipe under the same lighting conditions, you might correct the exposure, white balance, and color on one image and then apply similar adjustments to the rest of the series.
This can significantly reduce repetitive editing work, especially when you publish recipes frequently.
Keep Your Food Photography Organized
Lightroom is also useful for managing a growing photo library.
As your food blog expands, you can quickly accumulate thousands of recipe photographs. A consistent organization system makes it much easier to find older images when you want to refresh a post, create a new Pinterest pin, or reuse a photo in a newsletter or social media campaign.
Folders, collections, ratings, flags, and keywords can all help keep your image library manageable.
A simple folder structure might look like:
Year → Recipe Name → Raw Photos → Edited Photos → Final Exports
Creating a clear naming and storage system early can save a surprising amount of time later.
Lightroom vs. Photoshop for Food Bloggers
You do not necessarily need to choose between Lightroom and Photoshop because they serve slightly different purposes.
Lightroom is generally better for organizing and editing large groups of food photos, while Photoshop is more useful when you need advanced image manipulation, detailed retouching, or more complex design work.
For most everyday recipe photography, Lightroom can handle the majority of the editing workflow.
Best for: food photography editing, photo organization, batch editing, presets, and maintaining a consistent visual style across your food blog.
3. Notion — Best for Content Planning and Blog Organization
Food blogging involves a surprising number of moving parts.
You may have recipes being tested, articles waiting for photos, posts that need SEO updates, Pinterest graphics still to create, and seasonal content that needs to be published weeks in advance.
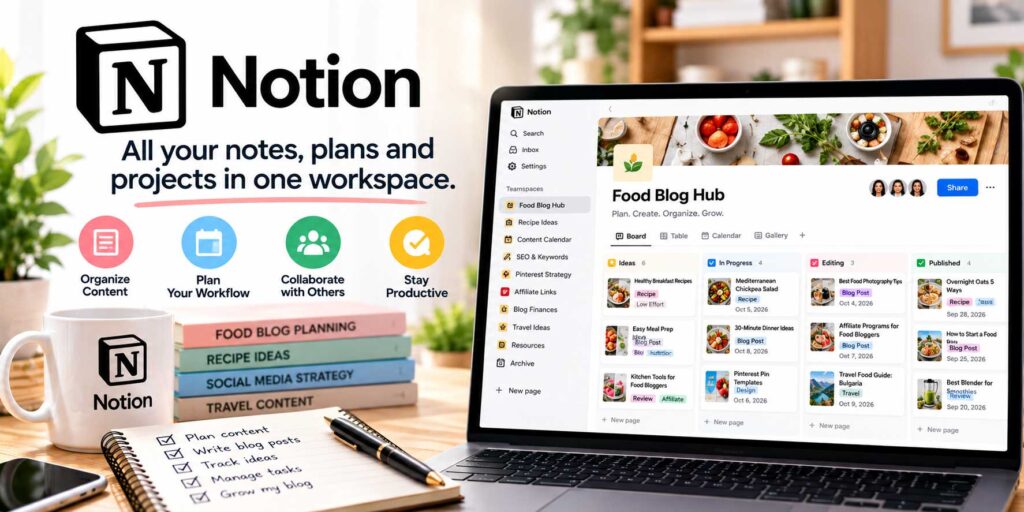
Notion can bring all of that into one central workspace.
Instead of keeping ideas scattered across notes, spreadsheets, emails, and documents, you can use Notion to manage your editorial calendar, recipe pipeline, content ideas, and recurring blogging tasks in one place.
How Food Bloggers Can Use Notion
A simple Notion content database can help you track details such as the article title, target keyword, category, publish date, recipe-testing status, photography progress, Pinterest graphics, internal links, affiliate links, and future updates.
That gives you a much clearer view of what is finished and what still needs attention.
For example, a recipe might move through a workflow like:
Idea → Keyword Research → Recipe Testing → Photography → Writing → Editing → Scheduled → Published → Promotion
A single dashboard lets you see where every post stands in the publishing pipeline without having to keep the details in your head.
Build a Food Blog Content Calendar
Notion is especially useful for seasonal planning.
A recipe blogger may need to prepare Thanksgiving content months before November or start working on summer grilling recipes while it is still spring.
A visual editorial calendar makes it easier to work ahead instead of scrambling to publish seasonal content after search interest has already started rising.
You can also group content by categories such as breakfast, dinner, desserts, drinks, meal prep, holiday recipes, or whatever matches the structure of your site.
Store Your Blogging SOPs
Another useful way to use Notion is for standard operating procedures, or SOPs.
These are repeatable instructions for tasks you perform again and again.
For example, a publishing checklist might cover keyword research, title optimization, recipe cards, images, alt text, internal links, external sources, schema, Pinterest graphics, and final proofreading.
An article-update checklist could include checking rankings, refreshing outdated information, improving images, reviewing internal and affiliate links, and creating new promotional graphics.
Documenting these processes makes it much easier to stay consistent.
It also becomes especially valuable if you eventually work with writers, editors, virtual assistants, or social media help.
Create an Idea Bank
Food bloggers constantly come across new recipe and content ideas.
Instead of letting those ideas disappear into phone notes or open browser tabs, create a central idea bank.
You can save the topic, target keyword, season, category, notes, competing content, and priority level.
When it is time to plan your next batch of posts, you already have a list of ideas ready to evaluate instead of starting from scratch.
Keep Notion Simple
Notion can become overly complicated if you try to build everything at once.
Most food bloggers do not need dozens of dashboards and databases.
A simple setup with a content calendar, article tracker, idea bank, and a few blogging checklists is often enough to make a noticeable difference.
The best productivity system is not the most complicated one. It is the one you will actually keep using.
Best for: editorial calendars, recipe planning, content pipelines, SOPs, idea management, and organizing your food blogging workflow in one place.
4. Trello — Best for Simple Editorial Workflow Management
If Notion feels too complex, Trello offers a simpler way to manage your food blog workflow.
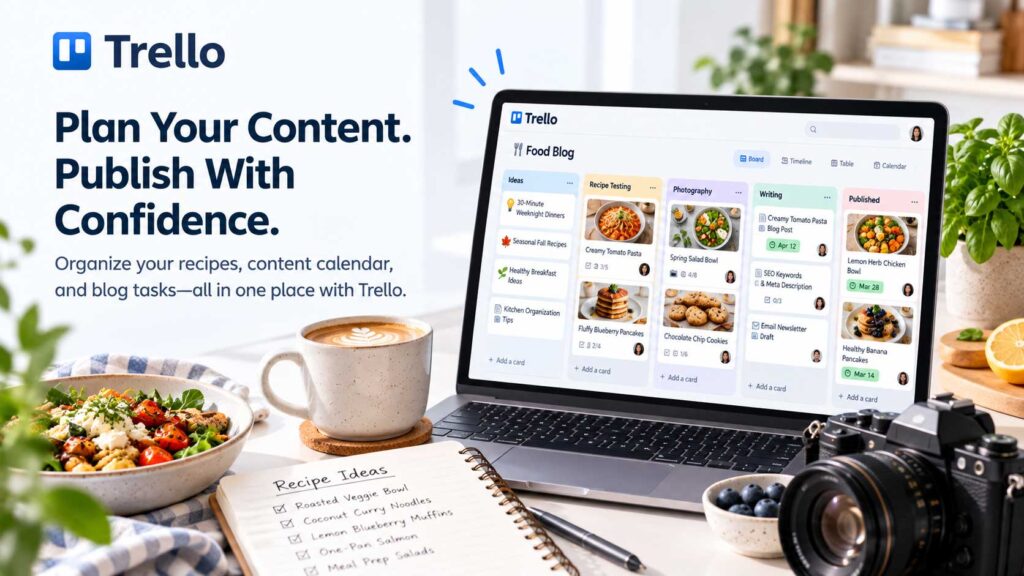
Trello uses boards, lists, and cards, which makes it easy to see where each recipe or article stands in the publishing process.
For food bloggers who prefer a visual system, it can be one of the easiest productivity tools to set up and start using.
How Food Bloggers Can Use Trello
You can create one board for your editorial workflow and organize it into stages such as:
Ideas → Research → Writing → Photography → Editing → Scheduled → Published
Each recipe or article becomes its own card.
Inside the card, you can keep the target keyword, publish date, recipe notes, photography tasks, SEO reminders, Pinterest graphics, internal links, affiliate links, and notes for future updates.
As the post moves forward, simply drag the card from one stage to the next.
That makes it easy to see what is waiting for photography, what still needs editing, and what is ready to publish.
Create Repeatable Checklists
Reusable checklists are one of Trello’s most useful features for bloggers.
For example, a recipe card might include steps such as testing the recipe, photographing the finished dish, editing the images, completing the article, adding internal links, writing the meta description, creating Pinterest graphics, and scheduling promotion.
Using the same checklist for every recipe helps you maintain a consistent publishing process without relying on memory.
Plan Content in Batches
Trello also works well if you prefer batching similar tasks.
You might test several recipes on one day, photograph them during another session, and handle writing or editing later in the week.
Instead of completing one recipe from beginning to end before starting another, you can move several cards through the same stage at once.
For many food bloggers, this can reduce context switching and make production more efficient.
Trello vs. Notion
Both tools can work well, but they suit different working styles.
Trello is generally better if you want a straightforward visual board with minimal setup.
Notion is better if you want a more detailed workspace that combines content databases, notes, calendars, documents, SOPs, and planning tools.
If your main goal is simply to track recipes from idea to publication, Trello may be the easier choice.
If you want to build a more complete operating system for your food blog, Notion gives you more flexibility.
Best for: visual editorial calendars, recipe workflows, publishing checklists, task management, and food bloggers who want a simple content-planning system.
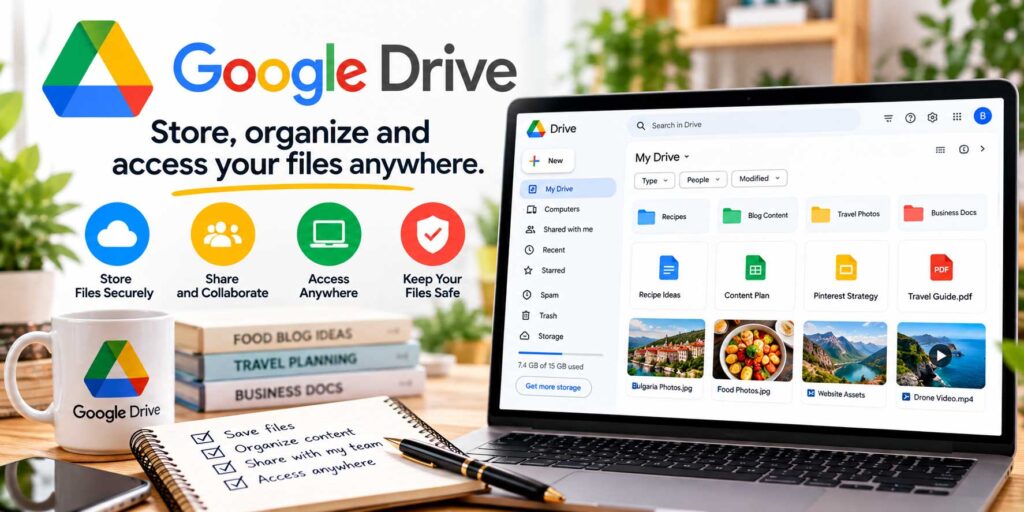
5. Google Drive — Best for Organizing Recipes, Photos, and Blog Files
Google Drive is one of the simplest productivity tools food bloggers can use to keep documents, spreadsheets, photos, and other important files organized and accessible across multiple devices.
Recipe development often creates more files than expected. You may have ingredient notes, photography shot lists, drafts, media kits, contracts, keyword research, and editorial calendars stored in different places.
Google Drive gives you one central location for all of it.
How Food Bloggers Can Use Google Drive
A consistent folder structure can make a big difference.
For example:
Food Blog → Recipes → 2026 → Recipe Name
Inside each recipe folder, you might keep testing notes, ingredient measurements, article drafts, final photos, Pinterest graphics, nutrition information, supporting research, or brand collaboration files.
Keeping everything related to the same recipe together makes future updates much easier.
Use Google Docs for Recipe Drafts
Google Docs works well for drafting articles before publishing them in WordPress.
You can write, edit, leave comments, review changes, and collaborate with writers or editors without emailing multiple versions of the same document back and forth.
If you work with a virtual assistant or freelance writer, comments can be added directly beside the section that needs revision, which makes feedback much clearer.
Use Google Sheets to Track Your Blog
Google Sheets can also become a useful management tool for a growing food blog.
You can use spreadsheets to track keyword research, published recipes, affiliate products, income and expenses, content updates, Pinterest performance, sponsored work, or editorial planning.
For example, a content inventory might include the article URL, focus keyword, publish date, category, traffic, ranking position, affiliate links, and the date the post was last updated.
That kind of content inventory makes it much easier to spot older posts that are due for an update.
Make Collaboration Easier
Google Drive becomes even more useful as your blog grows.
Writers, photographers, editors, virtual assistants, and other collaborators can work from shared folders instead of sending large files through email.
You can also control whether someone has permission to view, comment on, or edit a file.
That makes delegation easier without losing track of important documents.
Keep Your Drive Organized
Cloud storage only improves productivity if the files inside it are easy to find.
Avoid placing everything into one large folder. Use a consistent naming system and folder structure from the beginning.
For example:
Recipes → Desserts → Chocolate Cake → Photos
is much easier to navigate later than a folder full of files named:
IMG_4381.jpgfinal-recipe.docxfinal-final-recipe2.docx
A few minutes spent organizing files now can save a surprising amount of time when you need to revisit an older recipe months or years later.
Best for: recipe documents, spreadsheets, file organization, collaboration, content tracking, and keeping important food-blogging files accessible across devices.
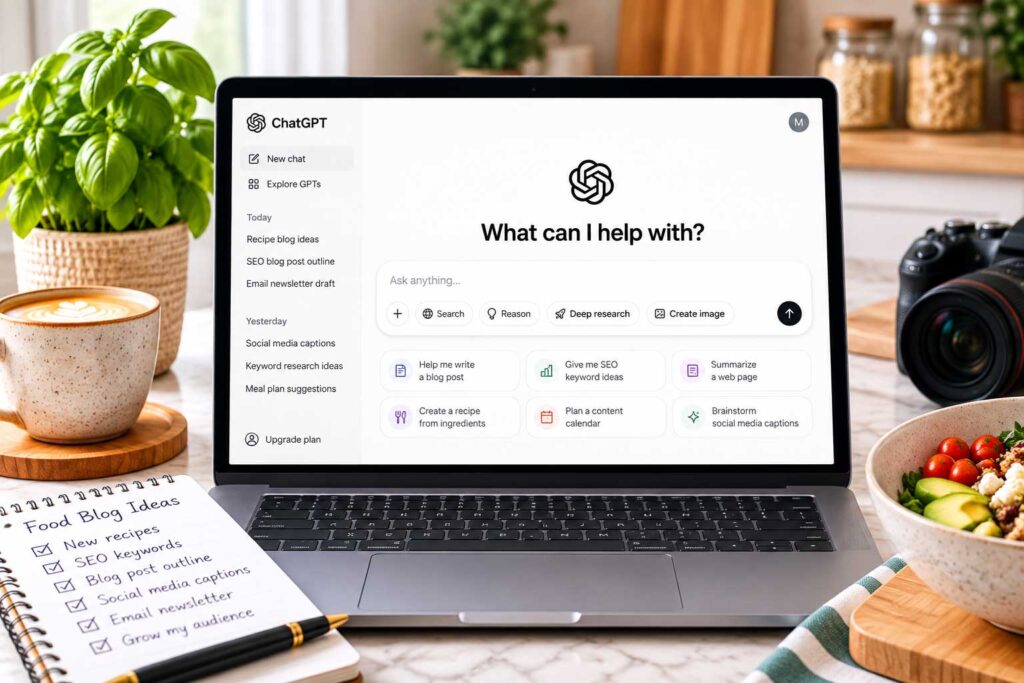
6. ChatGPT — Best for Brainstorming, Research Support, and Content Workflows
ChatGPT can be a useful productivity tool for food bloggers when it is used to support the work you already do.
Food blogging still depends on original recipes, real testing, accurate measurements, useful photography, and trustworthy recommendations. But many of the planning, organizing, and repetitive tasks around that work can be handled much faster with AI.
One of ChatGPT’s biggest advantages is speed. Instead of starting every task from a blank page, you can use it to organize ideas, structure articles, build checklists, brainstorm angles, and turn rough notes into a clearer working draft.
How Food Bloggers Can Use ChatGPT
Food bloggers can use ChatGPT for tasks such as brainstorming recipe ideas, creating article outlines, organizing keyword clusters, generating FAQ ideas, improving awkward sections, planning internal links, creating Pinterest title variations, drafting newsletter ideas, building content calendars, and turning research notes into a more usable structure.
It can also be helpful when you already have a draft and want another set of eyes on it.
For example, you could ask ChatGPT to identify missing questions, unclear instructions, weak headings, repetitive sections, or opportunities to make the article more useful.
Use AI to Support Recipe Development, Not Replace It
AI should not replace actual recipe testing.
If you publish a recipe, you should know that the ingredient quantities, cooking times, temperatures, substitutions, and instructions work in practice.
Where ChatGPT can help is everything around that process.
You might provide your own recipe notes and ask for help organizing them into a cleaner structure, turning them into a troubleshooting section, or identifying questions readers may have.
That saves time without removing the firsthand experience that gives a food blog credibility.
Create Repeatable Prompts
One of the easiest ways to improve productivity is to save prompts for tasks you perform regularly.
For example:
Article updates: Review this recipe post and identify outdated information, missing reader questions, weak headings, internal-link opportunities, and sections that could be clearer.
Pinterest: Create 20 Pinterest headline ideas for this recipe using natural language and different search-intent angles.
Content planning: Organize these keyword ideas into a food-blog content cluster without creating multiple articles that target the same search intent.
Proofreading: Edit this section for grammar, repetition, clarity, and natural wording while preserving the original meaning and tone.
Once you find prompts that consistently produce useful results, they can become part of your normal publishing workflow.
Use ChatGPT for Repetitive Blog Tasks
Some parts of food blogging require creativity and firsthand judgment.
Others are repetitive.
Creating multiple Pinterest title variations, organizing a long keyword list, turning rough notes into a checklist, or grouping related content ideas can take a surprising amount of time when done manually.
This is where ChatGPT tends to be most useful: taking repetitive planning and organization work off your plate.
That gives you more time to focus on the parts of food blogging where your own experience matters most: cooking, recipe testing, photography, storytelling, and understanding your audience.
Review Important Information Before Publishing
AI-generated information should still be checked before it goes live.
Pay particular attention to cooking temperatures, food safety, nutrition details, substitutions, statistics, prices, product recommendations, factual claims, and external sources.
Treat ChatGPT as a fast assistant for planning and organizing information, not as a replacement for verification.
Used that way, it can reduce the amount of time spent on research, editing, planning, and repetitive content work.
Best for: brainstorming, outlining, content planning, editing support, keyword organization, Pinterest ideas, workflow creation, and speeding up repetitive blogging tasks.
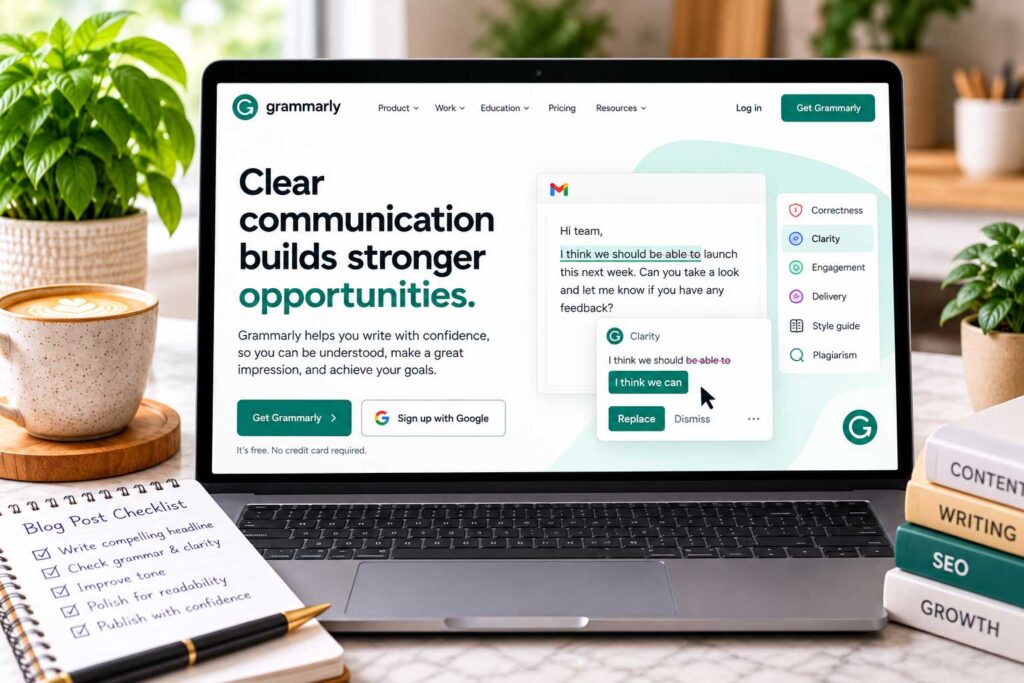
7. Grammarly — Best for Editing and Proofreading
Even experienced writers miss awkward sentences, repeated words, punctuation problems, and small grammar mistakes.
Grammarly can help food bloggers catch those issues before an article goes live.
It works especially well as a final editing layer after you have finished writing and reviewing the post yourself.
How Grammarly Helps Food Bloggers
Grammarly can identify spelling and grammar mistakes, punctuation problems, unclear sentences, unnecessary repetition, wordy phrasing, and readability issues.
That can be particularly useful when you are publishing frequently and do not have time to reread every paragraph several times.
It can also catch small errors that are easy to overlook after you have spent hours working on the same article.
Use Grammarly as an Editor, Not an Automatic Rewriter
You do not have to accept every suggestion Grammarly makes.
Food blogs often use a relaxed, conversational writing style, and a sentence that sounds perfectly natural to a reader may not match the structure a grammar tool prefers.
Review suggestions individually and keep the ones that genuinely make the writing clearer.
The goal is cleaner writing without sanding away the personality that makes the post sound like you.
Improve Recipe Instructions
Grammarly can also be useful when reviewing recipe directions.
Instructions should be clear enough to follow while someone is actually cooking, which usually means avoiding unnecessarily long or complicated sentences.
If one step includes several different actions, breaking it into shorter instructions may make the recipe easier to follow.
This is especially important for recipes involving precise timing, multiple cooking stages, or several ingredients added at different points.
Add a Final Editing Pass Before Publishing
A practical workflow is to finish the article first and edit it afterward.
Review the recipe details, formatting, links, and factual information yourself. Then use Grammarly as another pass to catch smaller writing problems you may have missed.
This is generally more efficient than stopping to edit every sentence while you are still trying to complete the first draft.
Grammarly Free vs. Paid
For many food bloggers, the free version is enough for everyday spelling, grammar, and punctuation checks.
Paid plans add more advanced writing and editing features that may become useful if you publish frequently or work with a large amount of written content.
There is no need to upgrade simply because a paid version exists. Start with the free tools and consider upgrading when the additional features would actually improve your workflow.
Best for: proofreading recipes, cleaning up blog posts, improving readability, catching writing mistakes, and performing a final editing pass before publication.
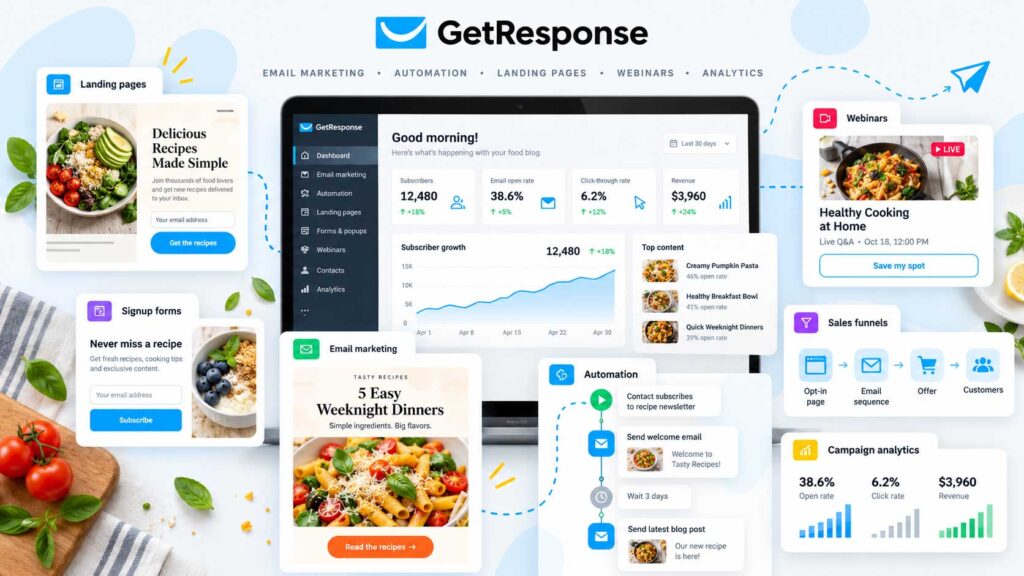
8. GetResponse — Best for Email Marketing and Automation
Email marketing can become time-consuming if every newsletter, welcome email, and promotion has to be created and sent manually.
GetResponse can help food bloggers automate much of that work.
Instead of building every email from scratch, you can create repeatable sequences that welcome new subscribers, deliver lead magnets, promote seasonal recipe collections, and bring readers back to your website.
How Food Bloggers Can Use GetResponse
Food bloggers can use GetResponse to collect subscribers, send regular newsletters, build automated welcome sequences, create landing pages, deliver free downloads, and segment readers based on their interests.
If you are still comparing platforms, our guide to the best email marketing platforms for food bloggers covers additional options for newsletters, automation, and subscriber management.
For example, you could offer a free 30 Easy Dinner Recipes ebook in exchange for an email address.
After someone subscribes, an automated sequence could deliver the download immediately, share a few of your most useful recipes over the following days, and introduce readers to other parts of your site.
Once that sequence is built, it can continue working without you manually sending each message.
Create Automated Welcome Sequences
A simple welcome sequence might look like this:
Email 1: Deliver the freebie and welcome the subscriber.
Email 2: Share several of your most popular recipes.
Email 3: Introduce your blog and explain what readers can expect.
Email 4: Recommend a useful recipe collection based on their interests.
The exact emails will depend on your audience, but the time-saving benefit is simple: build the sequence once, then let it handle the same welcome process for future subscribers.
Build Reusable Newsletter Templates
You also do not need to redesign every newsletter.
Create a reusable template containing your logo, colors, introduction, recipe sections, buttons, and footer.
Each week, you can duplicate the template and replace the content with your latest recipes or seasonal recommendations.
You can do the same for recurring campaigns around Thanksgiving, Christmas, summer grilling, back-to-school meals, or other seasonal topics.
Segment Your Audience
As your email list grows, segmentation can help you send more relevant content.
One group of readers may be interested in quick dinners, while others prefer baking, desserts, vegetarian meals, or meal prep.
Instead of sending every subscriber the same message, you can tailor some campaigns to specific interests or behaviors.
That can make your emails more useful without requiring you to manually manage every subscriber.
Don’t Over-Automate Your Emails
Automation should save time without making your newsletter feel impersonal.
Readers subscribe because they want useful recipes, ideas, and updates from you—not a constant stream of generic automated messages.
Use automation for repetitive tasks, but continue sending fresh recipes, seasonal recommendations, personal notes, and other content that gives people a reason to stay subscribed.
Best for: newsletters, welcome sequences, lead magnets, email automation, subscriber segmentation, and bringing readers back to your food blog.
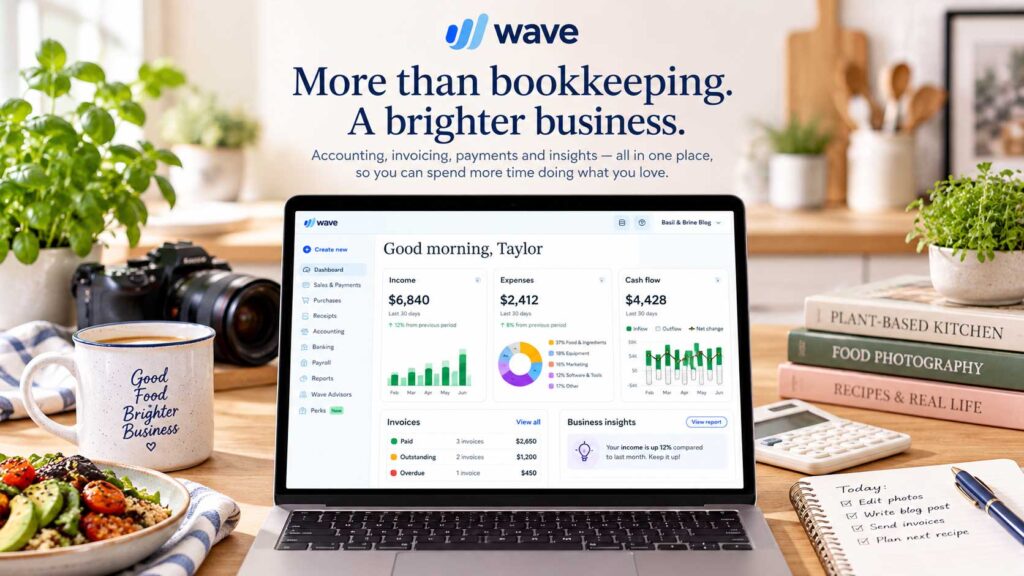
9. Wave — Best for Simple Accounting and Expense Tracking
Once your food blog starts earning money, bookkeeping becomes part of running the business.
Wave can help simplify that side of blogging by giving you one place to track income, expenses, invoices, and basic financial records.
Instead of keeping receipts in random folders or trying to reconstruct everything at tax time, you can organize transactions throughout the year.
What Food Bloggers Can Track
A food blog can generate a surprising number of business expenses.
That might include hosting, domain renewals, WordPress plugins, photography equipment, editing software, email marketing services, ingredients used for recipe development, props, freelance help, advertising, and other business subscriptions.
Keeping those expenses organized makes it much easier to understand what your blog actually costs to operate.
Wave can also help you monitor income from different sources, such as display advertising, affiliate marketing, sponsored content, brand partnerships, digital products, photography work, or other services.
Affiliate income can become an important revenue stream as your site grows, and our guide to the best affiliate programs for food bloggers covers programs worth considering.
Use Wave for Invoicing
If you work directly with brands or clients, Wave can also help you create and send professional invoices.
Invoice details connect with the accounting side of Wave, which can reduce the amount of information you need to enter manually. Wave also supports online payments, and some plans include additional automation such as recurring billing and payment reminders.
That can be useful if sponsored campaigns or freelance projects become a regular part of your food blogging business.
Automate Some of the Bookkeeping
Wave’s Starter plan covers basic invoicing and bookkeeping, while its paid Pro plan adds features such as automatic bank transaction imports, transaction categorization, and digital receipt capture.
Those features become much more useful once your blog has enough monthly transactions that manual bookkeeping starts eating into your time.
Instead of entering every expense manually, more of the routine bookkeeping can happen automatically, leaving you with less cleanup at the end of the month.
Review Your Numbers Regularly
Do not wait until tax season to look at your finances.
Set aside a little time each month to review your income, expenses, profit, unpaid invoices, and recurring subscriptions.
A simple monthly review can help you spot unnecessary expenses, identify growing revenue streams, and make better decisions about where to invest in your blog.
Keep Business and Personal Finances Organized
One of the easiest ways to make bookkeeping more manageable is to keep clear records from the beginning.
As your food blog grows, having organized income and expense records can save a significant amount of time.
Tax rules vary depending on where you live and how your business is structured, so use accounting software for organization and recordkeeping rather than as a substitute for professional tax advice.
Best for: tracking blogging income and expenses, sending invoices, organizing financial records, and reducing the amount of manual bookkeeping involved in running a food blog.
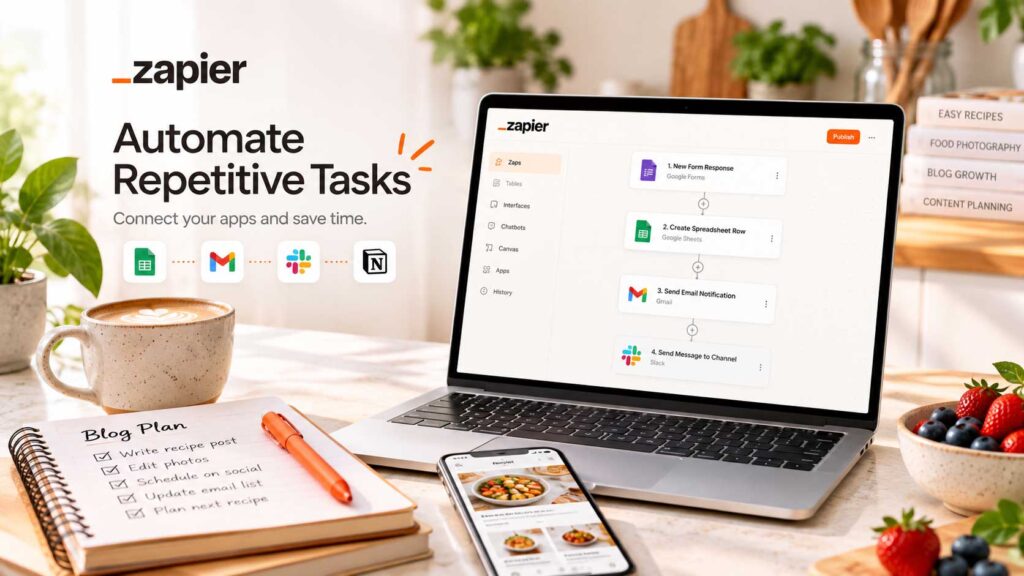
10. Zapier — Best for Automating Repetitive Blogging Tasks
A lot of food blogging involves small repetitive tasks that do not require much creativity but still take time.
Zapier helps automate some of that work by connecting the apps you already use.
When something happens in one app, Zapier can trigger an action in another. That means less copying and pasting, fewer manual updates, and less time spent moving information between different tools.
How Food Bloggers Can Use Zapier
Food bloggers can use Zapier to connect forms, spreadsheets, email platforms, project-management tools, and other parts of their workflow.
For example, a new subscriber could be added to a spreadsheet automatically, a contact form submission could create a task, or a new content idea could be sent directly into your editorial system.
You could also use automations to send notifications, create reminders, or move information between tools you already rely on.
The exact setup will depend on your workflow, but even a few simple automations can remove a surprising amount of repetitive work.
Automate Your Content Workflow
Imagine you manage your editorial calendar in Trello or Notion.
Instead of manually creating a new task every time a content idea is approved, an automation could create it for you with the article title, keyword, deadline, and other details already included.
That reduces duplicate data entry and makes it easier to move the article into your normal publishing process.
If you manage a busy content calendar, eliminating even a few repeated data-entry steps can save a surprising amount of time over a month.
Automate Leads and Brand Inquiries
Zapier can also be useful when readers, advertisers, or brands contact you.
For example, a new inquiry could automatically be added to a spreadsheet or CRM, create a follow-up task, and send you a notification.
That is especially useful if sponsorships, freelance work, or brand partnerships are becoming a larger part of your business.
Instead of copying the same information into several places, the workflow can happen automatically in the background.
Start With Simple Automations
You do not need to build complicated multi-step workflows right away.
Start by looking at the tasks you repeat every week.
Ask yourself:
What do I regularly copy, move, enter, rename, or organize by hand?
Those are often the best candidates for automation.
Even saving a few minutes on a task you perform dozens of times each month can make a noticeable difference.
Don’t Automate Everything
Automation works best for predictable, repetitive tasks.
It is less useful for work that requires judgment, creativity, or personal interaction.
Recipe development, photography, answering important reader questions, negotiating sponsorships, and reviewing final content still benefit from human attention.
The goal is not to automate your entire food blog. It is to remove the routine work so you have more time for the parts that actually need you.
Best for: connecting blogging tools, automating repetitive tasks, managing leads, moving information between apps, and building more efficient content workflows.
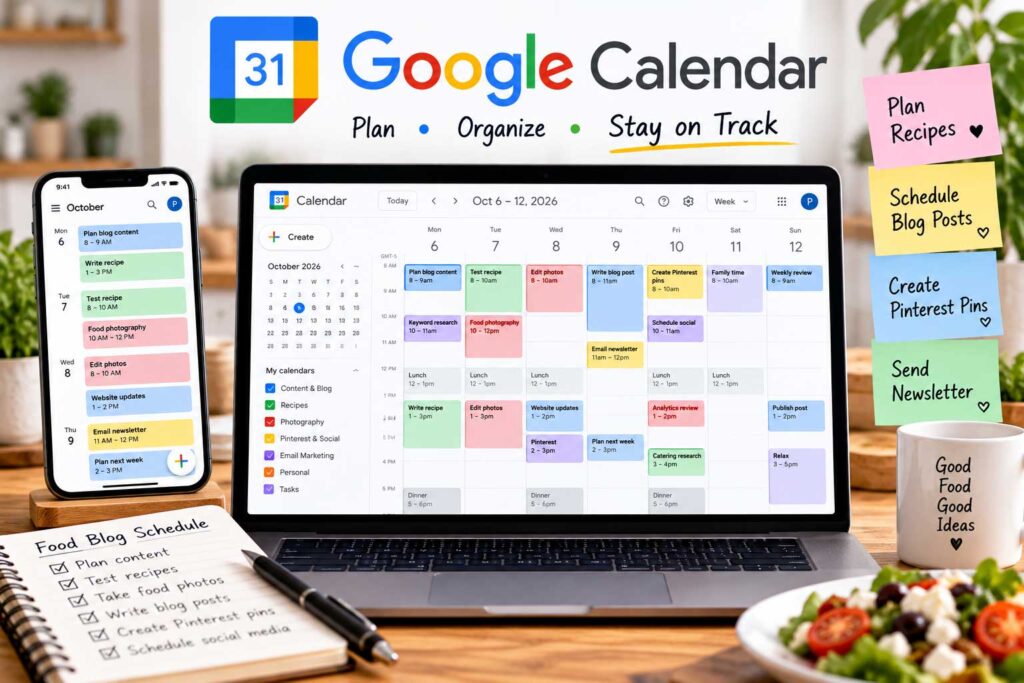
11. Google Calendar — Best for Editorial Scheduling and Deadlines
Google Calendar may seem simple compared with dedicated project-management tools, but it can be extremely useful for keeping a food blog on schedule.
Food blogging is highly seasonal.
Holiday recipes, summer grilling content, back-to-school meals, game-day snacks, and other timely topics often need to be planned well before readers start searching for them.
A calendar helps you work backward from those important dates instead of reacting at the last minute.
Use It as an Editorial Calendar
You can create a separate calendar specifically for your food blog and use it to schedule article publish dates, recipe testing, photography sessions, newsletter sends, sponsored-content deadlines, Pinterest campaigns, and content updates.
This gives you a clear visual overview of the month without mixing every blogging task into your personal calendar.
It also makes it easier to see whether too many deadlines are stacked into the same week.
Plan Seasonal Content Earlier
One of the most common mistakes with seasonal content is publishing too late.
If you want to target Thanksgiving, Christmas, Easter, summer grilling, or other recurring topics, it usually makes sense to prepare the content well before the actual event.
Google Calendar makes that easier because you can schedule reminders weeks or even months in advance.
Instead of realizing in late November that you wanted to refresh a holiday dessert roundup, you could schedule the update for September or October so the refreshed page is ready before holiday search interest peaks.
Create Recurring Blogging Tasks
Google Calendar is also useful for work that repeats.
You might create recurring reminders for weekly content planning, monthly analytics reviews, newsletter preparation, bookkeeping, affiliate-link checks, Pinterest batching, or quarterly content updates.
This reduces the amount of mental energy spent remembering routine maintenance.
Time-Block Your Blogging Work
Time blocking can also make your week more efficient.
Rather than switching constantly between unrelated tasks, reserve blocks of time for similar work.
For example:
Monday: keyword research and planning
Tuesday: recipe testing
Wednesday: photography
Thursday: writing and editing
Friday: Pinterest, newsletters, and content updates
You do not have to follow this exact schedule, but grouping similar tasks together can reduce context switching and help you stay focused longer.
Combine Google Calendar With Your Project-Management Tool
Google Calendar does not need to replace Notion or Trello.
It works well alongside them.
Your project-management tool can hold the detailed workflow, while Google Calendar shows the deadlines, appointments, and time blocks that matter most during the week.
That combination gives you both detailed organization and a practical view of what actually needs to happen next.
Best for: editorial scheduling, seasonal content planning, recurring reminders, deadlines, time blocking, and maintaining a consistent publishing schedule.
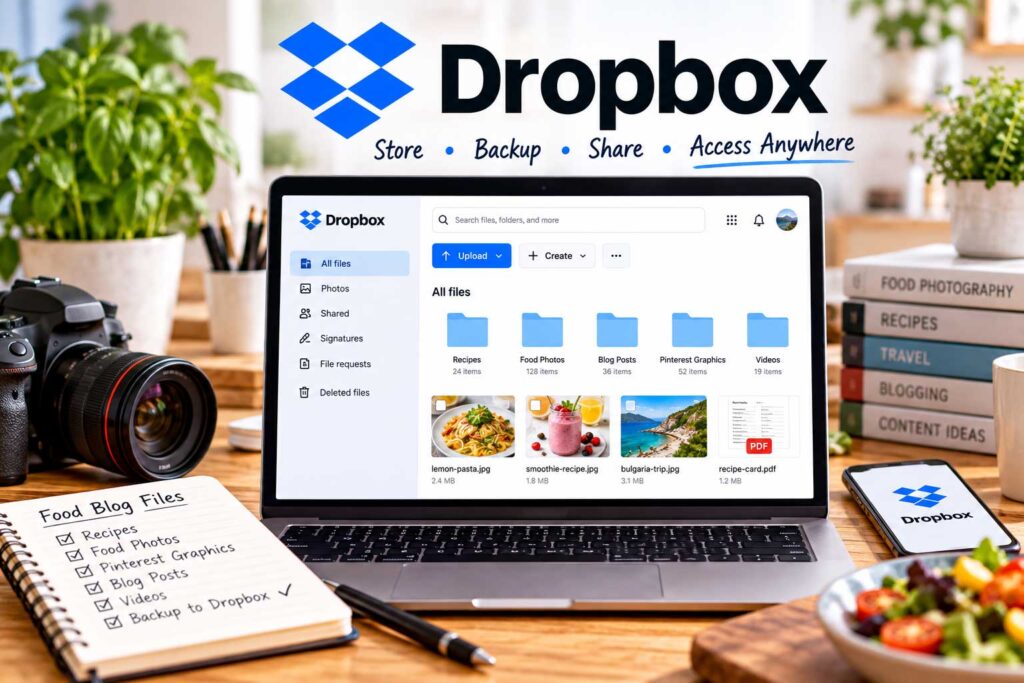
12. Dropbox — Best for Photo Backups and File Storage
Food bloggers can accumulate a huge number of files over time.
Raw food photography, edited images, recipe drafts, videos, media kits, brand assets, contracts, and downloadable products can quickly consume a large amount of storage.
Dropbox can help keep those files organized, synced, and accessible across multiple devices.
Why Backup Matters for Food Bloggers
Losing a finished article is frustrating.
Losing years of original food photography can be much worse.
Recipe photos are valuable business assets because they may be reused in blog posts, Pinterest pins, newsletters, ebooks, sponsored campaigns, social media, and future content updates.
Keeping only one copy of those files on a computer creates unnecessary risk.
Cloud storage gives you another layer of protection if a hard drive fails, a laptop is damaged, or files are accidentally deleted.
Create a Consistent Folder Structure
Organization is where Dropbox becomes especially useful.
A simple structure might look like:
Food Blog → 2026 → Recipes → Recipe Name
Inside each recipe folder, you could keep separate folders for RAW images, edited photos, final web images, Pinterest graphics, video clips, and article notes.
Using the same structure for every recipe makes older files much easier to find later.
Sync Files Across Devices
Dropbox is also useful if you work from more than one device.
You might edit photos on a desktop, review files on a laptop, and access a finished image from your phone.
Cloud syncing reduces the need to email files to yourself or constantly move them between devices manually.
As your food blog grows, you may eventually work with photographers, editors, designers, virtual assistants, or brand partners.
Instead of sending large attachments through email, you can share folders or individual files directly.
That is especially helpful for high-resolution photography, video, or larger batches of creative assets.
Use Cloud Storage as Part of a Backup System
Dropbox can be an important part of your backup strategy, but it should not necessarily be the only place where valuable files exist.
A stronger setup is to keep copies in more than one location.
For example, you might store your working files on your computer, maintain a separate copy on an external drive, and keep another copy in cloud storage.
The exact setup can vary, but the goal is simple: avoid having all of your important food-blogging files in one place.
Best for: food photography storage, file syncing, large creative assets, collaboration, and adding an extra layer of protection for valuable blog files.
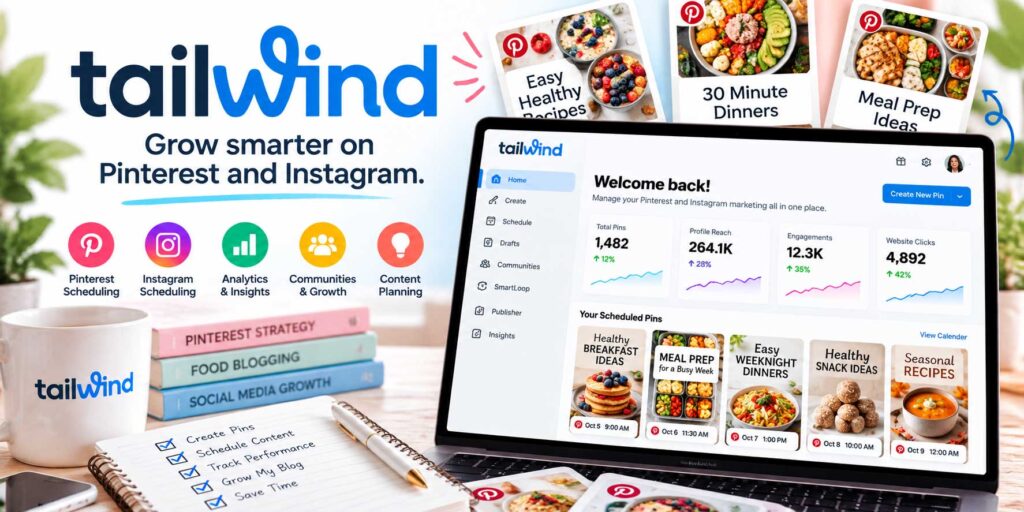
13. Tailwind — Best for Pinterest Scheduling and Content Batching
Pinterest can send valuable traffic to food blogs, but creating and publishing pins consistently can take a lot of time.
Tailwind helps simplify that process by letting you prepare and schedule Pinterest content in batches instead of publishing every pin manually.
For food bloggers with a growing recipe archive, that can make Pinterest much easier to manage.
How Food Bloggers Can Use Tailwind
Tailwind can help you plan pins ahead of time, spread them across different days, keep older recipes in circulation, and manage promotional content in batches.
Instead of logging in every day to publish something new, you can prepare a group of pins during one dedicated session and schedule them in advance.
That frees up more time for recipe development, photography, writing, and other parts of the blog.
Batch Your Pinterest Workflow
A simple batching system can save a surprising amount of time.
For example, you could select ten recently published or updated recipes, create several Pinterest designs for each one in Canva, write the titles and descriptions, and then schedule everything in one session.
That is usually more efficient than stopping your work every day to design and publish a single pin.
Batching also makes it easier to keep your branding and visual style consistent.
Promote New and Evergreen Recipes
Pinterest does not have to be used only for brand-new content.
Older recipes may still deserve promotion, especially if they are seasonal, evergreen, or have recently been refreshed.
A recipe that performed well last year might benefit from a new pin design and another round of promotion before the relevant season begins.
This is one of the easiest ways to get more value from content you have already created.
Build a Repeatable Pinterest System
The biggest productivity benefit comes from creating a workflow you can repeat.
A simple process might look like:
Publish or update recipe → Create several Canva pins → Write titles and descriptions → Schedule pins → Review performance later
Once that process becomes part of your regular routine, Pinterest promotion becomes much easier to maintain.
Don’t Sacrifice Quality for Volume
Scheduling tools make it easier to publish more content, but more pins do not automatically mean better results.
Focus on creating clear, visually strong pins that accurately represent the recipe or article they link to.
Testing different headlines, images, layouts, and angles can be useful. Publishing a large number of nearly identical designs usually is not.
Best for: Pinterest scheduling, batching promotional content, keeping evergreen recipes active, and building a more consistent Pinterest workflow.
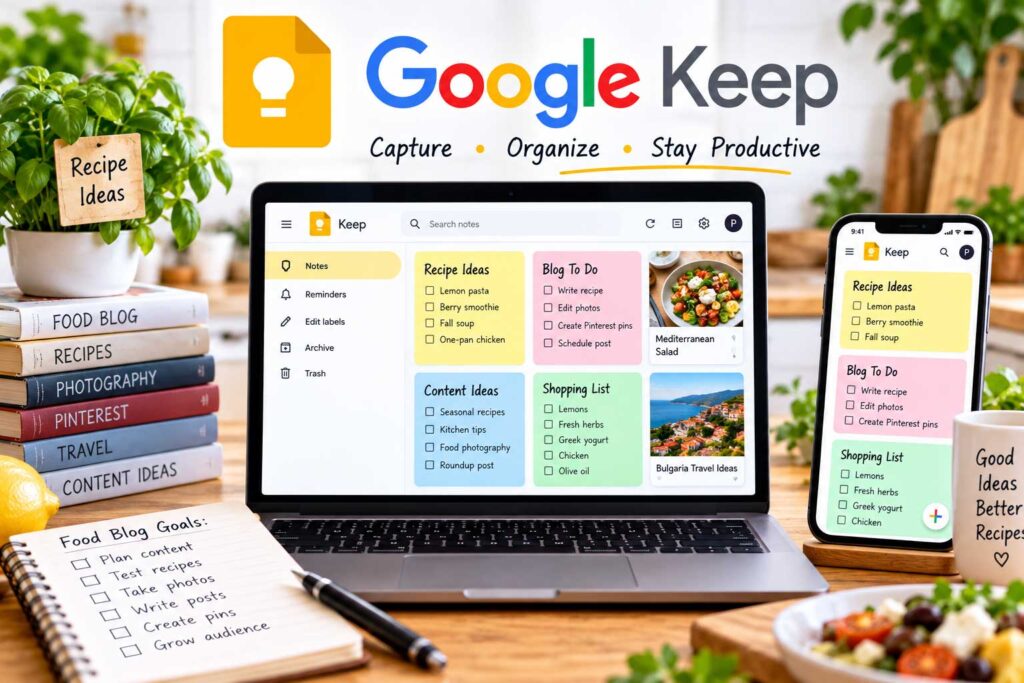
14. Google Keep — Best for Capturing Recipe Ideas Quickly
Some of the best content ideas appear when you are nowhere near your computer.
You might think of a recipe variation while grocery shopping, notice an interesting ingredient at a market, or suddenly remember a seasonal article you want to create.
Google Keep gives you a quick place to capture those ideas before you forget them.
How Food Bloggers Can Use Google Keep
You can use Google Keep for recipe ideas, ingredient combinations, grocery lists, photography notes, article ideas, seasonal content reminders, and questions readers frequently ask.
Its biggest advantage is speed.
You do not need to open your full project-management system every time an idea comes to mind. Save a quick note from your phone and organize it properly later.
Use Labels to Stay Organized
A few simple labels can prevent your notes from becoming another cluttered inbox.
You might use labels such as Recipe Ideas, Seasonal Content, Pinterest Ideas, Photography, Shopping Lists, and Blog Updates.
That makes it much easier to find an idea weeks or months later.
Capture Notes While Testing Recipes
Google Keep can also be useful in the kitchen.
If you are testing a recipe and notice that it needs less sugar, a lower oven temperature, or a different cooking time, record that observation immediately rather than relying on memory.
You might save quick notes such as:
“Try 15 grams less sugar next time.”
“Reduce oven temperature for the next test.”
“Take an overhead photo of the final version.”
Capturing those details while the recipe is fresh in your mind can make the next test much easier.
Move Good Ideas Into Your Main Content System
Google Keep works best as a quick capture tool rather than a complete editorial calendar.
Once an idea becomes something you seriously plan to publish, move it into Notion, Trello, Google Sheets, or whatever system you use to manage your content pipeline.
Think of Google Keep as an inbox for ideas: capture them quickly, then move the worthwhile ones into your actual workflow.
Best for: quick recipe notes, grocery lists, spontaneous content ideas, testing observations, and capturing ideas while away from your computer.
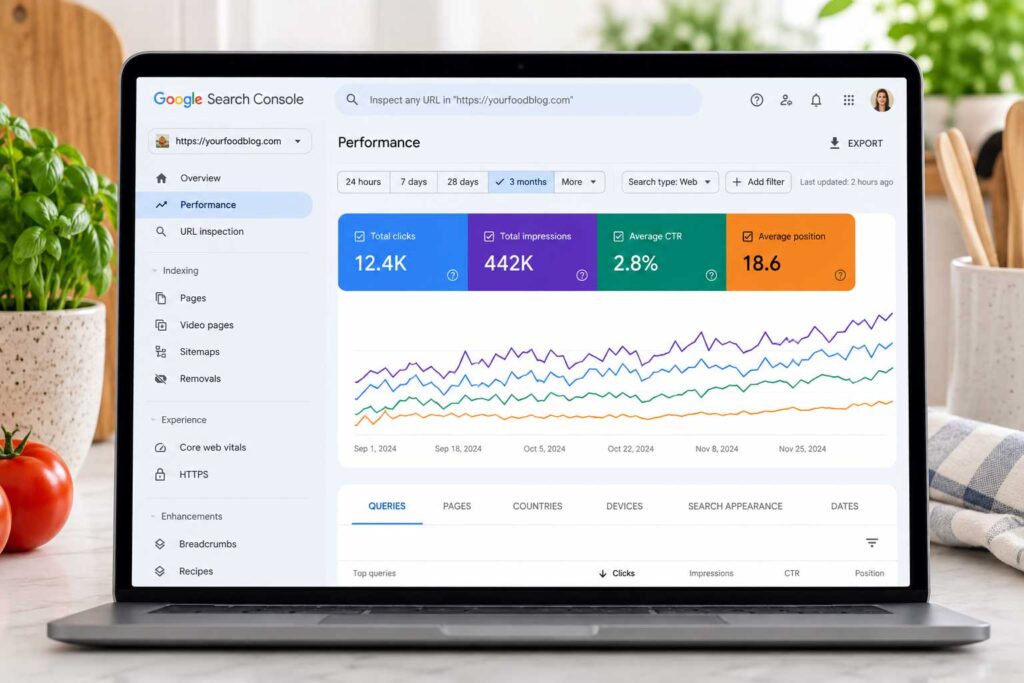
15. Google Search Console — Best for Finding Content Opportunities
Google Search Console is not a traditional productivity app, but it can save food bloggers a huge amount of time by showing which pages and search queries are already gaining visibility in Google.
Instead of guessing what to update next, you can use real search data to decide where your effort is most likely to make a difference.
How Food Bloggers Can Use Search Console
Search Console can help you identify recipes gaining impressions, pages losing clicks, keywords sitting just outside stronger ranking positions, seasonal topics starting to grow, indexing issues, and pages that receive plenty of impressions but relatively few clicks.
That makes content planning much more focused.
Rather than treating every article equally, you can concentrate on pages that are already showing signs of potential.
Find Quick-Win Articles
One useful workflow is to look for pages that already rank somewhere near the first page or top of the second page for relevant keywords.
Those posts may be close to performing much better.
Instead of immediately writing a brand-new article, you could improve the existing one by strengthening the introduction, adding missing information, improving internal links, updating images, or rewriting the title and meta description.
That can be a much more efficient use of your time than constantly starting from zero.
Identify New Content Ideas From Real Searches
Search Console can also reveal queries that readers are already using to find your site.
For more ways to discover search terms and content opportunities, see our guide to the best free keyword research tools for food bloggers.
For example, a chicken recipe might unexpectedly receive impressions for:
how to reheat chicken without drying it out
That could suggest adding a helpful FAQ section, expanding the existing article, or creating a separate supporting post if the topic deserves one.
These ideas are especially valuable because they come from actual search behavior connected to your own content.
Review Performance Regularly
You do not need to check Search Console every day.
A weekly, biweekly, or monthly review is usually enough, depending on the size of your site and how often you publish.
Focus on a few things:
Growing pages → Declining pages → High-impression queries → Ranking opportunities → Indexing issues
Then turn those findings into a short action list.
That keeps Search Console useful without allowing it to become another dashboard you constantly refresh.
Use Data to Prioritize Your Time
The biggest productivity benefit is prioritization.
Food bloggers often have hundreds of possible tasks competing for attention.
Search Console helps answer a much more useful question:
Which pages are already showing enough potential to deserve attention right now?
That can help you spend less time guessing and more time improving content that already has a realistic chance to grow.
Best for: SEO monitoring, finding quick wins, prioritizing content updates, identifying keyword opportunities, and deciding what to work on next.
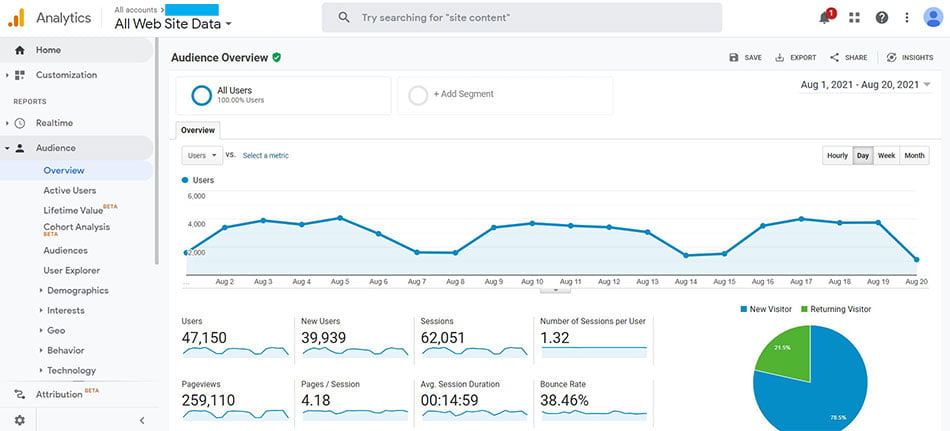
16. Google Analytics — Best for Understanding What Is Actually Working
Google Analytics can help food bloggers understand how people are finding the site, which pages attract the most visitors, and what readers do after they arrive.
That information can make your content strategy much more efficient.
Instead of giving every recipe or article the same amount of attention, you can identify the pages already driving traffic and focus more of your time on topics that are showing clear signs of demand.
What Food Bloggers Can Learn From Google Analytics
Google Analytics can help you review your most visited recipes, traffic sources, landing pages, returning visitors, engagement trends, seasonal spikes, device usage, and the performance of promotional campaigns.
That makes it easier to see whether visitors are arriving from Google, Pinterest, social media, email, referral sites, or direct traffic.
Over time, those patterns can help you understand which channels and types of content are contributing most to your growth.
Find Your Best-Performing Content
Start by identifying the pages and categories attracting the most traffic.
You may discover that air-fryer recipes, smoothies, desserts, quick dinners, or another part of your site consistently performs better than expected.
That does not mean you should abandon everything else.
But it can be a useful signal that readers are responding well to that topic and that additional supporting content may be worth creating.
You can also look for related posts that could be improved with stronger internal links from those high-traffic pages.
Watch for Meaningful Traffic Declines
Analytics can also help you spot recipes and articles that are losing visitors over time.
If a page that once received steady traffic has been declining for several months, it may be worth reviewing.
Check whether the information is outdated, the images need improvement, the title still matches the content, or the article could benefit from stronger internal linking or a more useful update.
The important thing is to look for a real pattern rather than reacting to a few slow days.
That gives you a more focused update strategy instead of randomly refreshing old posts.
Use Google Analytics With Search Console
Google Analytics and Google Search Console answer different questions.
Search Console helps you understand how your content is performing in Google Search, including impressions, clicks, queries, and search visibility.
Google Analytics gives you a broader view of what happens once people reach your website, including traffic sources, landing pages, engagement, and visitor behavior.
For example, Search Console might show that a recipe is appearing more often in search results, while Analytics can help you see whether visits to that page are increasing as well.
Using both together gives you a much clearer picture than relying on either tool alone.
Avoid Checking Traffic Constantly
Analytics can easily become a distraction.
Refreshing your visitor count several times a day rarely leads to better decisions.
A better approach is to schedule a regular review—weekly, biweekly, or monthly depending on the size of your site.
Use that session to identify a few meaningful actions, then get back to creating and improving content.
The goal of analytics is to help you make better decisions, not to give you another dashboard to watch all day.
Best for: understanding traffic, identifying successful content, spotting meaningful declines, analyzing traffic sources, and deciding where to focus your blogging time.

17. Loom — Best for Recording Tutorials and Team Instructions
As your food blog grows, you may eventually work with writers, editors, virtual assistants, designers, or other freelancers.
Explaining the same task again and again can take a surprising amount of time.
Loom can make that process faster by letting you record your screen while talking through exactly how you want something done.
Instead of writing a long set of instructions, you can demonstrate the process once and reuse the video whenever someone needs it.
How Food Bloggers Can Use Loom
Loom works especially well for repetitive tasks such as formatting recipe posts, uploading and optimizing images, adding internal links, creating Pinterest graphics, updating older content, checking affiliate links, publishing newsletters, or following an SEO checklist.
For visual tasks, a short screen recording can often explain the process more clearly than several paragraphs of written instructions.
Turn Repetitive Tasks Into SOPs
Suppose you hire a virtual assistant to update older recipes.
Instead of explaining the process every time, you could record one walkthrough showing:
Open article → Check formatting → Update links → Add images → Review recipe card → Check SEO → Save changes
That video can then live inside Notion, Google Drive, or wherever you store your standard operating procedures.
The next time someone performs the task, the instructions are already there.
Use Loom to Explain Problems
Loom can also save time when something goes wrong.
If you notice a WordPress formatting issue, plugin problem, or other website bug, recording your screen may be much easier than trying to describe the problem in a long email.
You can show exactly what is happening, where it happens, and what you expected to see instead.
That can make communication with developers, designers, and support teams much more efficient.
Build a Small Training Library
As you delegate more work, you can gradually build a library of short training videos covering areas such as content publishing, Pinterest, SEO updates, email marketing, and file organization.
This becomes especially valuable if more than one person works on the site or if you need to train someone new.
Keep Videos Short and Focused
Shorter videos are usually easier to follow and easier to update.
Instead of recording one long tutorial covering your entire workflow, create separate videos for individual tasks.
If your process changes later, you only need to replace the relevant video rather than rerecording everything.
Best for: SOPs, team training, delegating repetitive tasks, explaining technical problems, and documenting your food-blogging workflow.
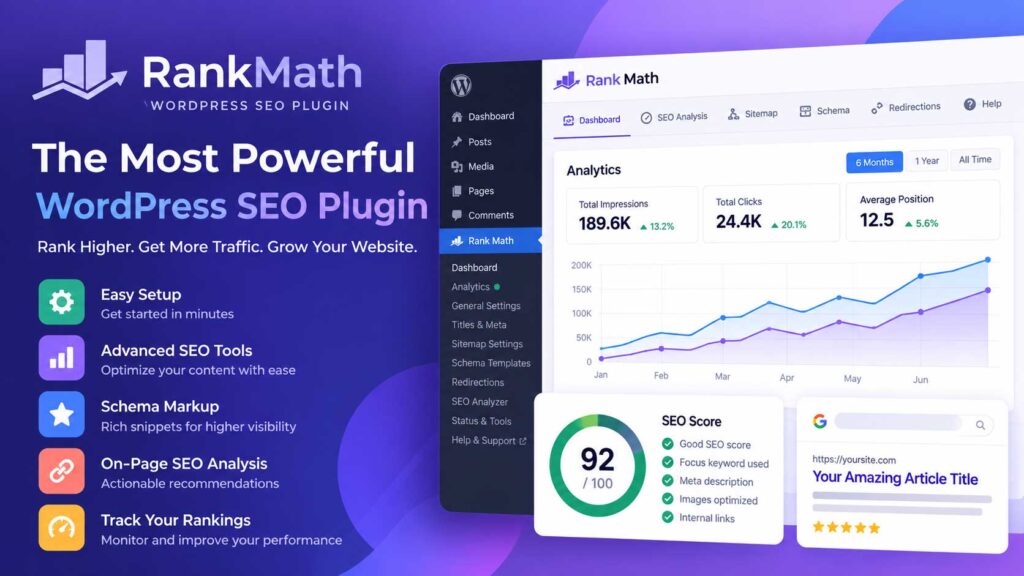
18. Rank Math — Best for On-Page SEO Checklists
Publishing a recipe or article involves a lot of small SEO tasks, and it is easy to forget one when you are moving quickly.
Rank Math can help food bloggers turn those tasks into a repeatable checklist inside WordPress.
Instead of trying to remember every optimization step manually, you can review important on-page elements before the post goes live.
How Food Bloggers Can Use Rank Math
Rank Math can help you review SEO titles, meta descriptions, focus keywords, headings, internal and external links, image alt text, URL structure, schema settings, indexability, and social sharing previews.
For food bloggers managing dozens or hundreds of posts, that consistency can save a lot of time.
It also gives you one place to catch small SEO details that are easy to overlook during the final publishing stage.
Use It as a Checklist, Not a Scorecard
One common mistake is trying to force every article to reach a perfect SEO score.
That is not the goal.
Plugin scores are useful as reminders, but they should not control the writing.
Natural language, useful information, accurate recipes, clear instructions, and a good reader experience matter more than turning every indicator green.
If adding the focus keyword again makes a sentence awkward, do not force it simply to improve the score.
Improve Older Posts Faster
Rank Math can also be useful when you are refreshing existing content.
You can quickly check whether a post is missing a meta description, needs stronger internal linking, has incomplete image alt text, or could use a better SEO title.
That makes large content-update projects easier to manage because you can follow the same checklist across multiple articles.
Review Schema Carefully
Recipe bloggers should also pay attention to structured data.
Recipe schema can help search engines understand details such as the recipe name, ingredients, preparation and cooking times, instructions, images, ratings, and nutrition information.
The important thing is accuracy.
Structured data should match the content readers can actually see on the page. Do not add fields simply because the plugin gives you the option.
If you already use a dedicated recipe plugin, also make sure you are not creating unnecessary duplicate recipe schema.
Build a Repeatable Publishing Workflow
A simple workflow might look like:
Write article → Add recipe card → Optimize images → Add internal links → Review Rank Math settings → Preview → Publish
Following the same process for every post reduces mistakes and makes publishing more predictable.
The real productivity benefit is not the SEO score itself. It is having a consistent system that helps you catch important details before an article goes live.
Best for: on-page SEO checks, metadata, internal-link reminders, schema review, and maintaining a consistent WordPress publishing workflow.
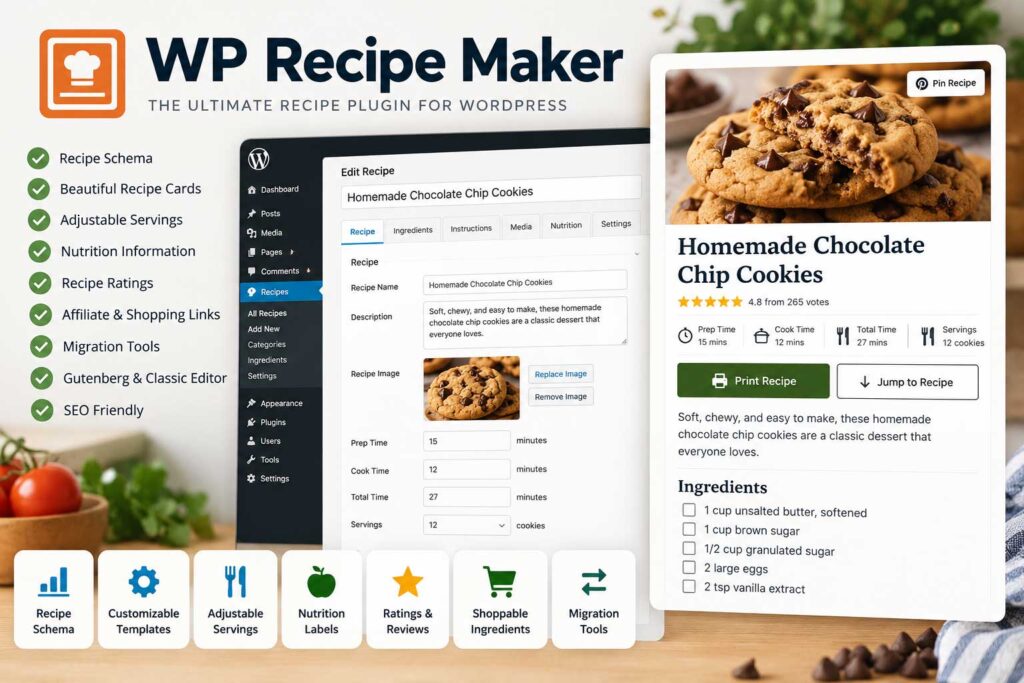
19. WP Recipe Maker — Best for Faster Recipe Publishing
For recipe-focused websites, WP Recipe Maker can save time by giving you a structured way to create, format, and manage recipe cards inside WordPress.
You can also compare WP Recipe Maker with other options in our guide to the best WordPress recipe plugins for food bloggers.
Instead of manually formatting ingredients, instructions, cooking times, servings, nutrition details, and other recipe information in every article, you can use the same repeatable recipe-card system across your entire site.
That makes publishing more consistent and much easier to manage as your recipe library grows.
How Food Bloggers Can Use WP Recipe Maker
A recipe card can organize ingredients, step-by-step instructions, preparation and cooking times, servings, recipe notes, nutrition information, equipment, images, and other useful details in one structured format.
That reduces the amount of manual formatting required every time you publish a new recipe.
It also helps readers find the practical information they need without searching through the entire article.
Create a Consistent Recipe Workflow
Consistency becomes increasingly important once your site contains dozens or hundreds of recipes.
A typical publishing workflow might look like:
Write article → Add recipe card → Enter ingredients → Add instructions → Upload recipe photo → Review times and servings → Preview → Publish
Following the same process each time can make publishing faster and reduce the chance of forgetting important details.
Make Recipe Updates Easier
WP Recipe Maker can also simplify updates to older content.
If you change an ingredient quantity, preparation note, cooking time, or serving size, you can update the structured recipe card instead of searching through several parts of the article.
That becomes especially useful during larger content-refresh projects.
Improve the Reader Experience
A well-structured recipe card makes the article easier to use.
Readers who want tips, substitutions, storage advice, or troubleshooting can explore the full post.
Readers who are ready to cook can quickly find the ingredients, times, servings, and instructions.
That balance allows you to create detailed recipe content without making the actual cooking process harder to follow.
Review Every Recipe Before Publishing
A recipe plugin can organize information, but it cannot verify that the recipe itself is correct.
Before publishing, review the ingredient quantities, cooking temperatures, preparation and cooking times, serving sizes, instructions, substitutions, and any nutrition information you include.
The plugin should make the publishing process more efficient, while your own testing and review ensure that the recipe is accurate and useful.
Best for: recipe cards, structured recipe publishing, consistent formatting, updating older recipes, and speeding up the WordPress publishing workflow.
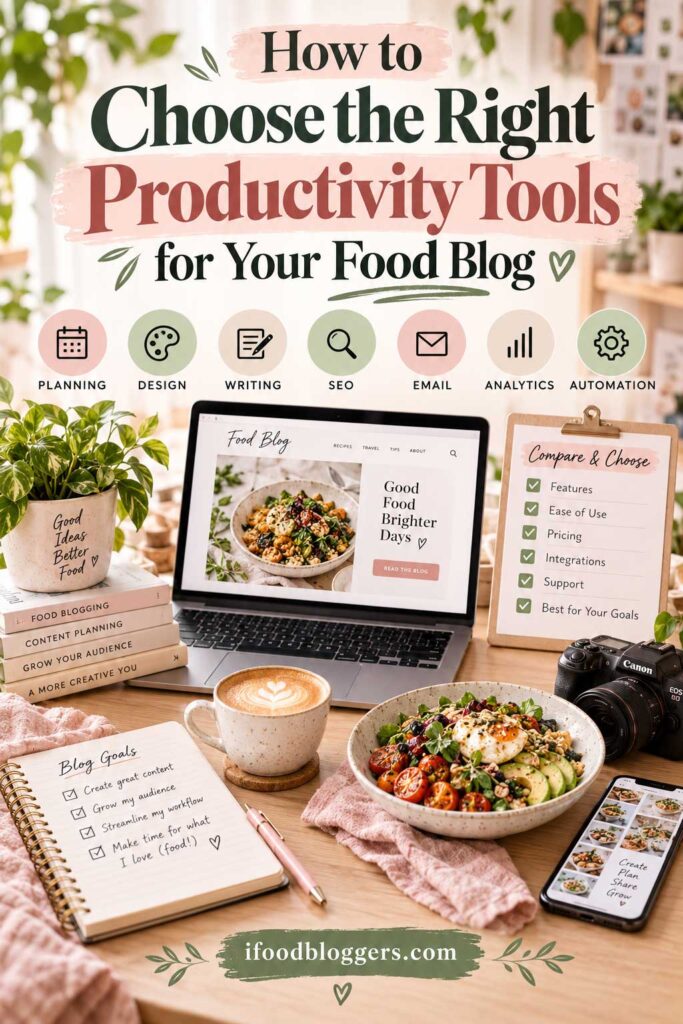
How to Choose the Right Productivity Tools for Your Food Blog
With so many apps available, it is easy to assume that using more tools will automatically make you more productive.
Usually, the opposite happens.
Every new platform adds another login, another dashboard, another subscription, and another system to maintain.
The goal should be to build the smallest set of tools that makes your workflow easier.
Start With Your Biggest Time-Wasters
Before paying for another app, look at where you are actually losing time.
Maybe photo editing takes too long. Maybe you keep forgetting publishing steps. Maybe your recipe ideas are scattered across several places, your email marketing is too manual, or you spend too much time deciding which older posts deserve an update.
Those problems should determine which tools you add.
If Lightroom saves you several hours every week, it may be far more valuable than subscribing to three smaller apps that you rarely use.
Build a Simple Food Blogging Tech Stack
A new food blogger does not need every tool in this guide.
A simple setup can cover nearly the entire workflow:
| Need | Tool Options |
|---|---|
| Content planning | Notion or Trello |
| Writing and drafts | Google Docs |
| Design | Canva |
| Photography | Adobe Lightroom |
| Recipe publishing | WP Recipe Maker |
| On-page SEO | Rank Math |
| Search performance | Google Search Console |
| Traffic analysis | Google Analytics |
| Email marketing | GetResponse |
| File storage | Google Drive or Dropbox |
That already covers most of the core food-blogging process.
As your site grows, you can add tools such as Zapier for automation or Loom for documenting workflows and training help.
The important thing is to add software because it solves a real problem, not because it appears on someone else’s list of recommended tools.
Avoid Paying for Duplicate Features
Many blogging tools overlap.
A platform you already use may include scheduling, templates, AI assistance, analytics, collaboration, file storage, or automation.
Before subscribing to something new, check whether one of your existing tools can already handle the same task.
Paying for several applications that solve nearly identical problems increases costs and usually makes your workflow more complicated.
Calculate the Time a Tool Actually Saves
A paid tool does not have to generate revenue directly to be worthwhile.
Saving time has value too.
Suppose a tool costs $15 per month but saves you three hours of work.
If those three hours allow you to publish another recipe, improve several older articles, create more Pinterest content, or work on monetization, the subscription may easily justify itself.
On the other hand, a cheap tool you rarely open can still be wasted money.
The better question is not simply, “How much does this cost?”
It is:
How much useful time does this save me?
Create Systems Before Adding More Software
Tools work best when they support a clear process.
A typical food-blogging workflow might look like:
Recipe idea → Keyword research → Recipe testing → Photography → Writing → SEO → Publishing → Pinterest → Email → Performance review
Once you understand that workflow, it becomes much easier to see where software can remove repetitive work or reduce mistakes.
Without a clear system, adding more apps often creates extra complexity instead of productivity.
Review Your Tools Every Few Months
Your needs will change as your food blog grows.
A free tool that worked perfectly when you had 20 recipes may become limiting when you have 300.
At the same time, you may discover that you are still paying for subscriptions you barely use.
Every few months, review your tools and ask whether each one still saves meaningful time, whether another platform already does the same job, and whether the subscription is still worth the cost.
Removing unnecessary software can be just as valuable as adding something new.
The best productivity setup is not the one with the most tools.
It is the one that helps you spend less time managing software and more time creating useful content, improving your recipes, and growing your food blog.
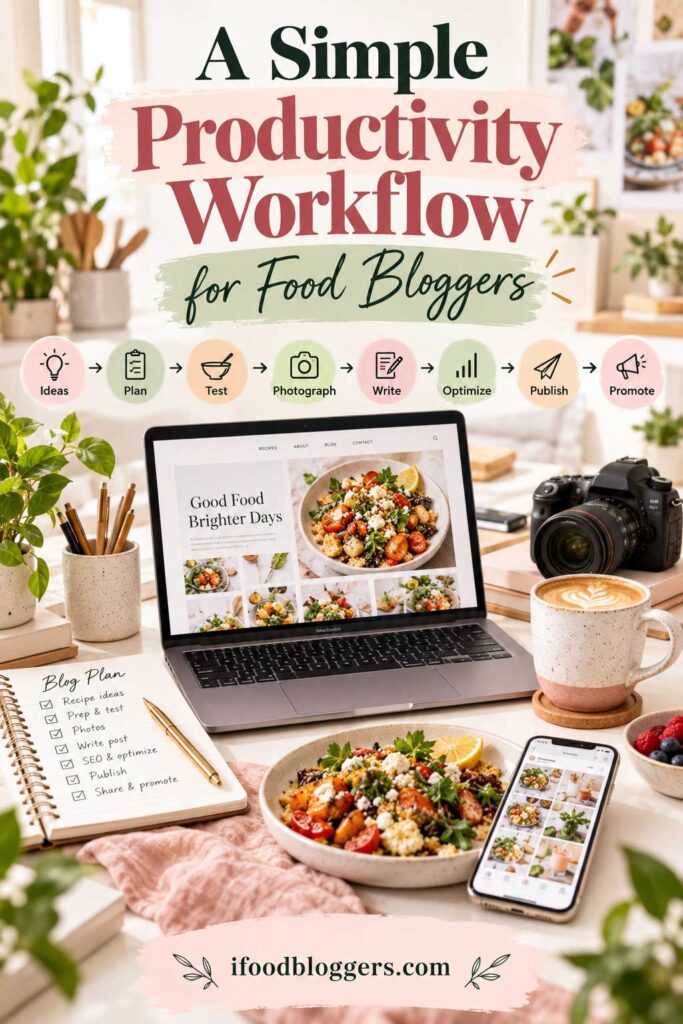
A Simple Productivity Workflow for Food Bloggers
The tools become much more useful when they are connected to a repeatable system.
Here is a simple workflow you can adapt to your own food blog.
1. Capture and Organize Ideas
Save recipe and article ideas as soon as they come to you.
Google Keep works well for quick notes, while stronger ideas can later move into Notion, Trello, or your main editorial calendar.
At this stage, it helps to record a working title, target keyword, category, season, priority, and rough publish date.
That gives every idea a clear place instead of letting it disappear into random notes, screenshots, or open browser tabs.
2. Research and Plan the Content
Before cooking or writing, spend a little time understanding what the article needs to cover.
Review search results, related questions, your own Google Search Console data, and competing content. Then create a simple outline based on what readers actually need.
ChatGPT can help organize research notes, group related ideas, or identify questions you may have missed, but the final recipe and recommendations should still come from your own testing and experience.
3. Test the Recipe
Recipe testing is one part of the process that should not be rushed.
Record ingredient quantities, cooking times, temperatures, substitutions, and anything that changes between tests.
Quick notes in Google Keep or a dedicated recipe document can prevent you from forgetting small details that matter later.
Once the recipe works consistently, move it to the photography stage.
4. Photograph Efficiently
Whenever possible, batch your photography.
Instead of setting up lights, backgrounds, props, and equipment for a single recipe, photograph several compatible recipes during the same session.
A basic shot plan can help you remember the finished dish, overhead view, close-up, process images, ingredient shots, serving presentation, and at least one vertical image that can work well for Pinterest.
Batching reduces setup and cleanup time and helps you get more value from each photography session.
5. Edit Photos in Lightroom
Import your photos, remove unusable shots, apply your preferred preset, and make the final adjustments.
When several images were taken under similar lighting, synchronize appropriate edits across the group instead of starting from zero every time.
Use a consistent file-naming system as well.
For example:
easy-chicken-pasta-1.jpg
is far more useful later than:
IMG_8462.jpg
6. Write and Format the Article
Now build the article around the tested recipe.
Use your outline and notes so you are not starting from a blank page.
A useful recipe post will usually cover the main ingredients, substitutions, preparation tips, step-by-step instructions, storage, reheating, common mistakes, and questions readers are likely to have.
Once the article is complete, add the structured recipe information to WP Recipe Maker or your preferred recipe plugin.
7. Complete the SEO Checklist
Before publishing, review the basic SEO elements.
A simple final check might look like this:
| SEO Element | What to Review |
|---|---|
| Title | Clear, useful, and aligned with the topic |
| Meta description | Accurate and compelling |
| URL | Short and descriptive |
| Headings | Logical structure |
| Keyword use | Natural, not forced |
| Internal links | Relevant supporting content |
| External sources | Useful and trustworthy where needed |
| Images | Descriptive filenames and alt text |
| Schema | Accurate and not duplicated |
| Mobile view | Easy to read and use |
Rank Math or another SEO plugin can help you catch missing elements, but do not change natural writing just to chase a perfect plugin score.
8. Create Promotional Graphics
Once the article is ready, create several Pinterest graphics in Canva.
Reusable templates make this much faster.
You can also prepare newsletter and social media graphics during the same session so you are not reopening the same project multiple times later.
Creating the promotional assets while the recipe is still fresh in your mind can reduce duplicate work.
9. Schedule Promotion
Use Tailwind or your preferred scheduling workflow to prepare Pinterest content in advance.
Add the recipe to your email newsletter schedule and plan any social promotion at the same time.
A simple system might be:
Publish → Pinterest → Email → Social → Repromote Later
The goal is to avoid publishing a strong recipe and then forgetting to promote it.
10. Review Performance
After the article has had enough time to collect meaningful data, review Google Search Console and Google Analytics.
Look at impressions, clicks, search queries, traffic, engagement, seasonal changes, and ranking opportunities.
Give a new article time to collect meaningful data before making major changes just because it has not ranked after a few days.
Use performance trends over time to decide which pages actually deserve additional work.
11. Update and Repurpose Successful Content
When a recipe performs well, try to get more value from it instead of immediately moving on.
You might create new Pinterest graphics, add it to a roundup, strengthen internal links, feature it in a newsletter, build a supporting article, refresh the photography, or turn the recipe into short-form video content.
That is often more productive than constantly creating something completely new.
A well-organized workflow helps every recipe move through the same system from idea to testing, publication, promotion, and future updates.
Once those steps become routine, you spend less time deciding what to do next and more time actually getting the work done.
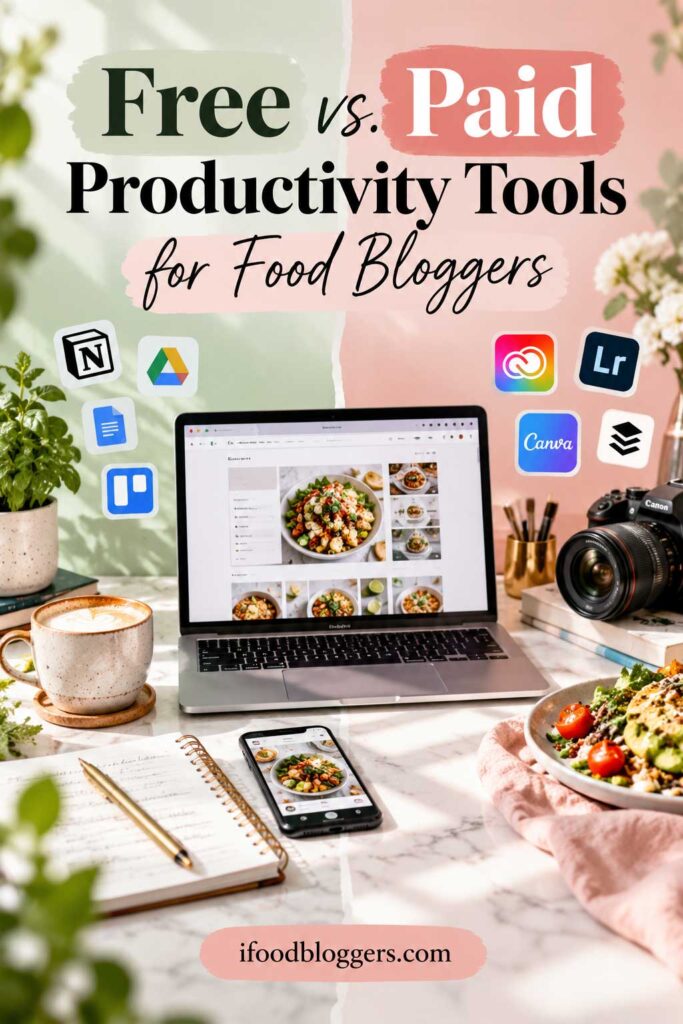
Free vs. Paid Productivity Tools for Food Bloggers
You do not need an expensive software stack to run a productive food blog.
Many of the tools in this guide offer free versions that are more than enough when you are starting out. The important thing is knowing when a paid upgrade will genuinely save time, remove a bottleneck, or add enough value to justify the cost.
Start With Free Tools
A beginner can build a capable workflow using mostly free options.
Google Drive can handle documents and spreadsheets, Google Keep can capture quick ideas, Google Calendar can manage deadlines, and Google Search Console and Google Analytics can provide valuable performance data.
Canva Free is enough for basic graphics, while Trello and Grammarly can cover simple task management and proofreading.
That already gives you a strong foundation for planning, writing, organization, design, analytics, and SEO without adding a large monthly software bill.
When a Paid Upgrade Makes Sense
Paid tools become more valuable when they solve a clear problem.
| Situation | A Paid Tool May Be Worth It When… |
|---|---|
| Design | Canva Pro saves time with branding, resizing, or premium assets |
| Photography | Lightroom becomes essential for regular batch editing |
| Email marketing | You need stronger automation or segmentation |
| Project management | Your free setup no longer handles your workflow well |
| Scheduling | Advanced scheduling saves meaningful time each month |
| Automation | Zapier or similar tools remove repetitive admin work |
| Recipe publishing | Premium plugin features improve your publishing process |
The key is to upgrade because you need the feature, not because the paid plan has a long list of extras.
Think in Terms of Time Saved
A paid tool does not have to generate revenue directly to be worthwhile.
Saving time has value too.
Suppose a tool costs $20 per month but saves you four hours of work.
If those four hours allow you to publish another recipe, refresh several older posts, create more Pinterest content, or work on monetization, the subscription may be worth the cost.
On the other hand, even a $5 tool is wasted money if you rarely use it.
Keep Software Costs Under Control
Blogging subscriptions can add up surprisingly quickly.
Hosting, plugins, email marketing, design software, photography tools, keyword research platforms, automation, scheduling, backups, and other services can quietly become a significant monthly expense.
Review your subscriptions every few months and ask whether each tool still saves meaningful time or supports an important part of your workflow.
If it does not, canceling it may be just as useful as adding something new.
A productive food blog does not need dozens of paid tools.
It needs a small group of tools that are used consistently and solve real problems.
How We Chose These Productivity Tools
We focused on tools that solve real problems in the day-to-day workflow of running a food blog.
Rather than including apps simply because they are popular, we looked at how useful they can be for common tasks such as recipe planning, writing, photography, graphic design, SEO, email marketing, file organization, accounting, and automation.
We also considered how much time each tool can save, how easy it is to use, whether it supports repeatable workflows, whether a free or affordable version is available, and whether it can continue to be useful as a food blog grows.
A tool that works well for a solo blogger should still be useful as the site grows, the publishing schedule becomes more demanding, or additional people begin helping with content, design, photography, or marketing.
Not every tool will be right for every blogger.
Someone publishing one recipe a week may need a very different setup from someone managing several websites, working with a team, or publishing content every day.
For that reason, we recommend choosing tools based on the specific bottlenecks in your own workflow rather than trying to use everything in this guide.
The best productivity tool is ultimately the one that helps you spend less time managing software and more time creating, publishing, and improving useful content for your readers.
Frequently Asked Questions About Productivity Tools for Food Bloggers
What are the best productivity tools for food bloggers?
The best tools depend on where you spend the most time.
For many food bloggers, a strong basic setup includes Canva for graphics, Lightroom for food photography, Notion or Trello for content planning, Google Drive for files, Google Search Console for SEO insights, and an email marketing platform for newsletters and automation.
You do not need every tool in this guide. Start with the parts of your workflow that currently take the most time.
What tools do beginner food bloggers really need?
Beginners can keep things simple.
A practical starter setup might include Canva for graphics, Google Drive for documents and spreadsheets, Google Calendar for planning, Google Search Console for search performance, Google Analytics for traffic insights, Grammarly for proofreading, and a recipe plugin if you publish recipes.
You can add more advanced tools later as your site, workload, and revenue grow.
Are free productivity tools enough for a food blog?
Yes, especially in the beginning.
Free tools can handle a large part of the food-blogging workflow, including planning, graphic design, file storage, proofreading, analytics, and basic task management.
Paid tools usually become more valuable when they save significant time, unlock automation, or remove limitations that are slowing you down.
What is the best tool for planning food blog content?
Notion and Trello are both strong options, but they suit different working styles.
Notion is better if you want detailed databases, editorial calendars, SOPs, notes, and several parts of your blogging business in one workspace.
Trello is simpler if you mainly want to move recipes through stages such as idea, testing, photography, writing, editing, and publication.
Google Sheets can also work extremely well if you prefer a straightforward spreadsheet.
What is the best photo editing tool for food bloggers?
Adobe Lightroom is one of the most useful tools for food bloggers who regularly edit large groups of photos.
Presets, batch editing, organization tools, and selective adjustments can speed up the editing process while helping you maintain a more consistent visual style across your site.
What is the best tool for creating Pinterest pins?
Canva is one of the easiest options for food bloggers because you can build reusable Pinterest templates and quickly adapt them for new recipes.
Creating a library of templates is much faster than designing every pin from scratch.
Can AI tools save food bloggers time?
Yes, when used carefully.
AI tools can help with brainstorming, article outlines, organizing research, content planning, proofreading, Pinterest headline ideas, and repetitive administrative tasks.
They should support your workflow rather than replace recipe testing, firsthand product experience, food-safety judgment, or fact-checking.
How many blogging tools should I use?
There is no ideal number.
Use as few tools as possible while still covering the important parts of your workflow.
If two platforms perform nearly the same job, keeping both may only add extra cost and complexity.
A small group of tools that you use consistently is usually more productive than a large collection of apps you rarely open.
How can I make my food blogging workflow faster?
Batch similar tasks whenever possible.
You might test several recipes during one period, photograph multiple dishes in one session, edit photos together, create Pinterest graphics in batches, and schedule promotional content ahead of time.
Templates, presets, repeatable checklists, and automation can reduce even more repetitive work.
Is it worth paying for productivity software as a food blogger?
It can be, but only when the tool provides meaningful value.
Consider how much time the software saves and whether that time can be used for activities that help grow your blog.
A subscription that saves several hours every month may be worthwhile. A cheaper tool that you rarely use probably is not.
Final Thoughts: Build a Productivity System That Fits Your Food Blog
The best productivity tools for food bloggers are the ones that make your everyday workflow simpler.
The right tools can make design, photography, planning, SEO, email marketing, and publishing easier to manage, but no single app will fix an inefficient workflow.
The biggest improvement usually comes from creating a repeatable process:
Plan → Test → Photograph → Write → Optimize → Publish → Promote → Review → Update
Once that workflow is established, the tools simply help each step happen faster.
Start small, fix your biggest bottlenecks first, and add new software only when it clearly improves the way you work.
A simple system that you use every week will almost always be more effective than a complicated setup filled with tools you rarely open.
Keep Improving Your Food Blogging Workflow
Productivity is only one part of building a successful food blog.
Once you have a system that helps you create content efficiently, the next step is improving the tools and infrastructure behind your website.
If you are still building or upgrading your setup, start with our guide to Best Hosting for Food Bloggers. It compares hosting options and can help you choose a setup that supports your site as traffic and content grow.
You may also want to read Best WordPress Recipe Plugins if you are looking for a better way to manage recipe cards, structured data, and the overall reader experience on recipe posts.
For content planning and SEO, our guide to Best Free Keyword Tools for Food Bloggers covers tools that can help you find recipe and article ideas based on what people are actually searching for.
Building a food blog becomes much easier when your hosting, content planning, SEO, photography, email marketing, and publishing tools work together instead of operating as separate systems.
Keep refining your workflow as your site grows, and focus on the tools that give you more time to create better content, improve older posts, and grow your audience.